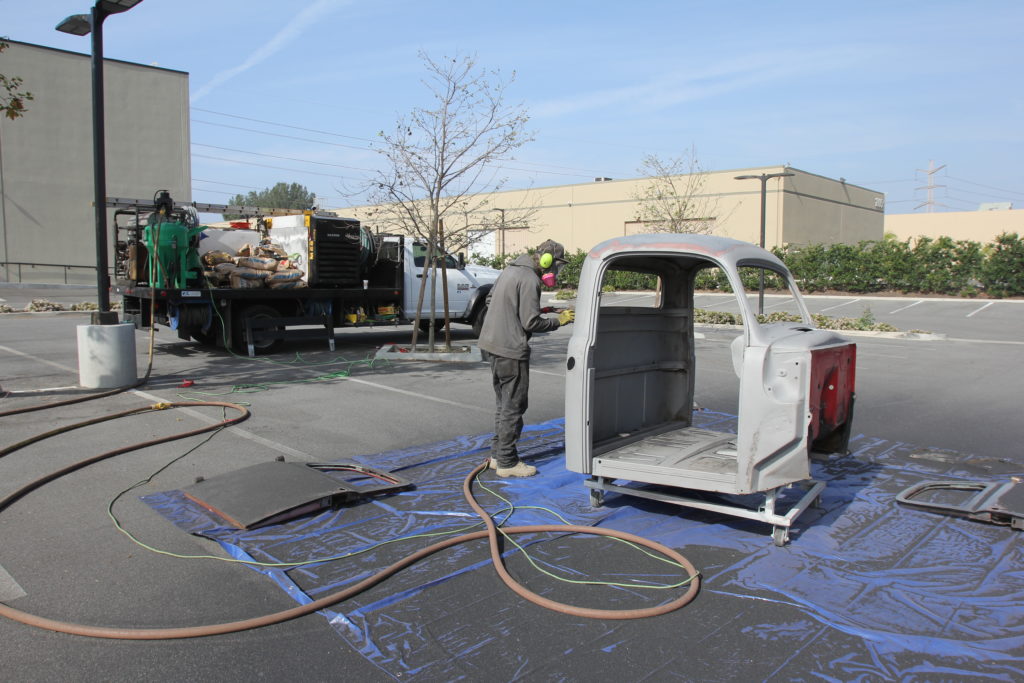
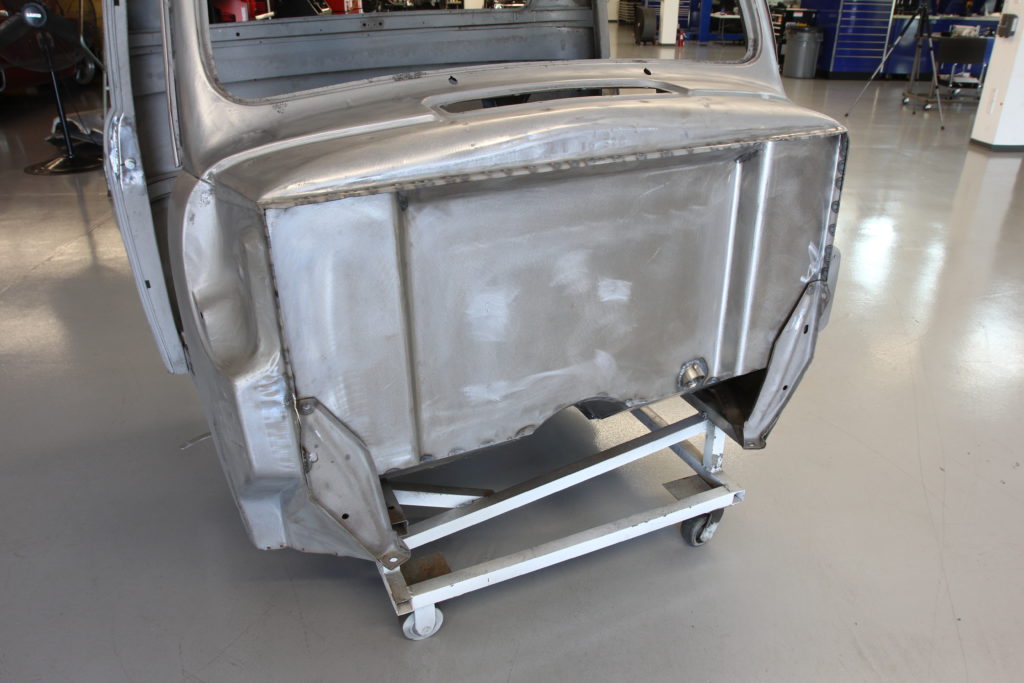
Cab repairs can be one of the most frustrating components of a classic truck build since most of the damage remains hidden until the truck is reduced to its bare essentials. This makes it difficult to assess the shape of the cab while the truck is still assembled, which is how most of us are purchasing our projects. Upon disassembly, what seemed like a pretty solid cab might turn out to need a laundry list of repairs. That was the case of our ’52 Ford F1 project following a quick bath in the KC Power Clean blasting cabinet (our parking lot). What the blasting revealed was that while the majority of the sheetmetal of our cab was in good shape, the firewall, floors, and trans tunnel had seen better days.
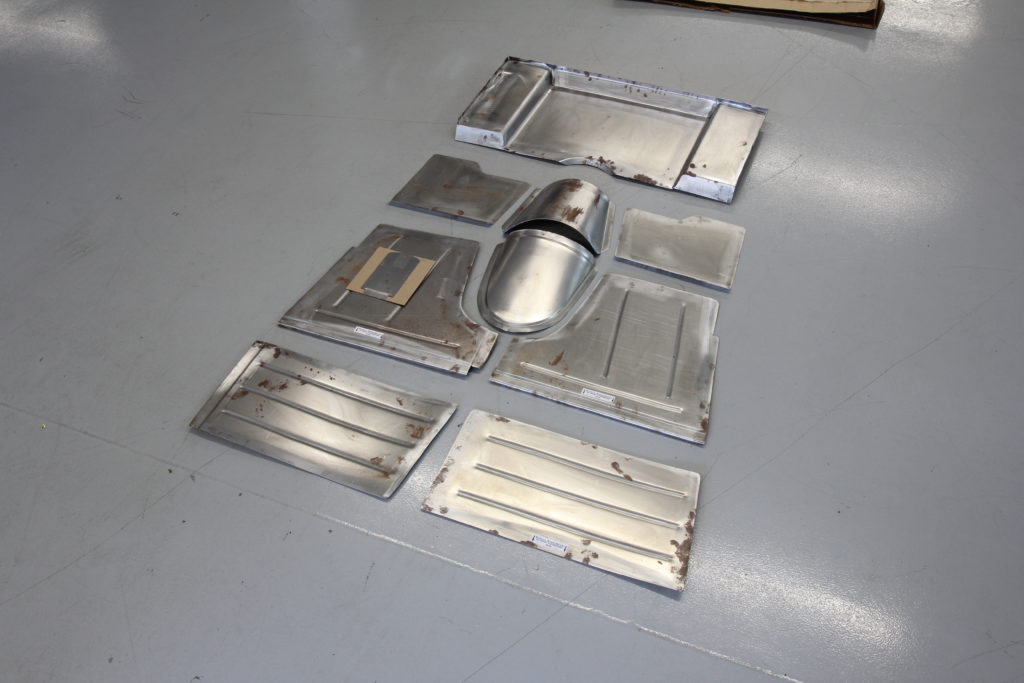
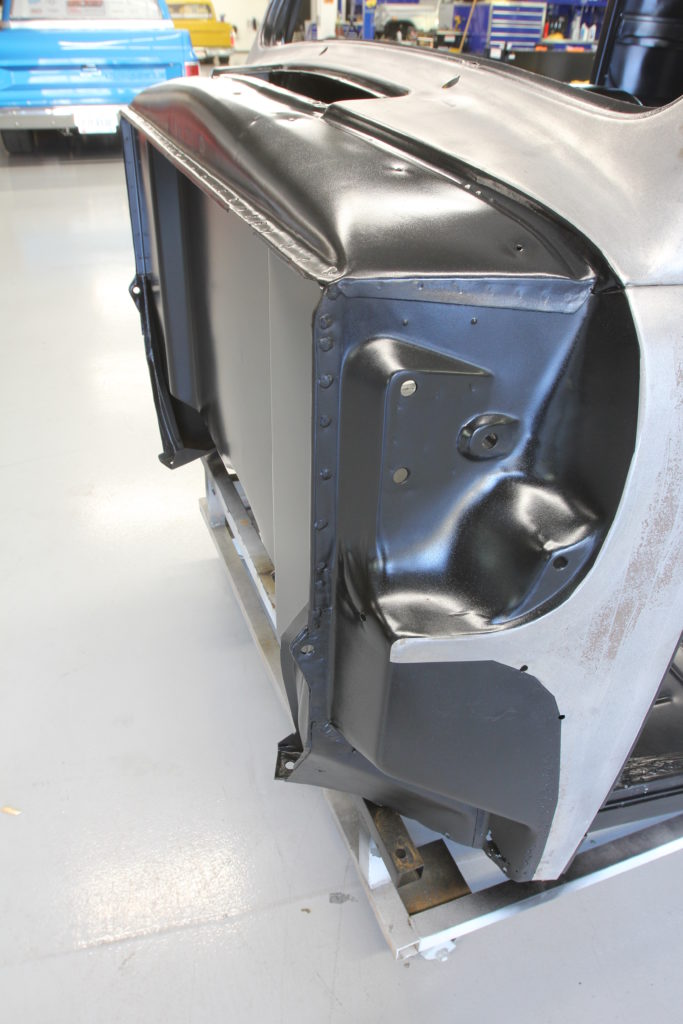
Like many trucks of similar vintage, the years were tough on our old Ford, the floor and firewall especially. A relocated master cylinder access panel, damaged trans tunnel, questionable repairs, and a firewall full of holes all needed to be mended. My original intention was to leave the original firewall in place, filling all the offending holes and repairing the floor sections as required. Since I was working in the Classic Trucks Tech Center under the watchful eye of our buddy Jason Scudellari, he recommended replacing the firewall with one from Direct Sheetmetal. The more I pondered his solution, the more it started to make sense as I knew how easy they can be to install. While it might sound like more work, I considered the time it would take to weld up every hole, grind the weld smooth, apply body filler and block sand the entire enchilada in order to repair the original sheetmetal as opposed to simply cutting the spot welds, removing the offending material and Rosette welding in a new firewall. The latter would require half the effort and zero prep before it was ready for paint. Better yet, the new firewall would serve as the perfect backdrop in which to install a Direct Sheetmetal floorboard kit as well, repairing a number of trouble spots in another single move.
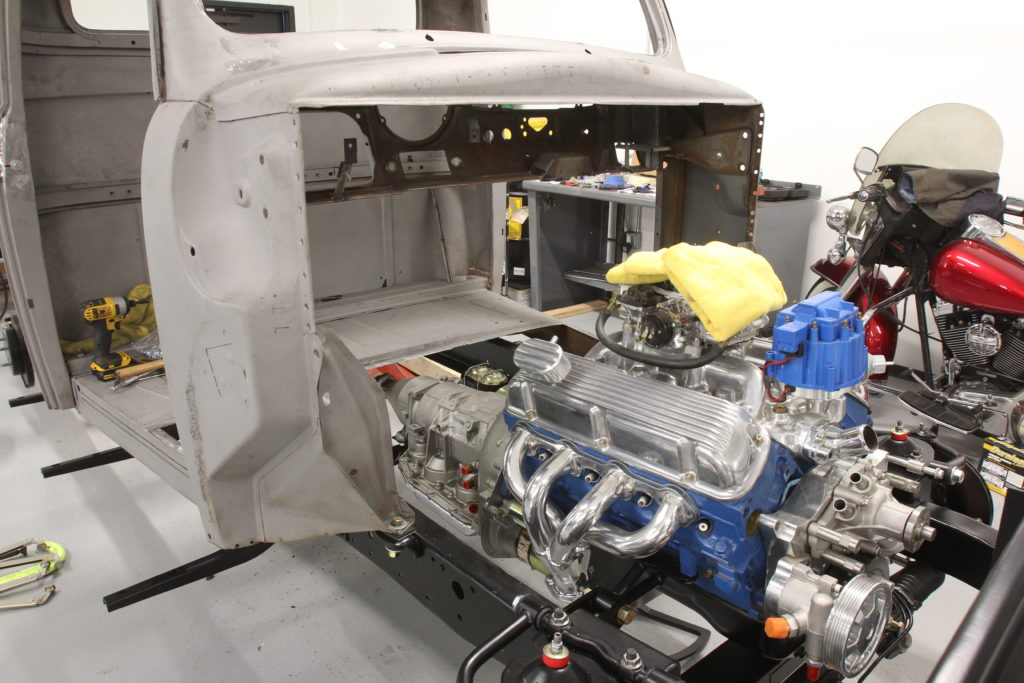
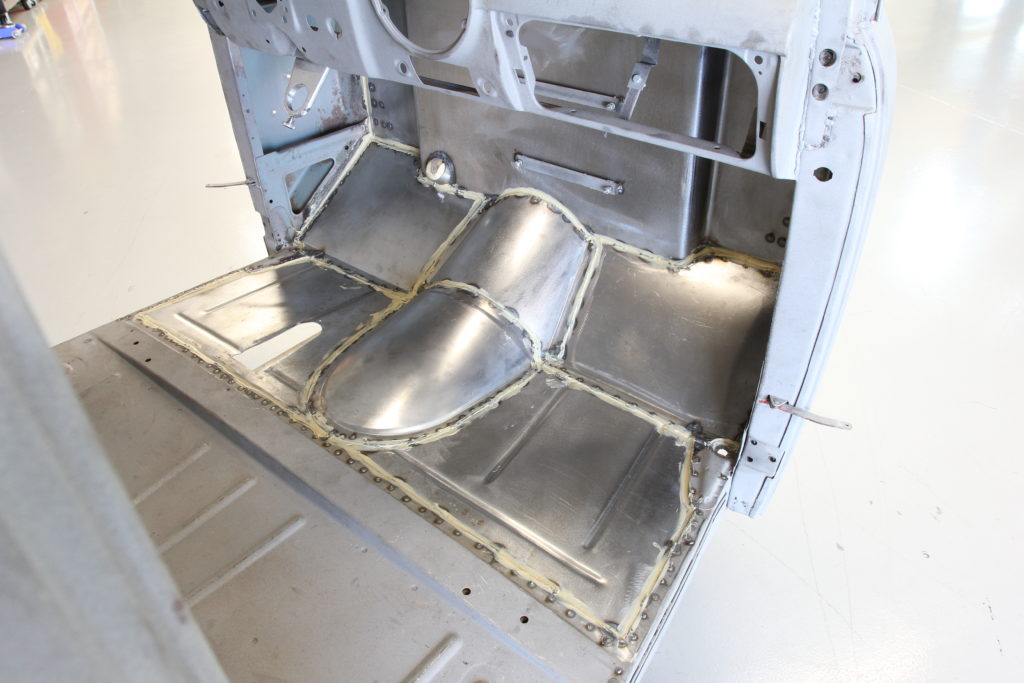
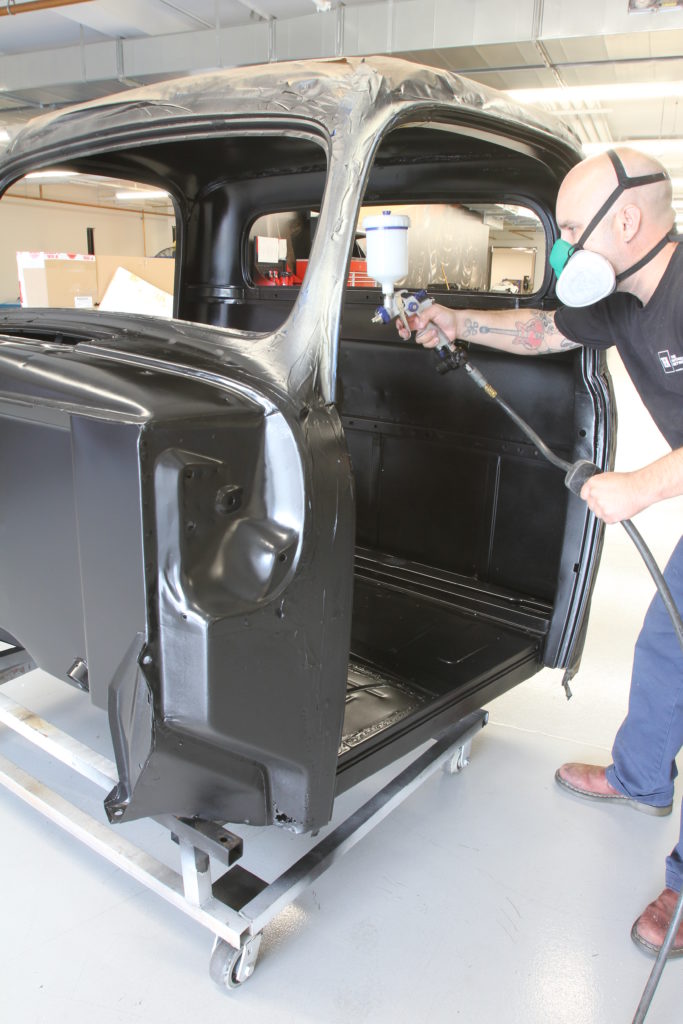
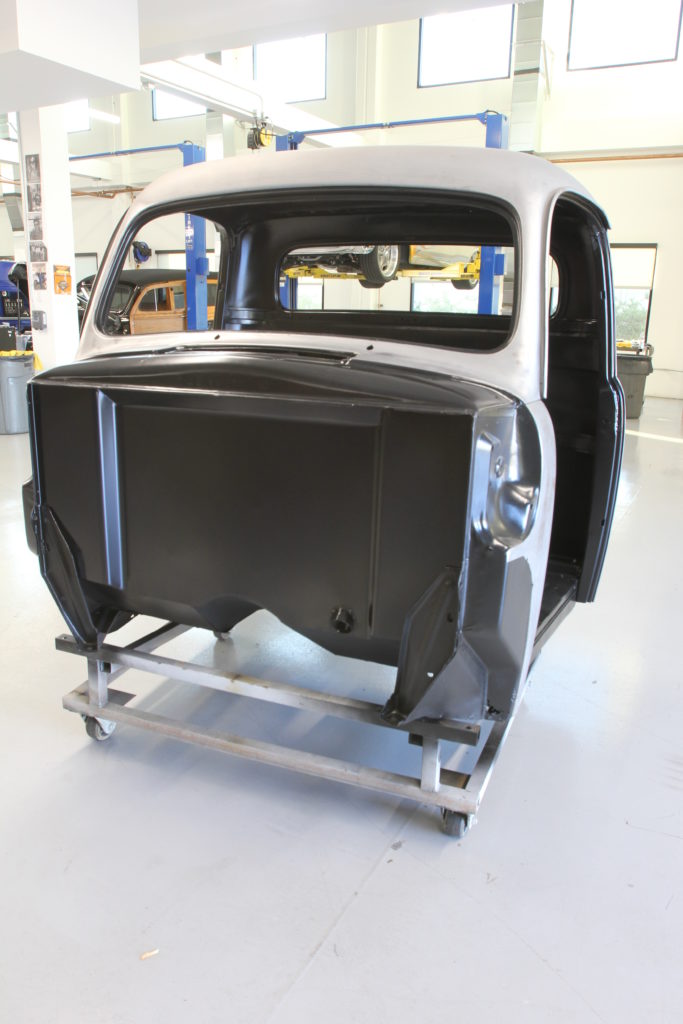
Once the sheetmetal was installed, we used Seam Sealer from LMC Truck to prevent heat or nasty exhaust gasses from seeping in between the sheetmetal joints before applying two coats of Eastwood Rust Encapsulator over the entire cab, save the exterior. The plan is to leave the truck in bare metal for now until we can decide on paint particulars.
After two days spent in the shop, our cab went from decidedly damaged to fashionably fixed, ready to start accepting all the components necessary to construct a modern vintage pickup. CC
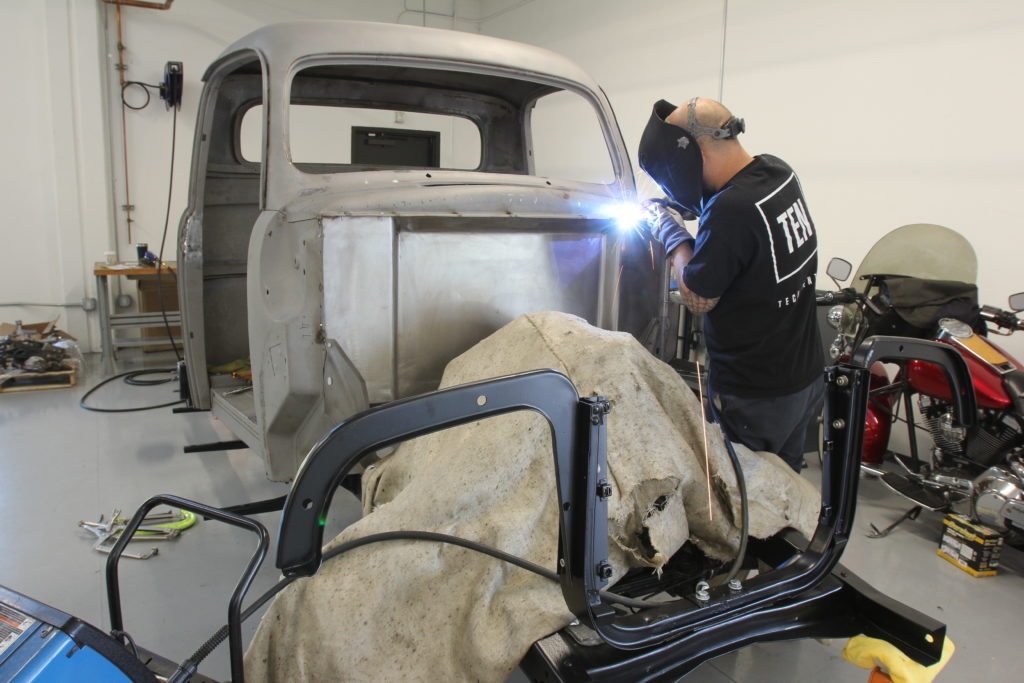
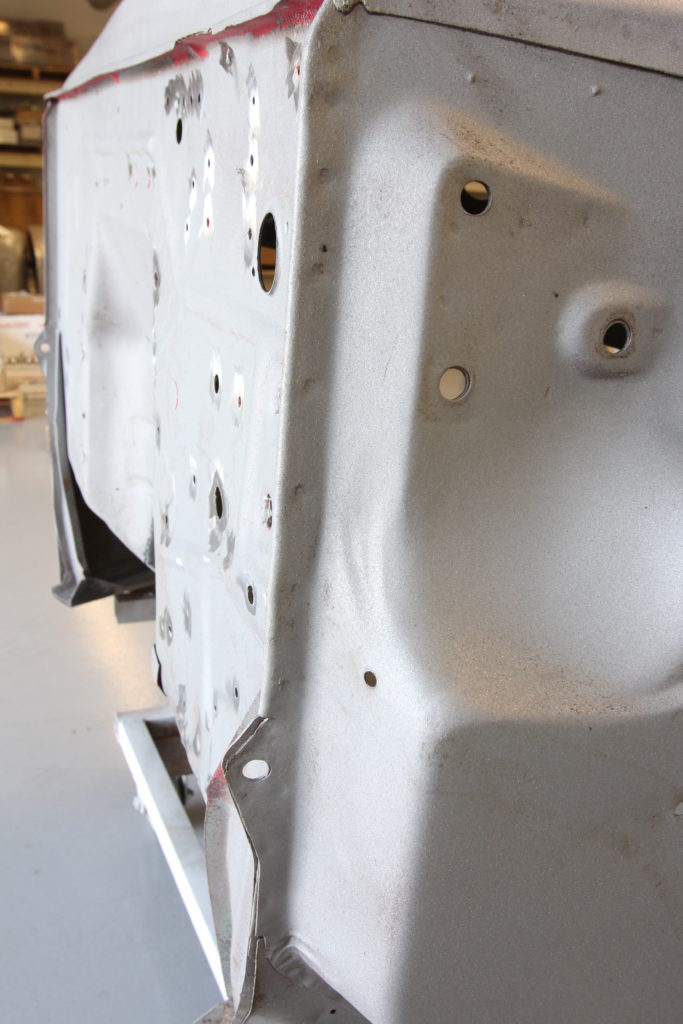
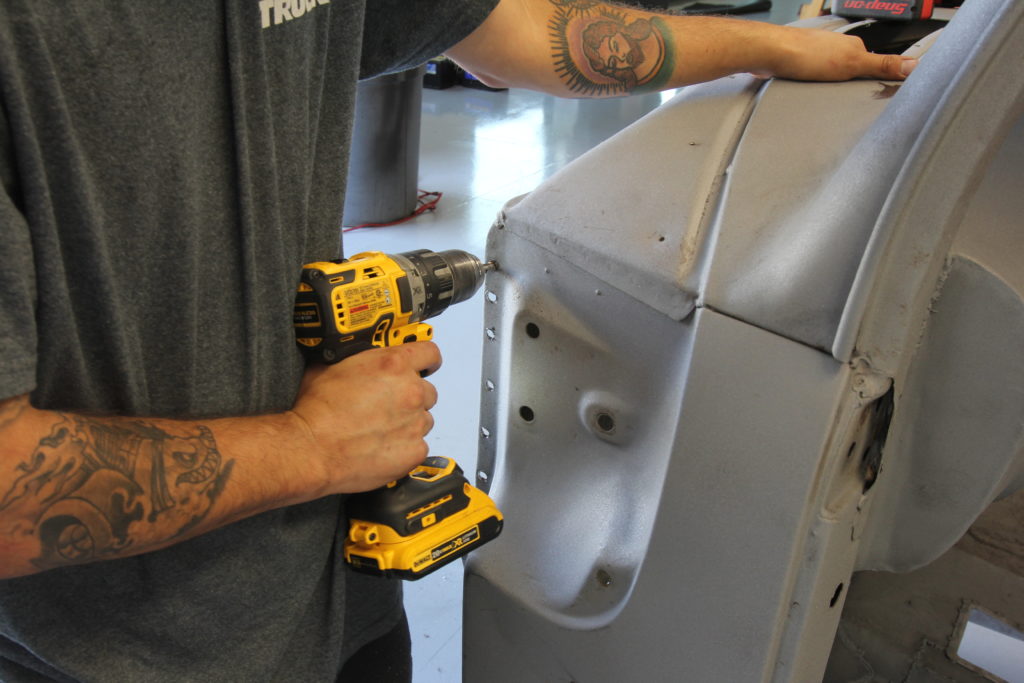
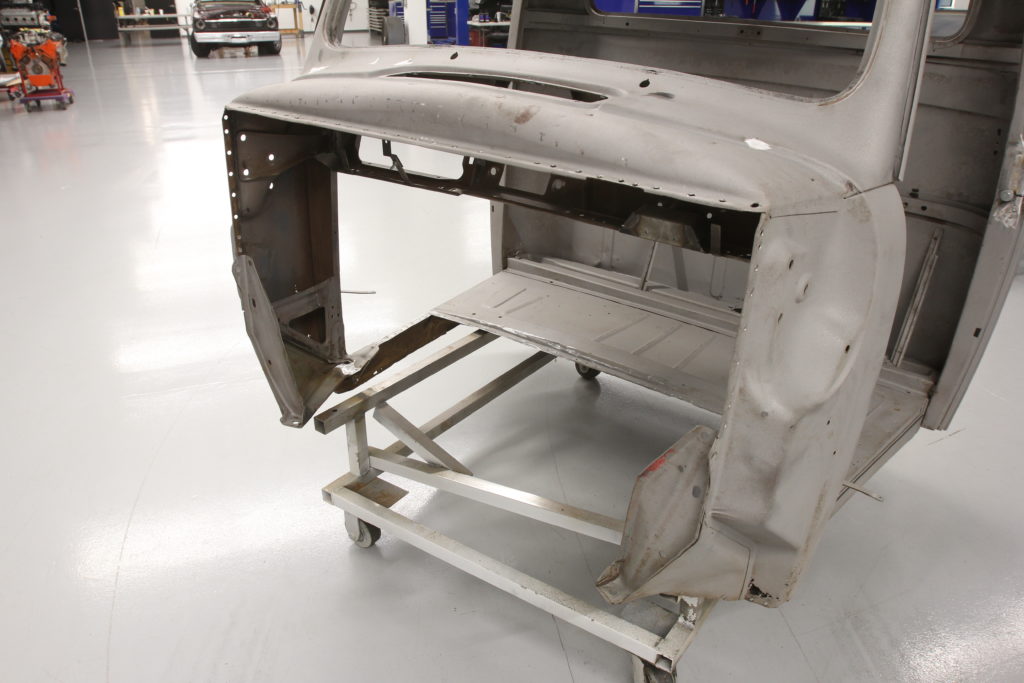
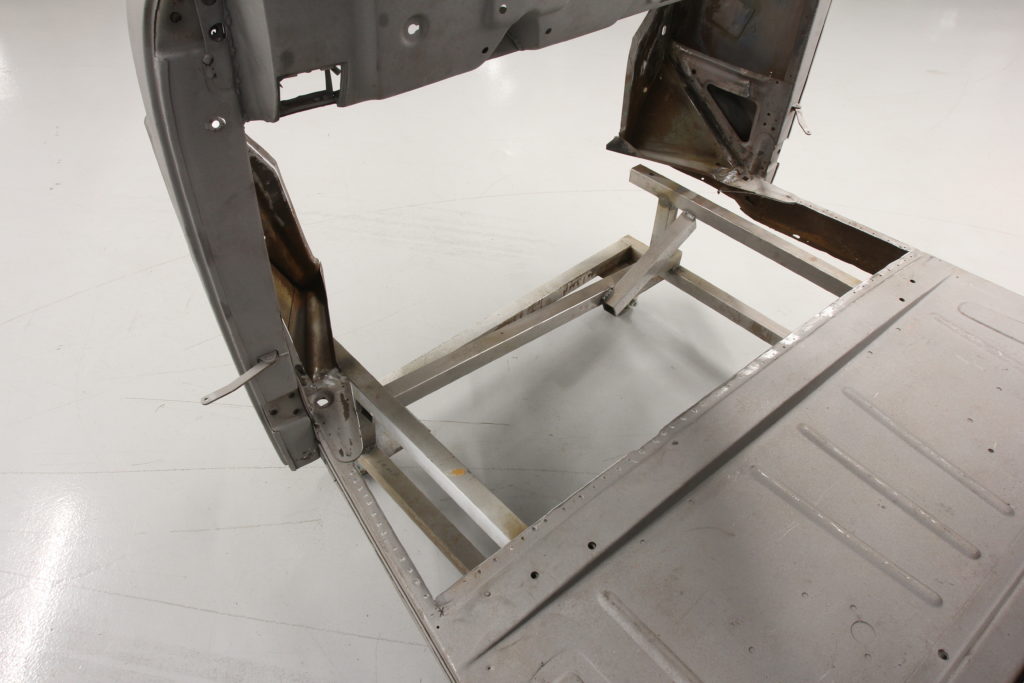
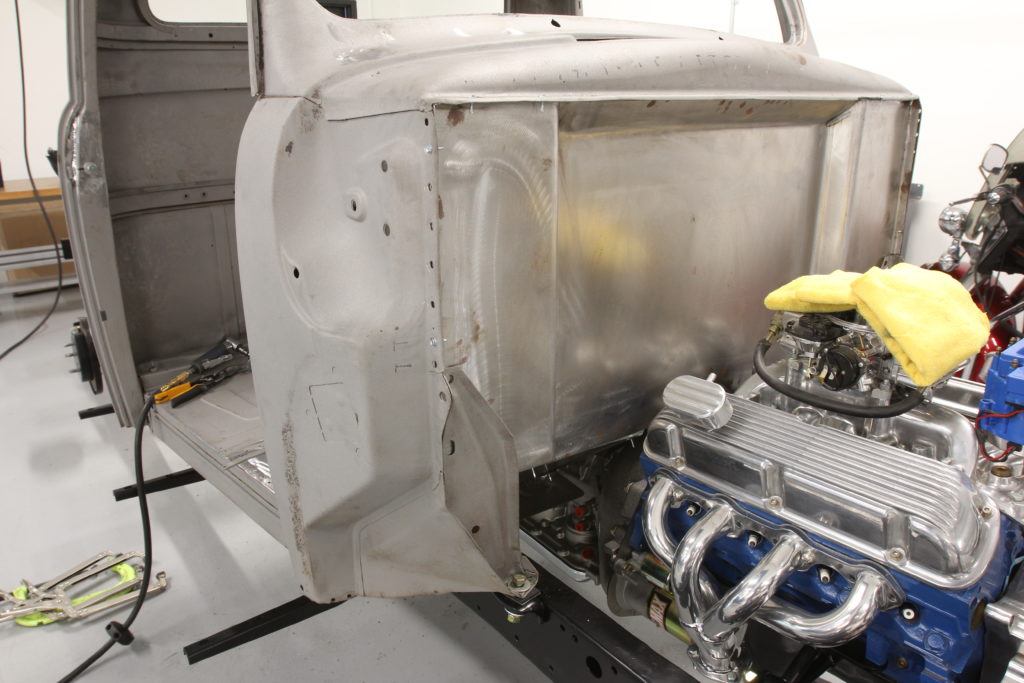
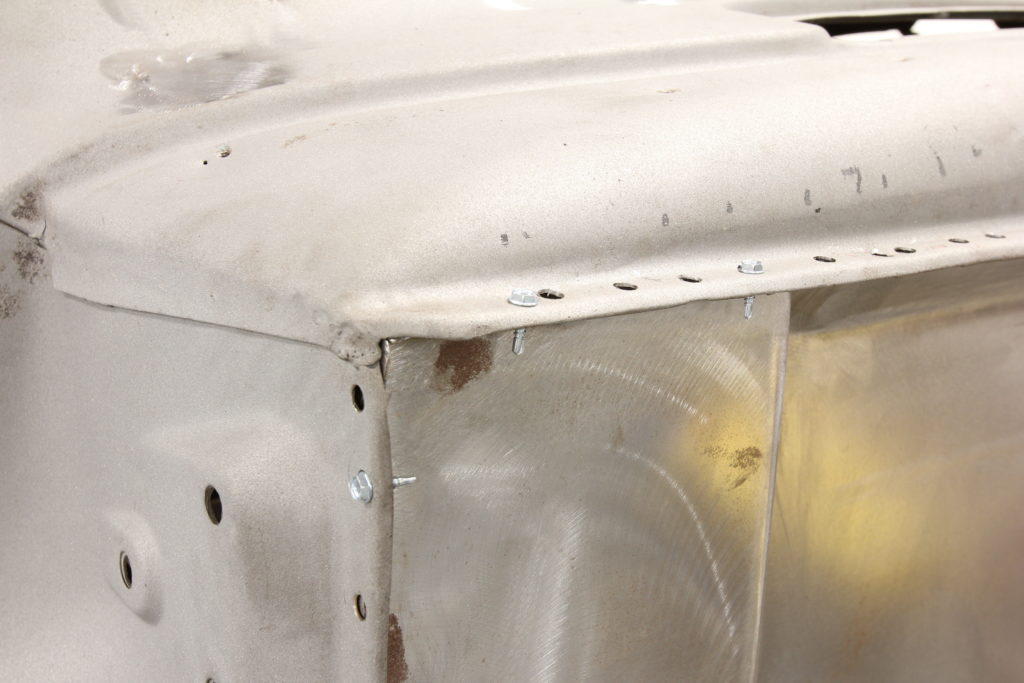
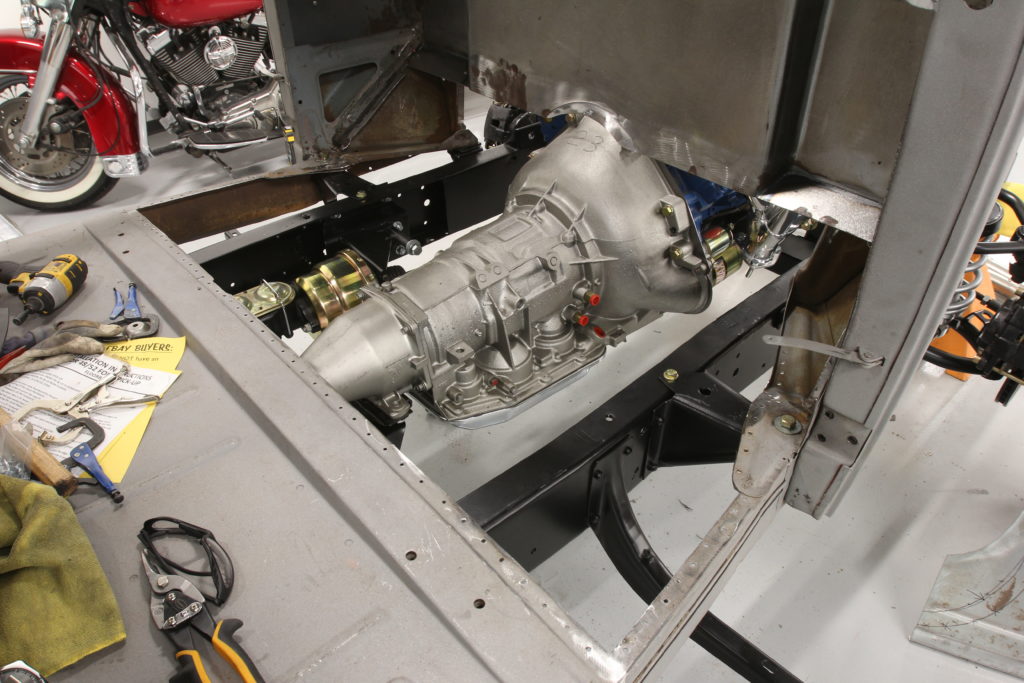
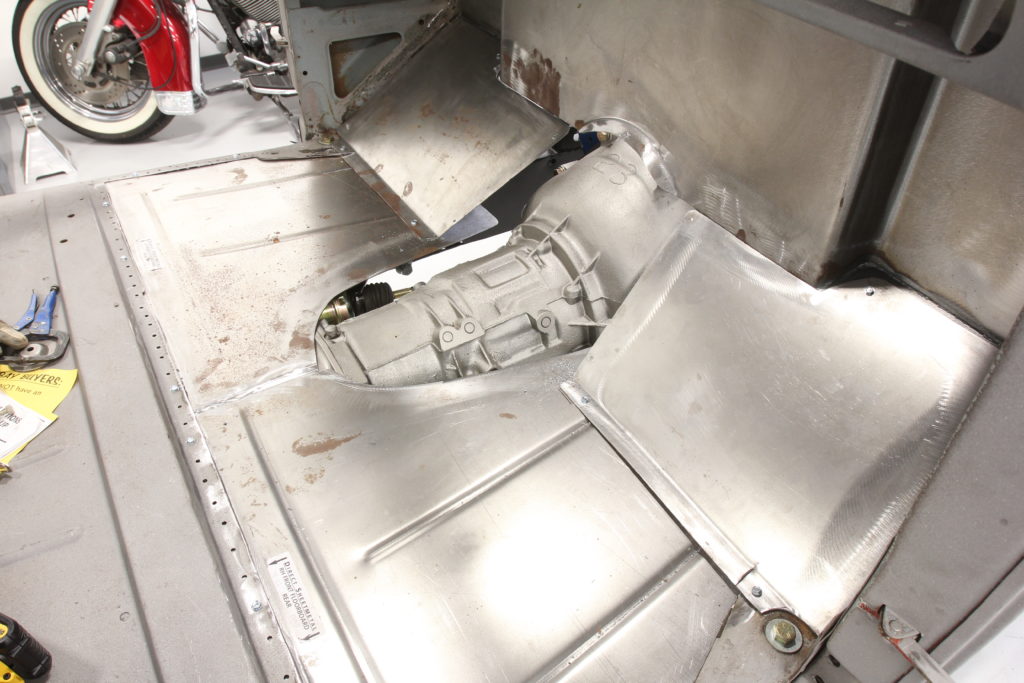
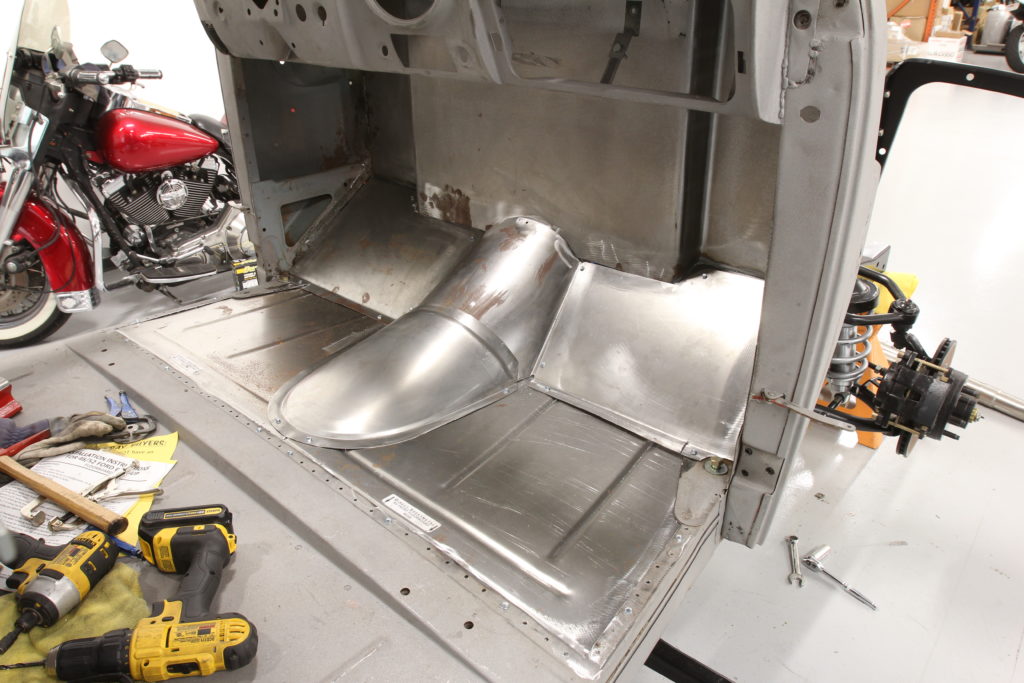
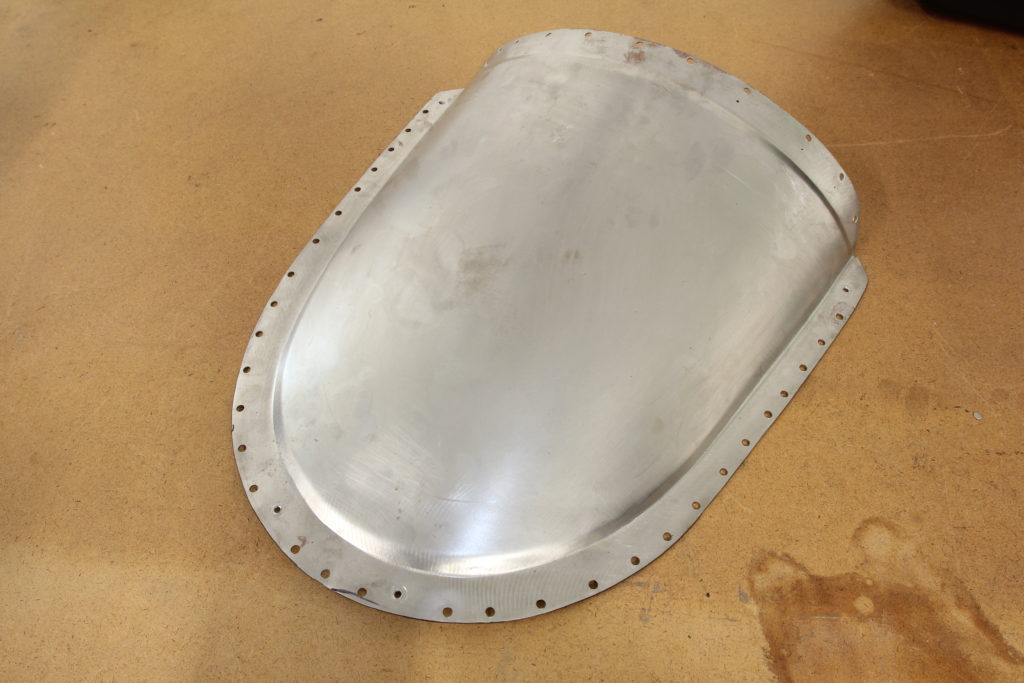
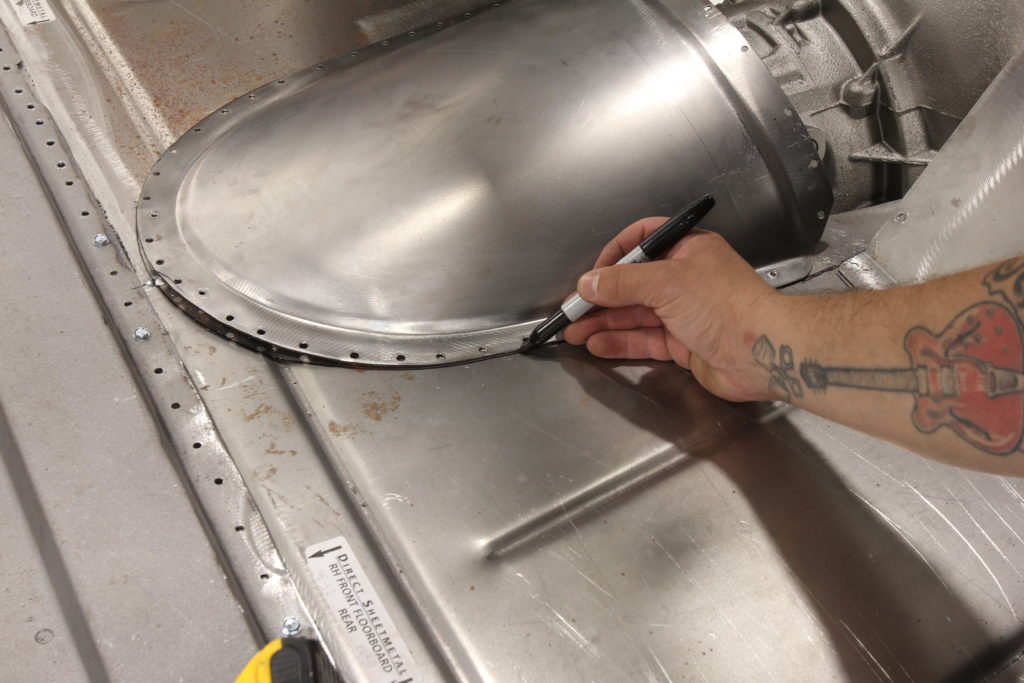
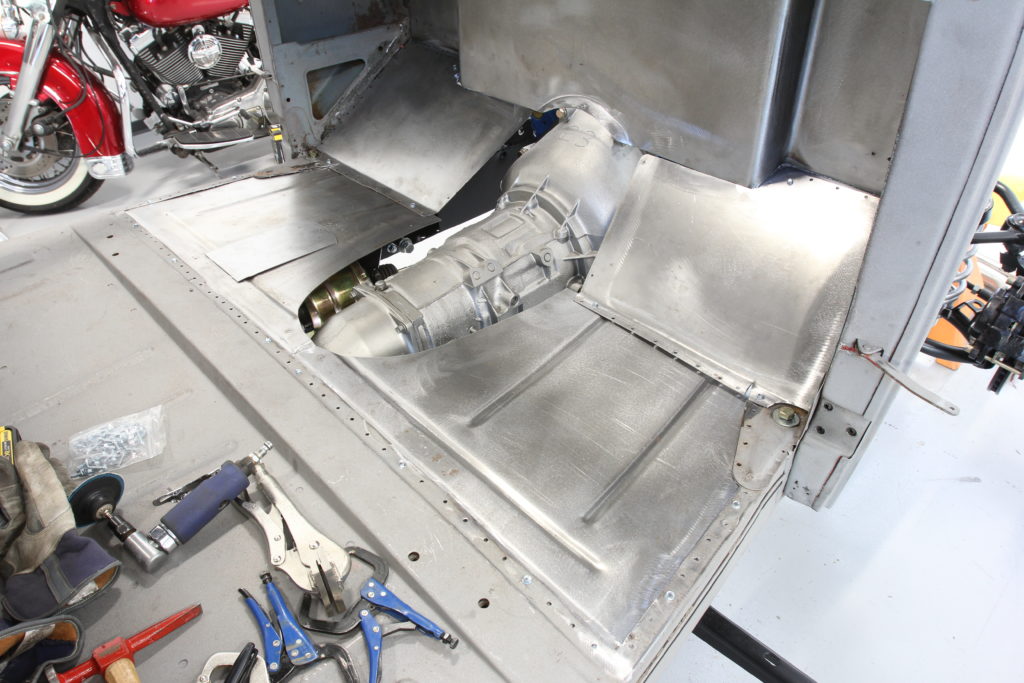
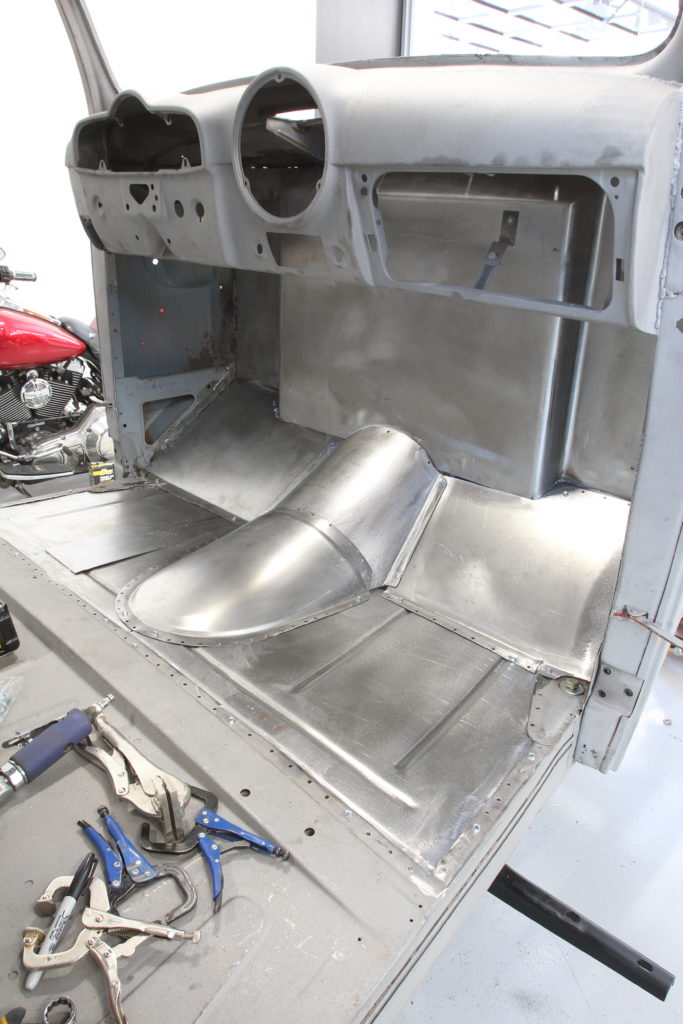
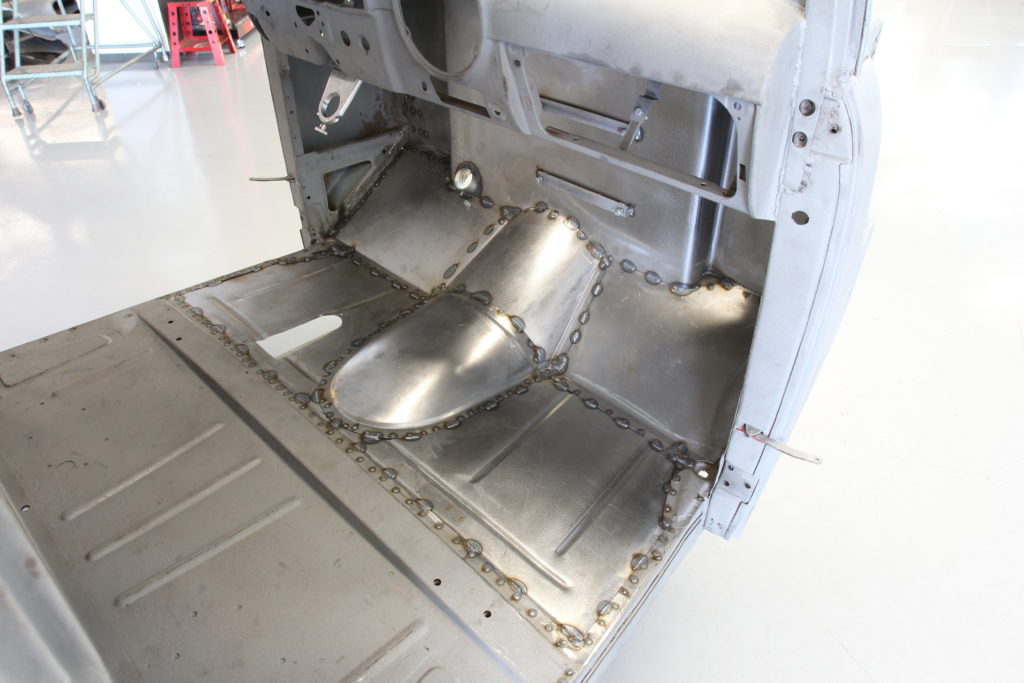
The first step in fixing our Ford cab is to strip all the old paint and bodyfiller off, as well as any surface rust that might be present. KC Power Clean brought their mobile rig to our shop and spent the next couple hours hosing all of our sheetmetal off. The result is a perfectly clean steel surface ready for repair and refinishing.With the cab rolled back into the shop, it’s time to take inventory of the repairs that need to be made. For starters, all the holes on the firewall need to be filled. As you can see, I began to sand the surrounding area of about half the holes on the firewall before sharper minds entered the picture to convince me that replacing the entire kit and caboodle would be faster, easier and yield a better conclusion.Here’s the Direct Sheetmetal Firewall and Floorboard kit that we’ll be using. Assembled using 16-gauge cold-rolled steel, the Firewall will be installed first by Rosette welding it to the cowl just like the original. The Floorboard kit will then be installed in a similar fashion, trimmed to fit between the seat riser and the new firewall.First, we need to remove the stock firewall by drilling out all the spot welds that hold it in place.To do so, we’ll be using a 5/16-inch Blair Equipment Company Spotweld Cutter.In addition to the firewall, we went ahead and cut out all the spot welds holding the original floor in place as well. That made removing the firewall a little easier and gave us a great jumping off point for installing the new sheetmetal.Next, we removed the cab from the temporary dolly and installed it on the chassis using a body mount kit from LMC Truck, including new cab mount arms at the back of the cab. It’s very important that moving forward, the cab is nice and square on the chassis and mounted securely.After trimming the firewall to fit the idiosyncrasies of the cowl of our truck, it’s attached using a handful of sheetmetal screws. Note that we’re using Direct Sheetmetal’s 2-inch recessed Firewall to give our small block Ford some more breathing room.With the firewall temporarily attached, our attention is redirected inside the cab. Our cab mounts were in great shape and allowed us to mount the cab securely while the floor and firewall is replaced. The new sheetmetal will be trimmed around these, which will keep everything nice and square.We start the floor repair at the seat riser, working towards the firewall. Here are two of the Direct Sheetmetal Floorboard kit set in place while we check fitment. Note that they tuck under the door sill section and seat riser, which will allow us to Rosette weld the Floorboards directly to the cab’s structure. For now, a few more sheetmetal screws hold things in place. Pleased with the first section’s fitment, we then set up the toe kick sections, using a couple more screws to hold the three sections together as one. The toeboards are supported by a flange on the firewall on either side of the recess.Next, the trans tunnel section is fit and screwed to the floor and toe kick boards.With the floor screwed together and pleased with the fitment, it’s time to start working towards final assembly. We weren’t sure how the trans tunnel was going to work out but it turns out that it will sit on top of the floor. In order to Rosette weld it to the floorboards, 5/16-inch holes are punched along its flange using an Eastwood Flanger/Punch pneumatic tool.Now that we know how the panels will be assembled, it’s time to trim some of the excess sheetmetal. Here, the trans tunnel is traced so that the floorboards can be trimmed.While we’re at it, the master cylinder access panel hole is marked as well. Note the line we traced in the last step, which has been ‘x’d out and a new line added one inch inside. This is so that we trim the final shape so as to allow a flange with which to attach the trans tunnel.Here are the floor and toe boards installed after being trimmed to fit……and the entire floor attached to the cab and ready for final welding.We’ll start the welding process at the firewall, filling all those 5/16-inch holes we created when the original spot welds were removed using our trusty Miller 252 MIG welder. A pair of Eastwood Spot Weld Pliers are used to hold the firewall nice and tight against the stock cowl while the hole is welded solid. This is how a Rosette weld is made.Once the firewall was welded solid, we started on the floor, with more Rosette welds. I also added a couple stitch welds here and there for good measure.After the sheetmetal has cooled, we went over all the seams using Seam Sealer from LMC Truck.Back on the dolly, the sheetmetal work on our cab is complete and it’s time to apply some sort of coating to protect the new steel.For this end, we’ll be using Eastwood’s Rust Encapsulator, a matte black finish that can be applied directly over light surface rust and can be top coated by almost any paint or can be left as the top coat itself.Eastwood’s Rust Encapsulator can be applied using a number of methods, but since we’re going to spray the firewall and dash as well as the entire interior of the cab, we want as nice of a finish as possible. To achieve that, we’ll be using Eastwood’s Concours Pro HVLP 2-Gun Paint System Kit. This kit includes a Concours Pro full sized paint gun, a smaller detail gun, extra tips, cleaning kit, air regulator and cup, all packed into an aluminum storage case. Engineered specifically to work with smaller compressors, these guns require some of the lowest CFMs of any HVLP paint guns on the market and includes three different needle/nozzle sets that ensure proper atomization of a number of different coatings.With the compressor up and running, we sprayed the Matte Black Rust Encapsulator as it came out of the can, directly onto the cab of our truck. It laid out nice and flat and covered in two coats, leaving enough in the gallon can for a couple more small jobs.The result was a finish that will not only look great for years to come, but will prevent rust from developing under the carpet, headliner or behind the gas tank, providing the perfect foundation for the rest of our build.
Related posts:
Dashing Debonair Installing a 1952 Pontiac dash in a 1952 Ford F1 pickup truck Dashing Debonair By Ryan Manson * clampdowncomp@gmail.com It’s not uncommon in our hobby to see a car that has been customized to such an extent that it makes it quite hard for not only the newcomer but even...
Roadster Rhinoplasty, Part II Roadster Rhinoplasty, Part II The track nose for the Project Potvin roadster is starting to take shape By Ryan Manson * clampdowncomp@gmail.com Our last story laid the foundation for the front end of the Project Potvin Roadster in the form of building a buck in which to shape the track...
Roadster Rhinoplasty, Part III Roadster Rhinoplasty, Part III Wrapping up the track nose for the Project Potvin roadster By Ryan Manson * clampdowncomp@gmail.com One of the most exciting aspects of any project is when it really begins to take shape and form and begin to actually look like something. For the past year or...
Replacing an Under Decklid Panel on a 1940 Ford coupe Replacing an Under Decklid Panel on a 1940 Ford Coupe Battered, Bruised, and Broken By Ryan Manson * clampdowncomp@gmail.com One of the most common troublesome areas on a 1935-40 Ford coupe has got to be the panel under the decklid. Whether damaged from collision, rot, or rust, this panel seems...
How to Rebuild a 1932 Ford Model B Zenith Carburetor for a Model A 4-Banger How to Rebuild a 1932 Ford Model B Zenith Carburetor for a Model A 4-Banger Motor Big Improvements for the Little Banger By Ryan Manson * clampdowncomp@gmail.com When Ford introduced the Model A in late 1927, it was remarkably different from other automobiles offered at the time, even Ford’s own...
How to Rebuild a Model A Two-Tooth Steering Box How to Rebuild a Model A Two-Tooth Steering Box Upgrade and Improve Your Model A’s Driveability By Ryan Manson * clampdowncomp@gmail.com When it comes to owning a 90 year old car, one thing is for certain: there’s always going to be something to work on! That has been the case...