How to Rebuild a 1932 Ford Model B Zenith Carburetor for a Model A 4-Banger Motor
Big Improvements for the Little Banger
By Ryan Manson * clampdowncomp@gmail.com
When Ford introduced the Model A in late 1927, it was remarkably different from other automobiles offered at the time, even Ford’s own Model T. In many ways, it was a clean sheet design when compared to Ford’s previous line. Many similarities abound, but the Model T and the Model A differ in more ways than they are similar. And four years later, when the Model B came along, the story was very similar. If the brass at Ford at the time were learning things as they went, it was pretty obvious that they were incorporating those things in real time. So, it should come as no surprise that as the new models came out, hot rodders borrowed parts for their older Fords. Wheels, brakes, shocks, transmissions, engines, even complete frames were common swaps for the earlier T and A models as better components were introduced on Ford’s latest offerings.
One of the early hop up techniques for the Model A was to swap to the larger 1932 Model B Zenith carburetor. Equipped with a similar, slighlty upgraded flathead four-cylinder engine, the Model B Ford was fed by a slightly larger updraft carburetor (1 1/8-inch) than that found on the Model A (1-inch). While that small difference in size may not sound substantial, it actually equates to a 26% increase in area which translates into more air and fuel that can be fed into the A engine. That small increase can yield upwards of 4 horsepower. Another inconsequential sounding number, but when added to the A’s paltry 40 horsepower, results in a net gain of 10%. Not too shabby for the 1930s!
In addition to the performance gains, there are a few reliability improvements to be had with the Model B carb as well. For starters, Ford changed the design of the float bowl on the B, going from a float that pivoted at the rear of the float bowl to one that pivoted from the side, transverse to the direction of vehicle travel. This promptly solved the “stalls when stopping” issue that plagued so many Model As at the time. The addition of a power jet circuit on the Model B carb also resulted in a smoother transition from off-idle to wide open throttle settings thanks to an ingenius design that siphoned fuel from the float bowl at varying throttle openings, enriching the mixture at open throttle conditions similar to an accelerator pump but without the linkage or diaphragm.
Upon researching the benefits of the Model B carb and with a stock Model A Zenith carb that leaked while parked and stalled while stopping, I decided to set out to find and install a Model B carb on my ’30 coupe. Once a usable core was located, I ordered up the necessary gaskets, fuel fittings, and a set of flowed jets from Renner’s Corner in anticipation of splitting the old carb in two and putting it back together, better than new. The result is an old car that fires right up, doesn’t stall while coming to a stop, and smoothly accelerates without hesitation. It doesn’t leak when parked anymore either, which is an added bonus!
So follow along as we breath new life into an 88 year old carburetor to improve an 90 year old car by rebuilding that old Model B Zenith carb! CC
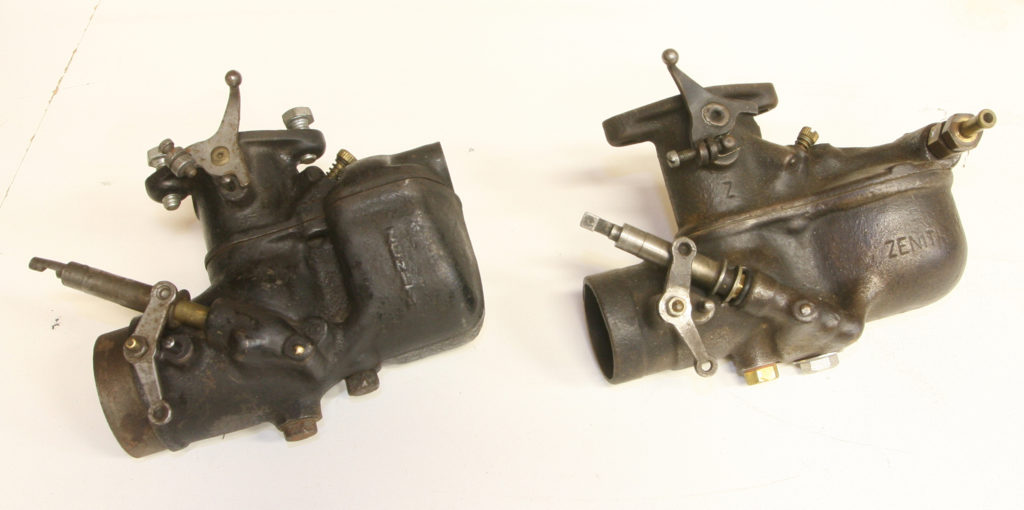
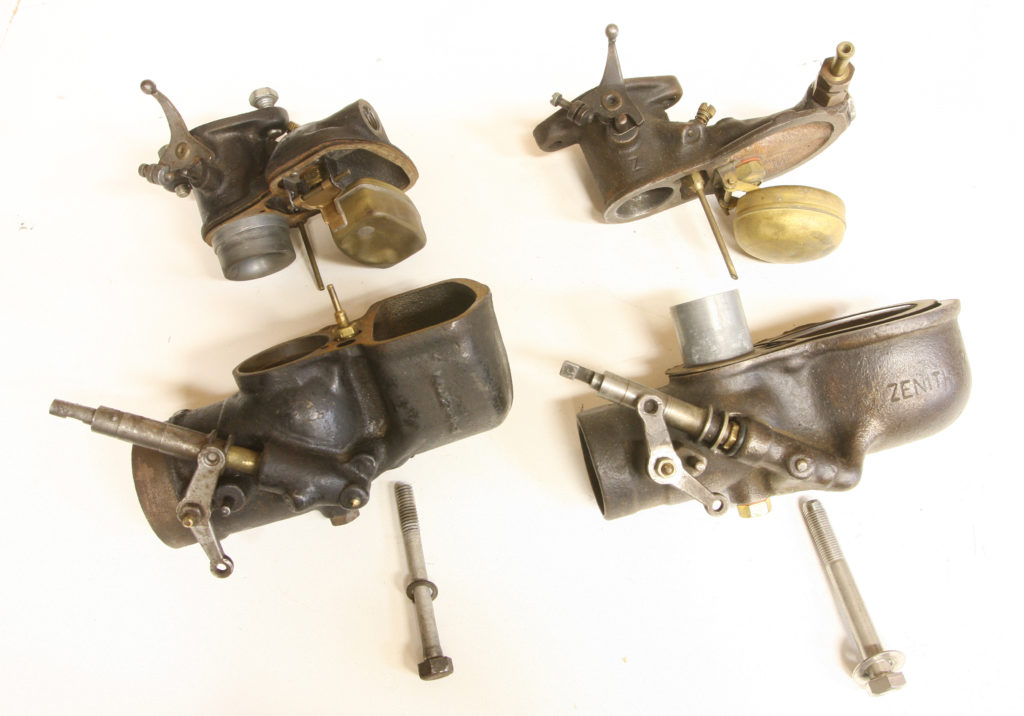
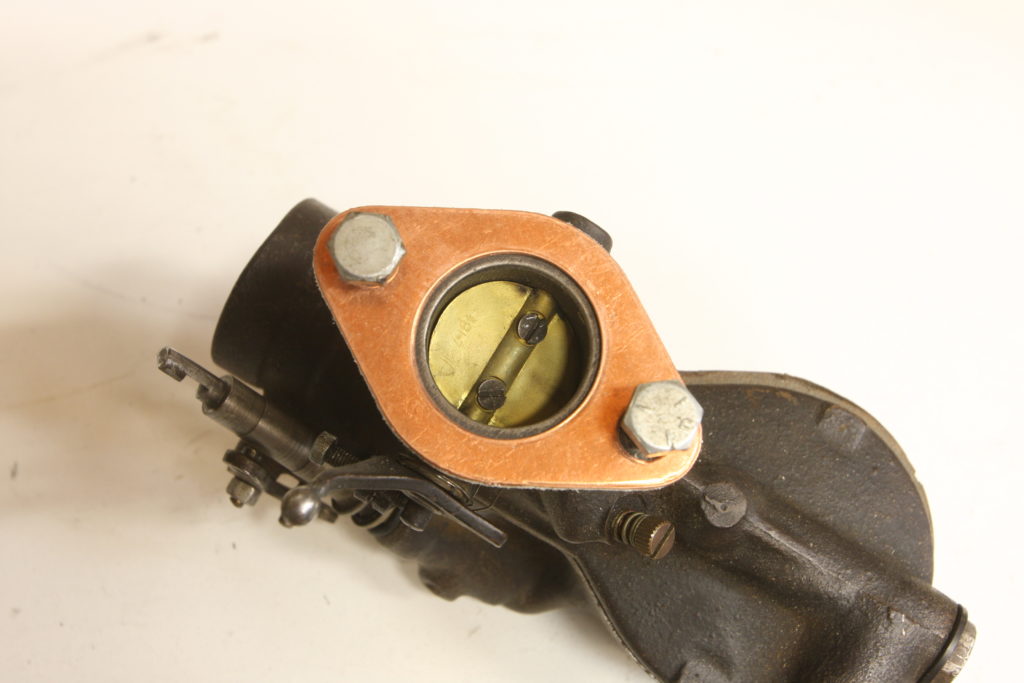
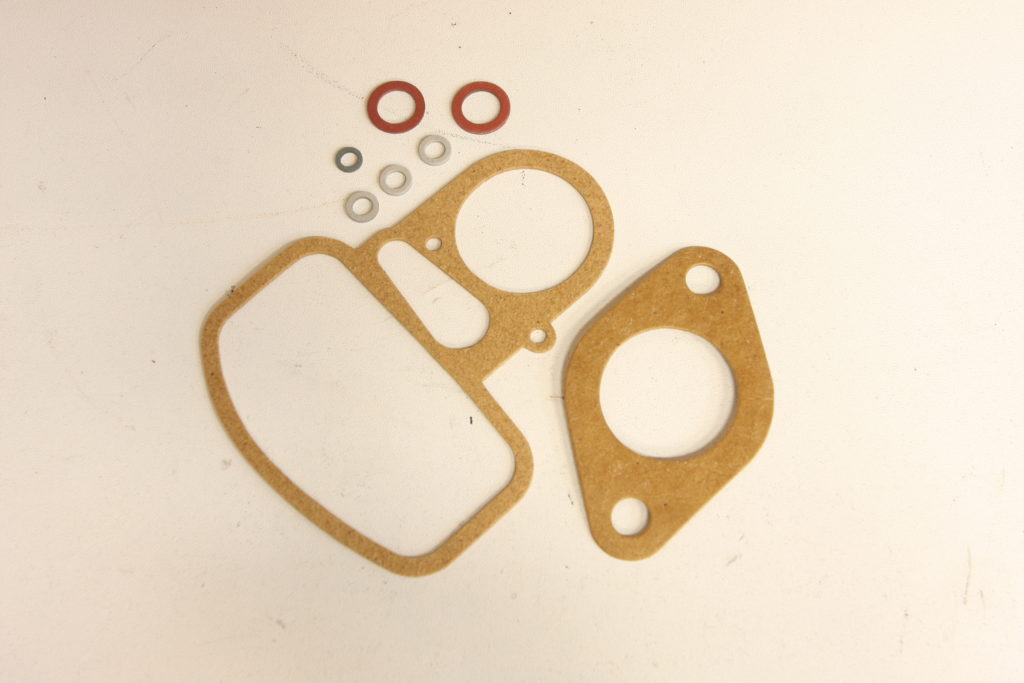
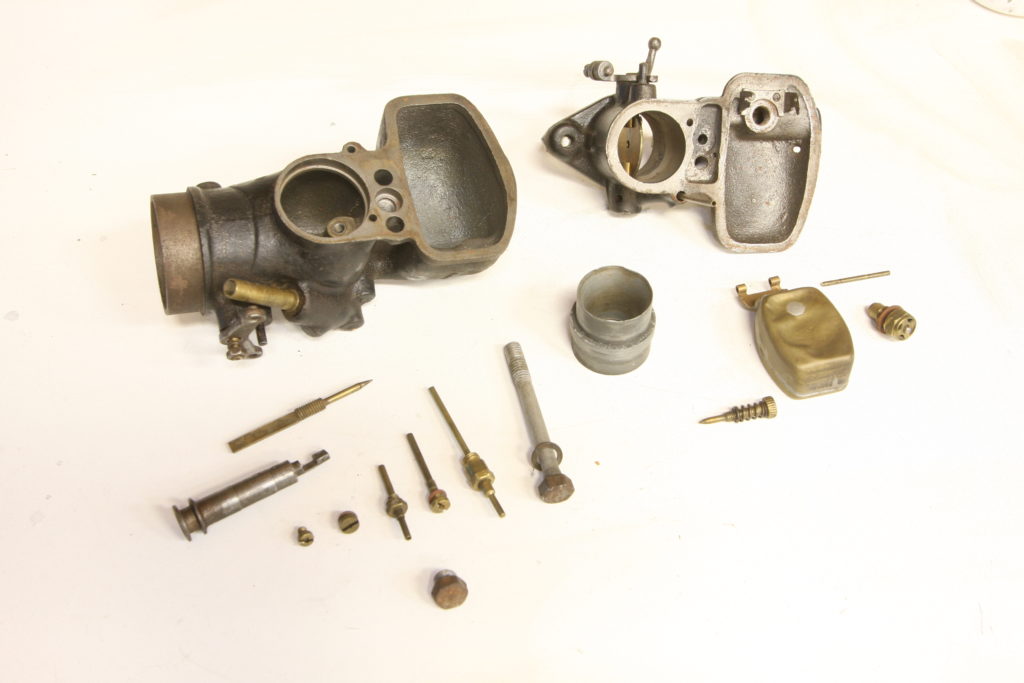
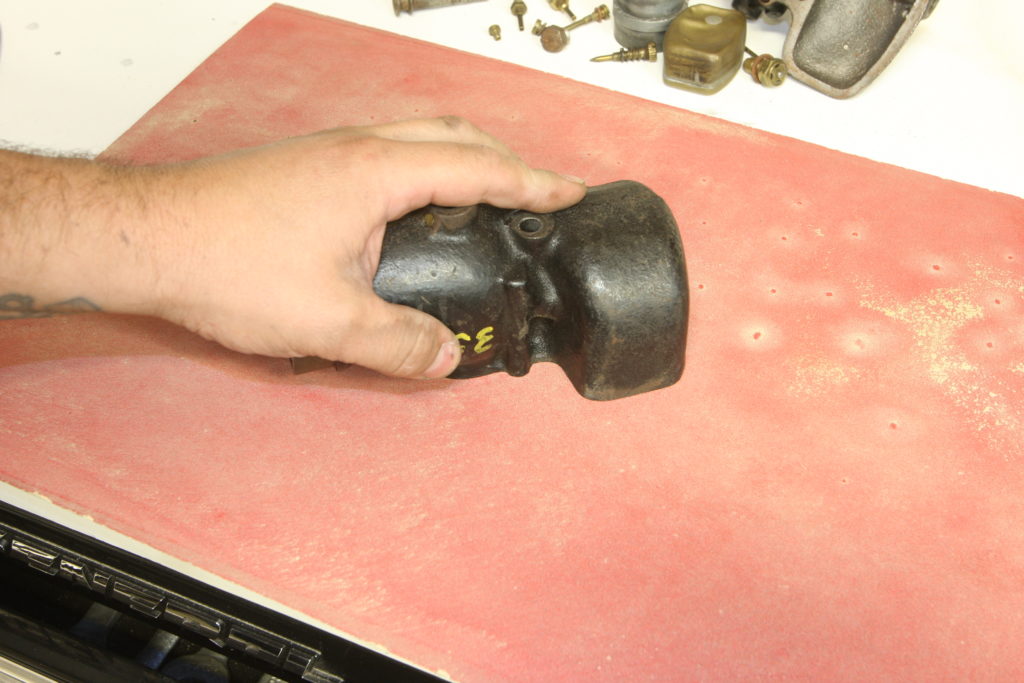
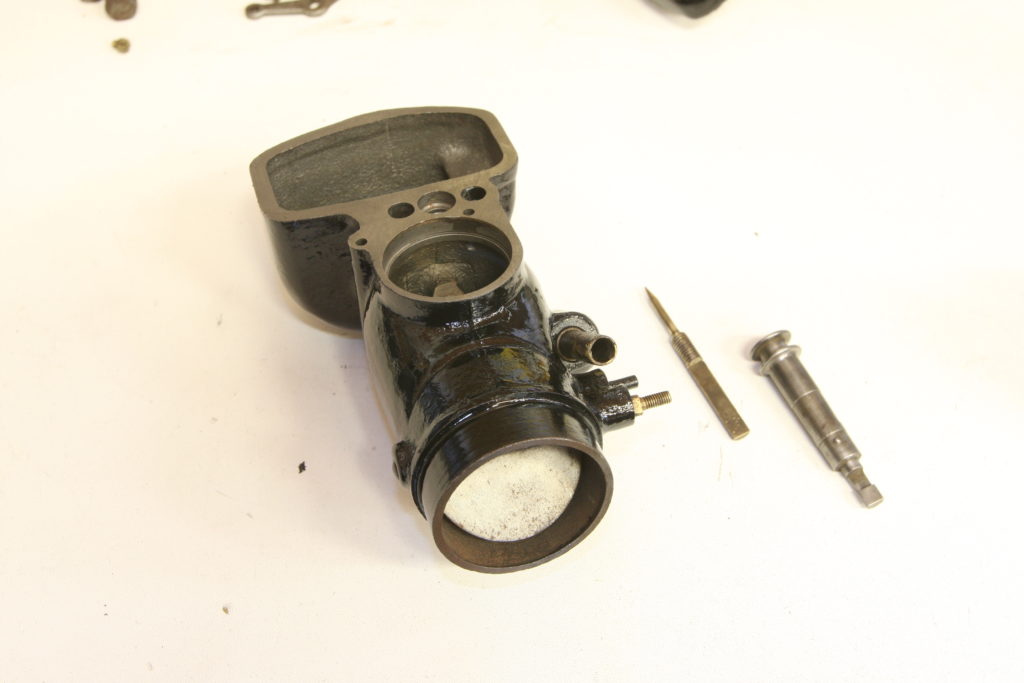
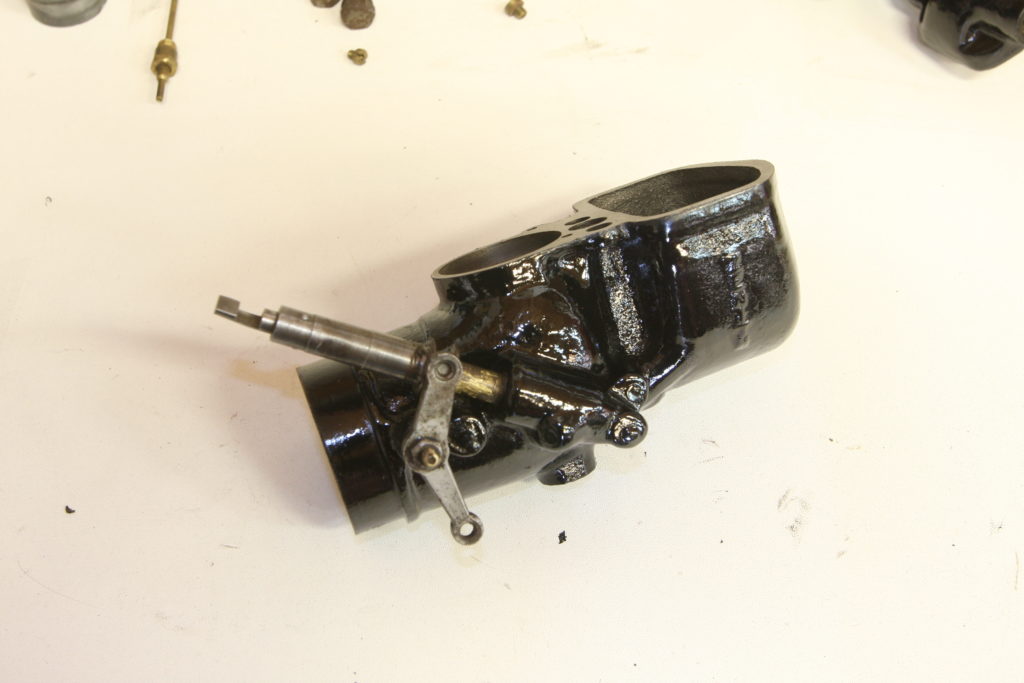
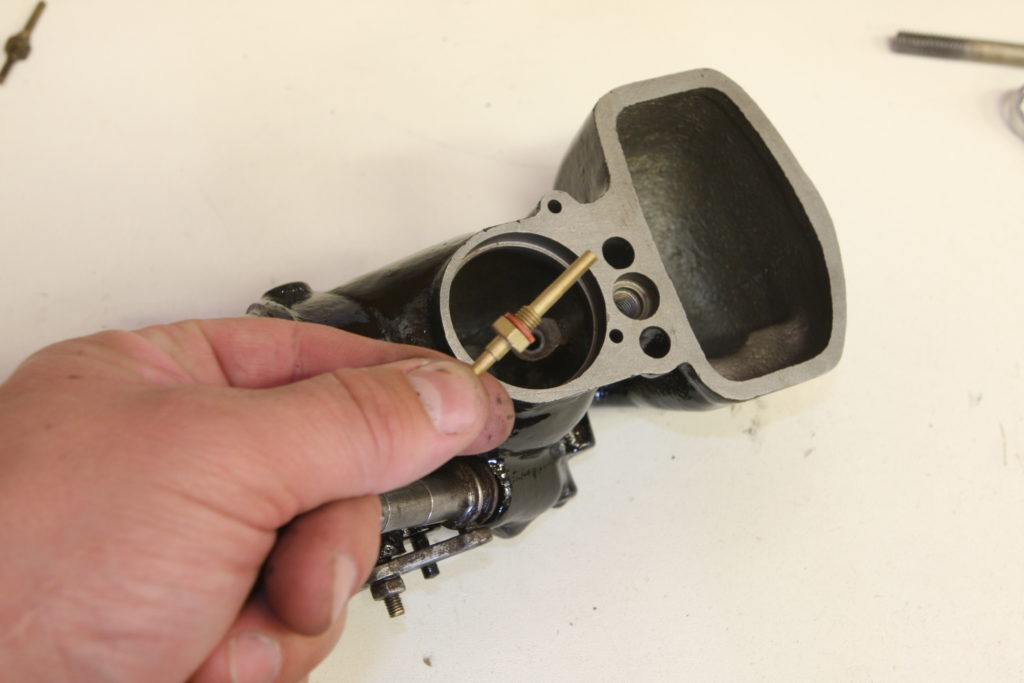
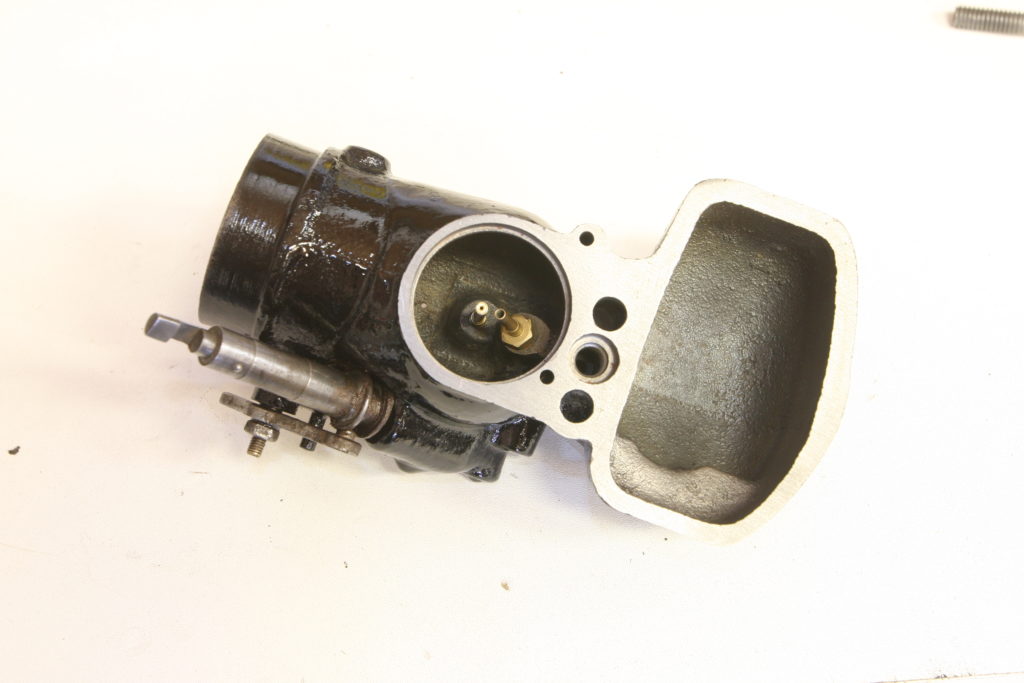
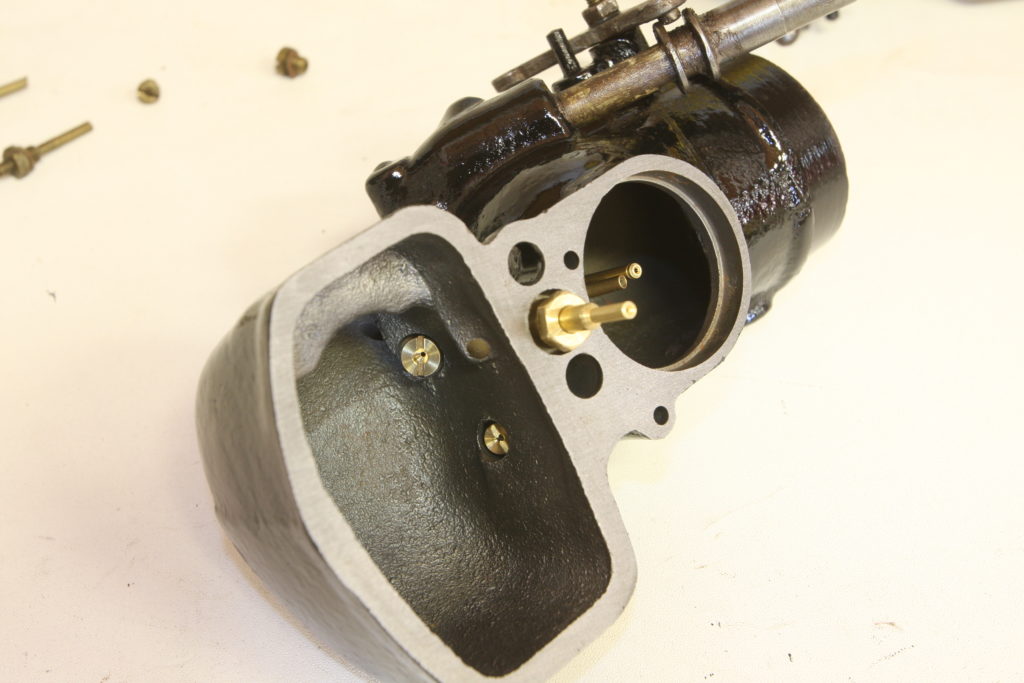
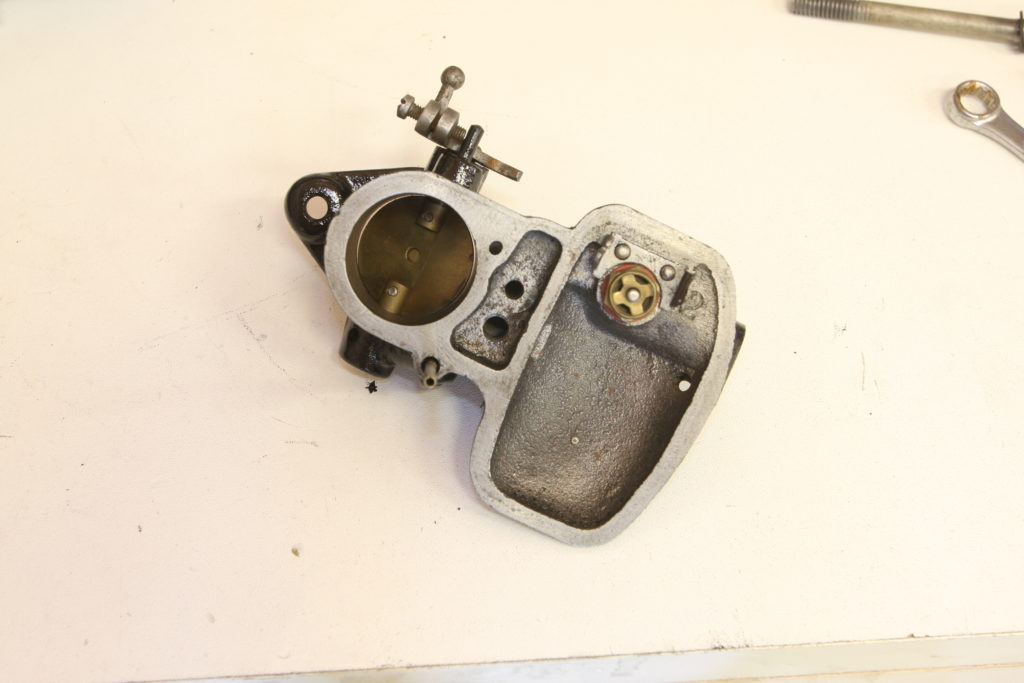
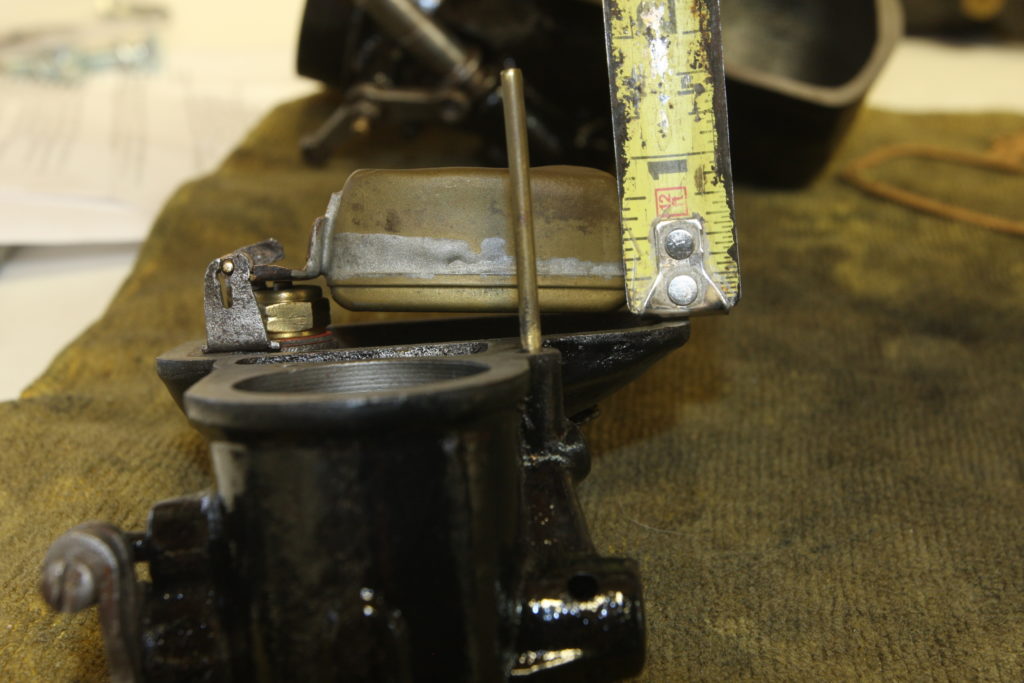
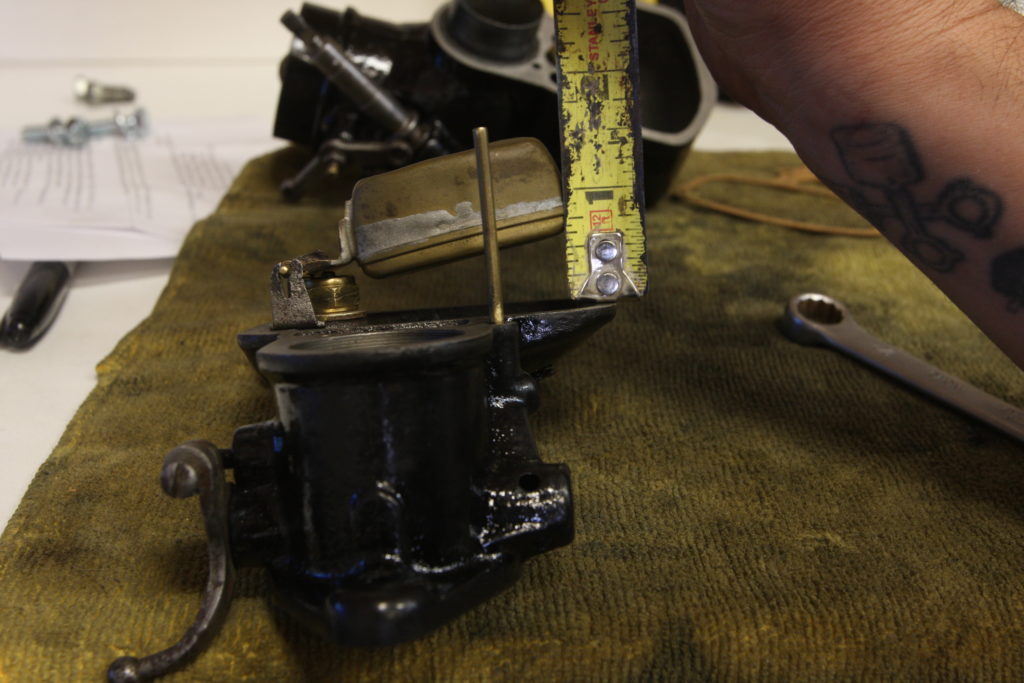
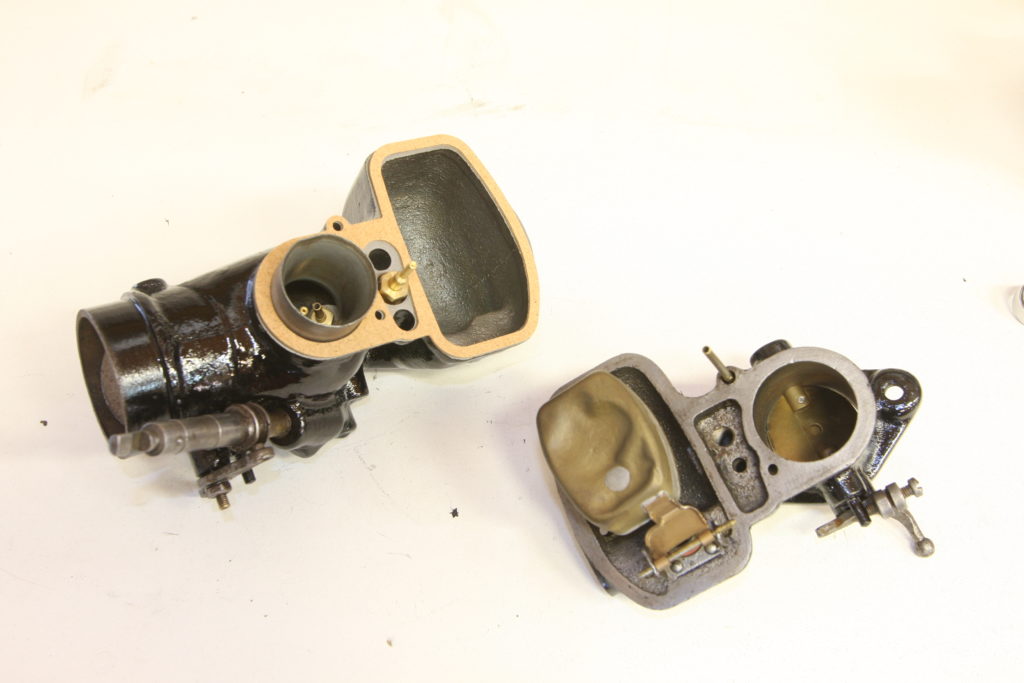
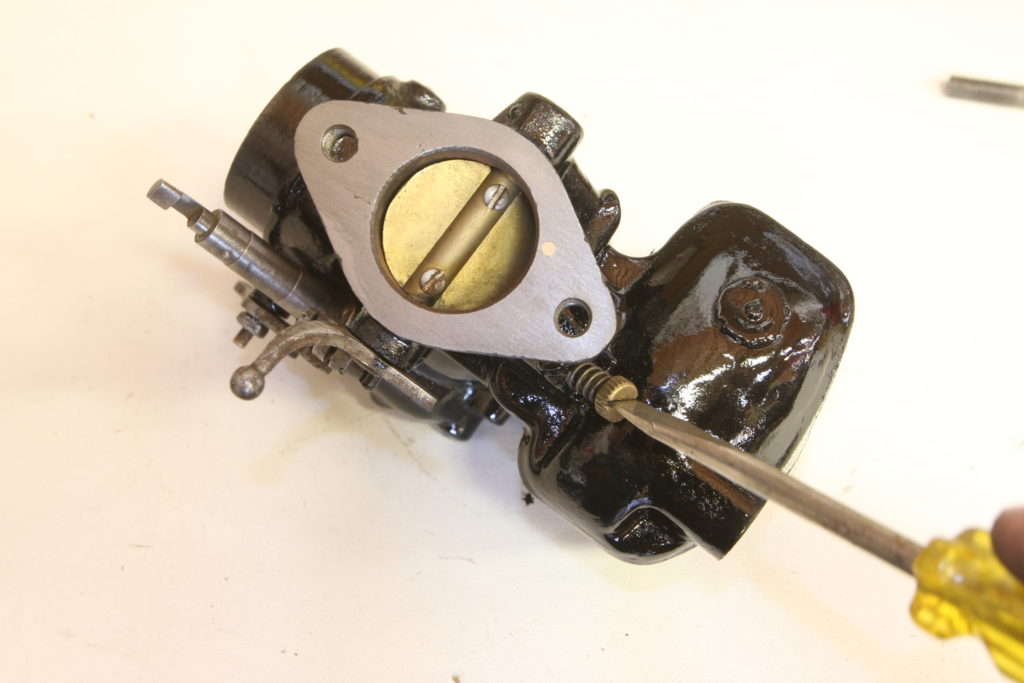
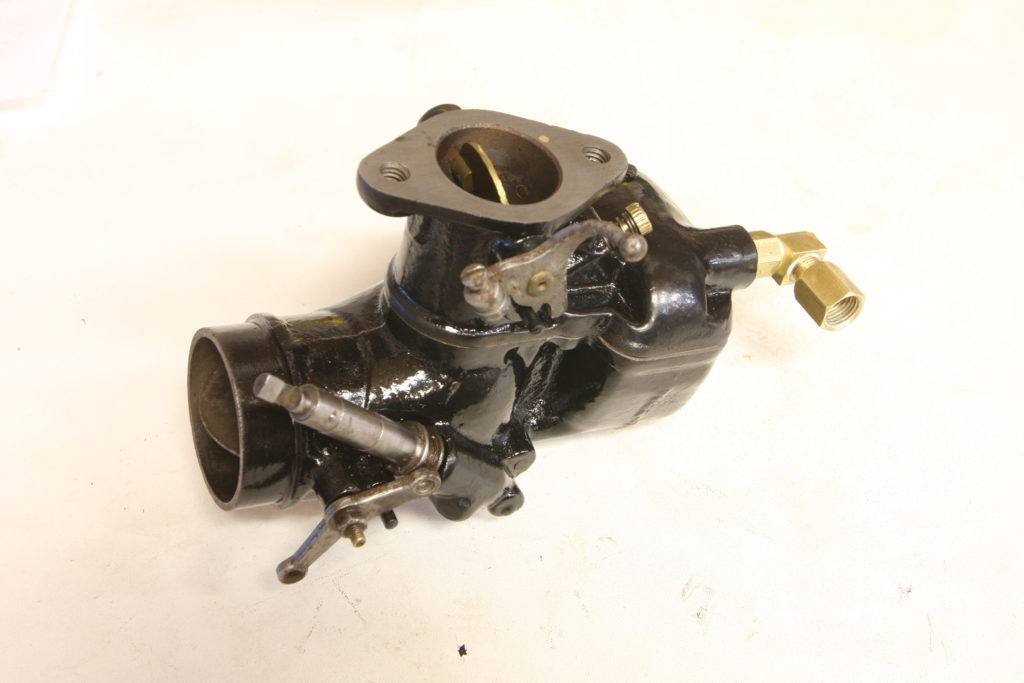
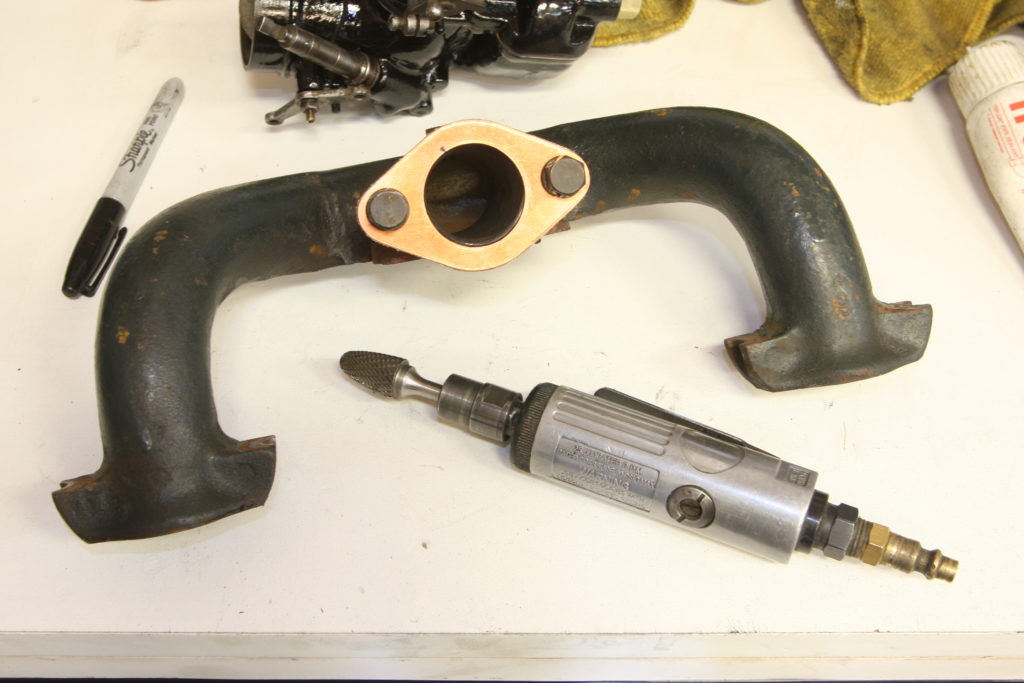
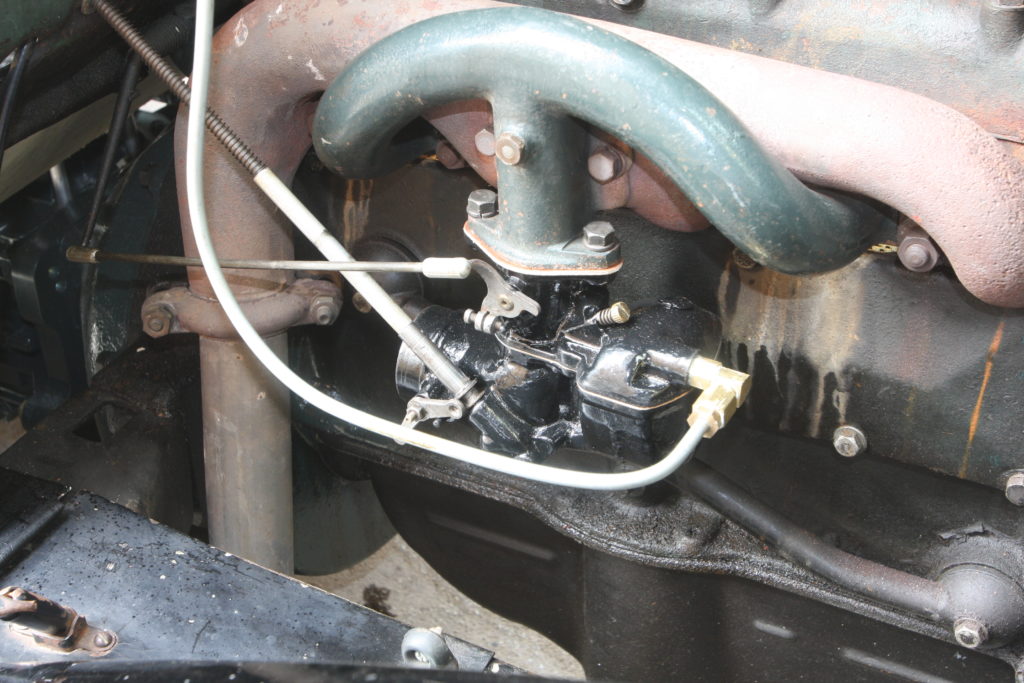
Here are the two carbs, side by side; the Model B on the left and the Model A unit on the right.With the two carbs split in two, a few differences are immediately noticed. One is the aforementioned difference in float bowl designs, with the Model B mounting the float from the side of the carb, solving the stall and surge issues common to the A design. The other is the power jet tube that is attached to the upper housing between the venturi and float chamber on the Model B carb. More on this in a bit.In addition to the Model B carb’s revised design, it also flows 26% more volume thanks to an increase of 1/8-inch inlet diameter, illustrated here with a Model B carb base gasket installed on an A carb.The fuel inlet on the Model B carb was moved from the side (on the A carb) to the front. This requires either changing the design of the fuel hard line or (pictured here) using Renner’s 90-degree adapter.We’ll also be using a gasket set from Renner’s to complete our rebuild.One of the most important aspects of a quality rebuild when it’s comes to the Model A and B carbs is to use a set of flowed jets. This is to ensure that the new jets actually flow the numbers that they’re supposed to. There’s no telling what’s been modified over the years and some of the new jets being offered have been found to flow numbers that are remarkably off from their specs. Thankfully, Renner’s Corner offers jet sets that have been flowed and matched with an acceptable specification, ready for installation.Here’s the Model B Zenith carb after being completely blown apart and ready to be restored. From the left you have the GAV (gas adjustment valve) and needle, power jet, compensator jet, cap jet, main jet, idle jet, venturi, idle air adjustment screw, float, and float valve. That’s the drain plug at the very bottom of the picture.The first thing I like to do when rebuild any carb is to ensure all the mating surfaces are nice and flat, without any imperfections. This can usually be done by placing a piece of sanding paper on a flat surface and lightly running the surface of the carb body slowly across.You want a clean, even surface free of imperfections when you’re finished. At this point, we masked off what we didn’t want painted and shot the two assemblies in gloss black paint.The first thing we’re going to install is the GAV needle. The GAV, or gas adjusting valve, provides a manual adjustment from inside the car to provide additional gasoline to the cap jet, bypassing the metering effect of the compensator jet.Here, the GAV assembly has been installed, along with the GAV driver and choke arm.Next, the cap jet and gasket is installed.The main jet is next, installed from below. The drain plug and gasket should follow.The idle jet, comp jet and power jet are installed next. That power jet is part of the power jet circuit that works in conjunction with the power jet tube that we previously mentioned. The function of this circuit is to enrich the airflow in open throttle conditions, similar to an accelerator pump and is controlled by an air passage valve machined into the throttle shaft and upper body. With the lower body assembled, our attention is turned to the upper housing, notably the float, needle and seat assemblies.Float height should be adjusted by adding or removing gaskets from below the float valve. Never try to bend the tang of the float to adjust float height as damage can occur. Here, our float level is too high (closer than 1/2 inch to the parting line of the upper and lower castings).With an additional shim installed under the valve, the float will now force the needle into the seat when it’s 5/8-inch from the parting line, a good starting point for a well running carb.The upper and lower carb assemblies are now complete and ready to be mated and sealed tight with a new carb gasket.With the carb assembled, we set the air/fuel mixture screw to 1 1/2 turns out from tight as a baseline setting to get us up and running.Here’s the finished carb, complete with the necessary fuel line adapters from Renner’s Corner to connect directly to our stock fuel line.To fully appreciate the 26% increase in area the Model B carb affords over the stock Zenith A carb, we need to machine or port match the intake manifold so we’re not restricting any flow. This is easy work with a rounded tree burr on a pneumatic grinder, using the gasket as a template.Hooking up the throttle linkage, GAV and choke controls, and the fuel line wrap up the install. Now it’s just a matter of refining the carb’s settings and enjoying the newly found performance and reliability of the “modern” carburetor!
Related posts:
Installing an Overdrive T5 Transmission in a Model A Ford Installing an Overdrive T5 Transmission in a Model A Ford Five Forward Gears for a Model A By Ryan Manson * clampdowncomp@gmail.com A Model A Ford can be one of the simplest machines in which to work. That’s a good thing becuase if you own one, chances are there’s something...
How to Rebuild a Model A Two-Tooth Steering Box How to Rebuild a Model A Two-Tooth Steering Box Upgrade and Improve Your Model A’s Driveability By Ryan Manson * clampdowncomp@gmail.com When it comes to owning a 90 year old car, one thing is for certain: there’s always going to be something to work on! That has been the case...
Dashing Debonair Installing a 1952 Pontiac dash in a 1952 Ford F1 pickup truck Dashing Debonair By Ryan Manson * clampdowncomp@gmail.com It’s not uncommon in our hobby to see a car that has been customized to such an extent that it makes it quite hard for not only the newcomer but even...