Installing a 1952 Pontiac dash in a 1952 Ford F1 pickup truck
Dashing Debonair
By Ryan Manson * clampdowncomp@gmail.com
It’s not uncommon in our hobby to see a car that has been customized to such an extent that it makes it quite hard for not only the newcomer but even the seasoned hot rodding veteran to discern the model, year, or even the make of a hot rod or custom. This can be traced back to the earliest days of hot rodding when guys were swapping out items on their stock roadsters, coupes, or sedans in favor of more modern conveyances. This act of updating, as it were, continues today in the guise of dropping in the latest Detroit has to offer in drive train and suspension components as well as using original parts from the past to customize our rides to satisfy our desire to set our rides apart from the pack. While some upgrades, such as the aforementioned drive train and suspension components are due to our desire to make our hot rods a little more user friendly in a contemporary environment, some are made to make our cars even more retro as it were. Things like disc brakes, EFI systems, and overdrive transmissions arguably make sense, but when it comes to the aesthetic side of customization, sometimes looking to the past makes the most sense.
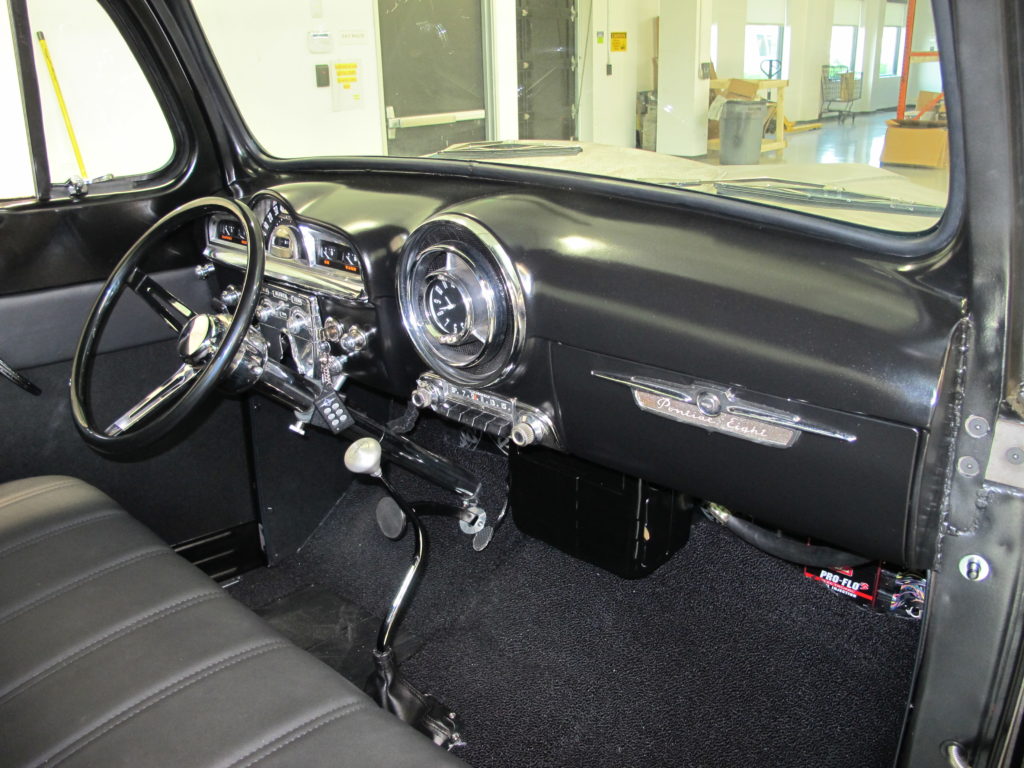
This has proven to be very true in the ’52 Ford F1 pickup that I’ve been building over the last year or so. If you’ve kept up with SRM lately, you might recall the Hemi build up I did as well as the T5 transmission story we ran a few months prior. That’s the traditional drive train that will inevitably power the hauler, but complementing the old parts are a few modern additions in the form of a new Currie nine-inch rearend with disc brakes and the Total Cost Involved Mustang II IFS installed up front. The goal is to have a truck that will appeal to the traditional aesthetic that I love and will perform in contemporary, real world application.
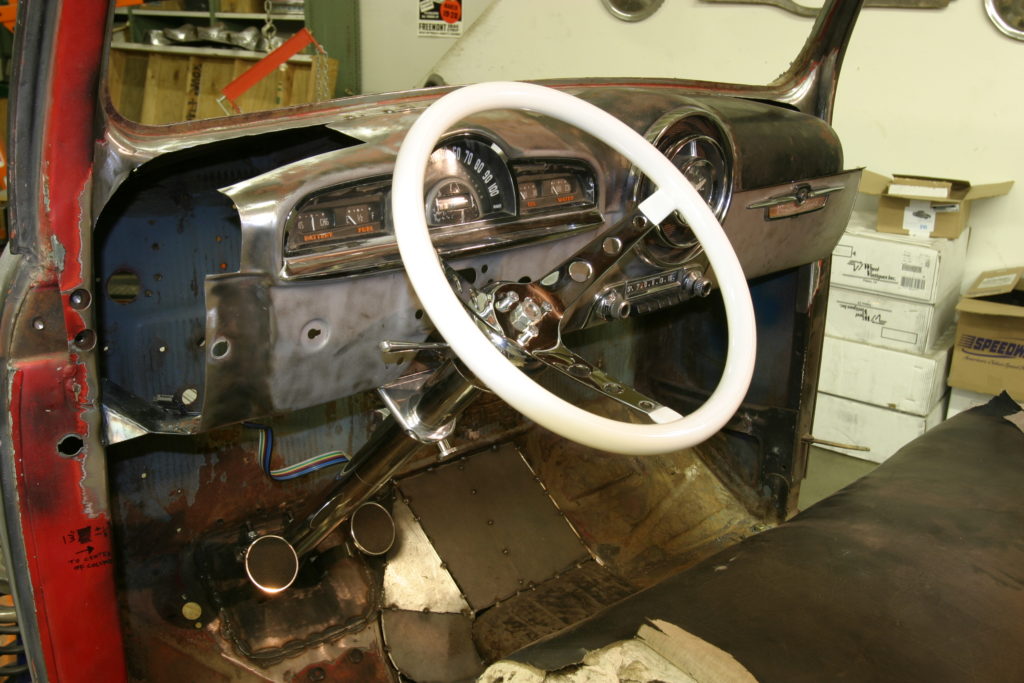
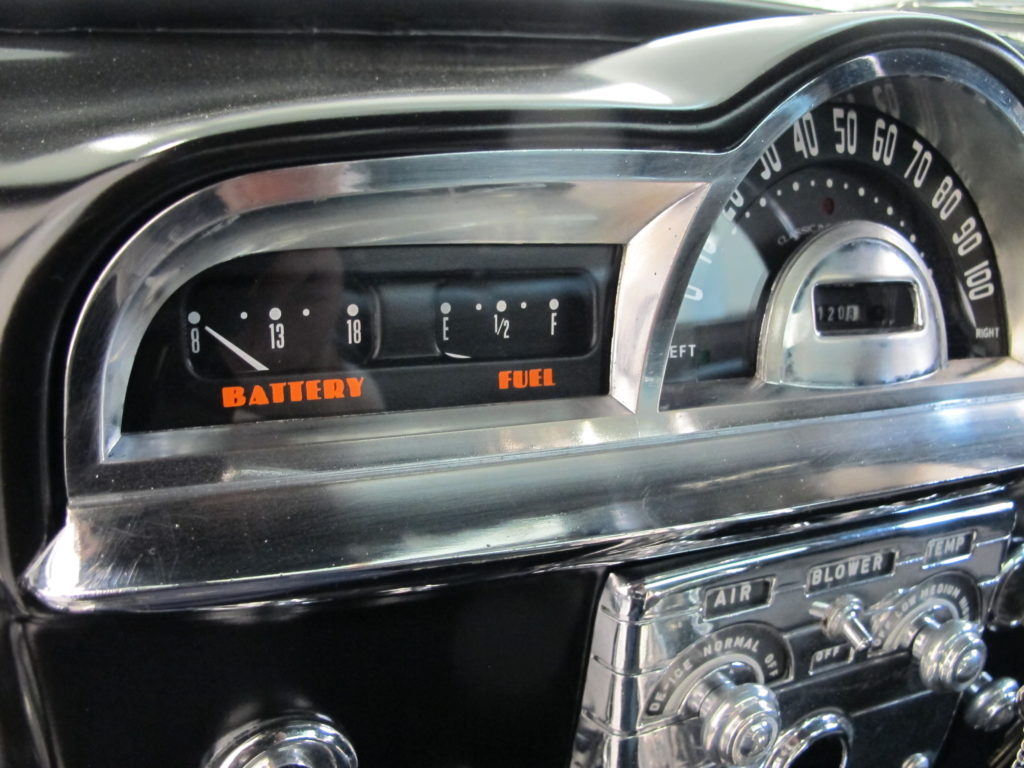
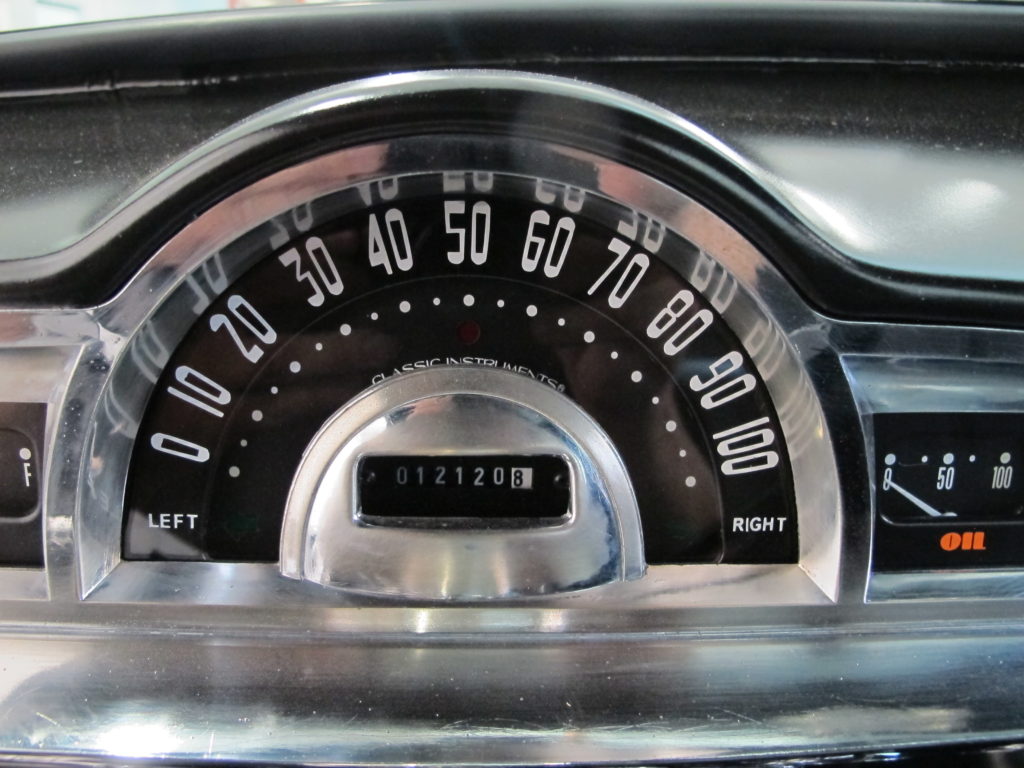
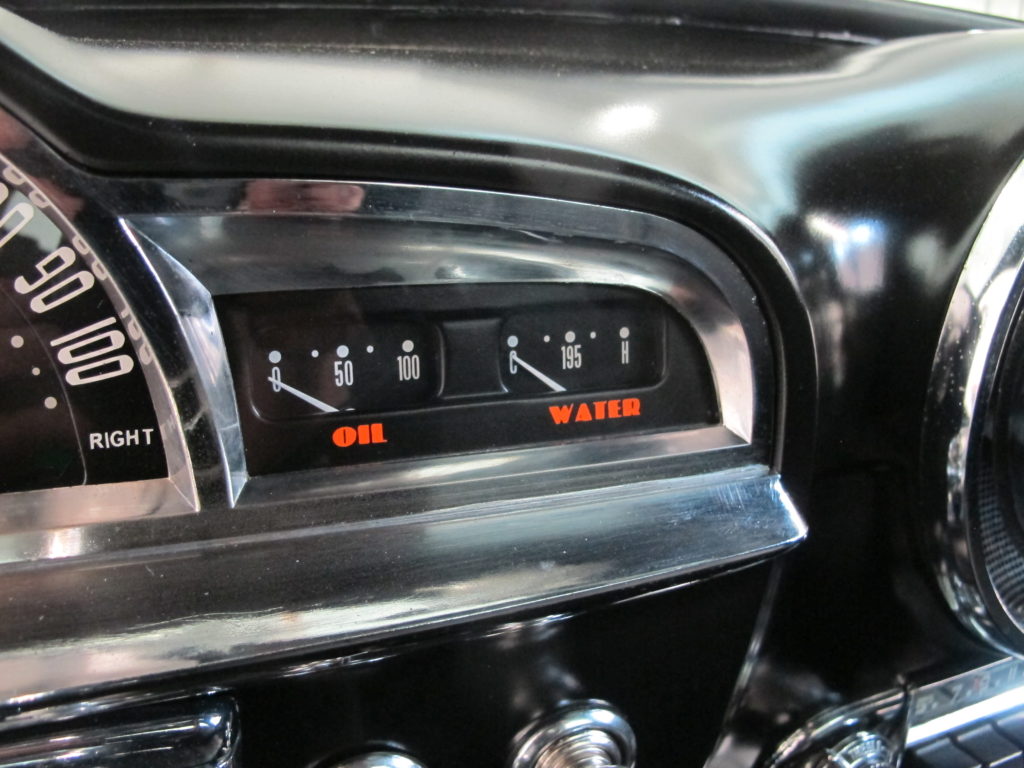
With that traditional aesthetic in mind, I was recently looking over the cockpit confines of the stock F1 and realized that the dash was lacking that ‘50s flair that I wanted. Consisting of two 4 ½-inch round gauges and a minimal amount of chrome trim, it just didn’t have that ‘50s custom look. With that said, I started scouring the swap meets and the internet in search of something a bit classier to slide into its place. What I found was a dash out of a ’52 Pontiac passenger car that incorporated not only a liberal amount of chrome, but had a gauge cluster that would allow Classic Instruments to restore it complete with volt meter, fuel gauge, speedo, oil pressure, and water temperature gauges all incorporated in the same cluster. The price was right and the specs were met and soon I found myself trying to fit the wide dash into the narrow confines of the pickup cab.
Fitting a dash from a larger passenger car into a pickup or a roadster is not without its share of headaches, but with a little patience and perseverance, any dash can be trimmed and shoehorned to fit just about anything. One thing to be careful of is trimming too much of the original dash and surrounding area before the new dash can be mocked up into place. This can result in more work than necessary and will compound any problems that may arise. But by going slow, measuring twice and cutting once, it’s easy to fit any dash into your ride, instantly transforming a stock hauler to a custom, all in a day’s work. CC
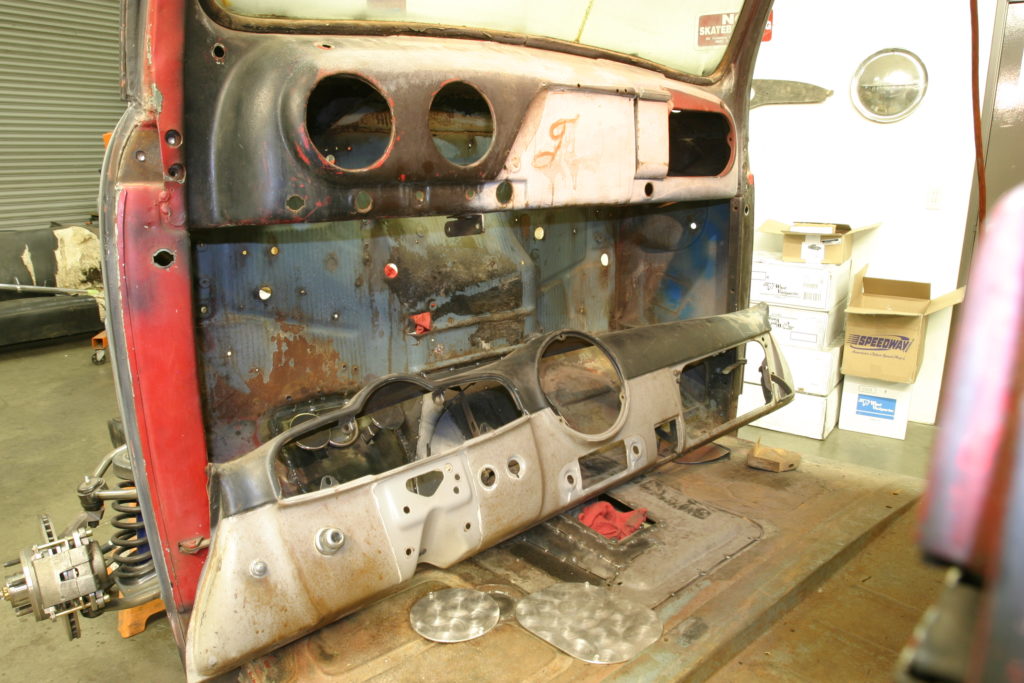
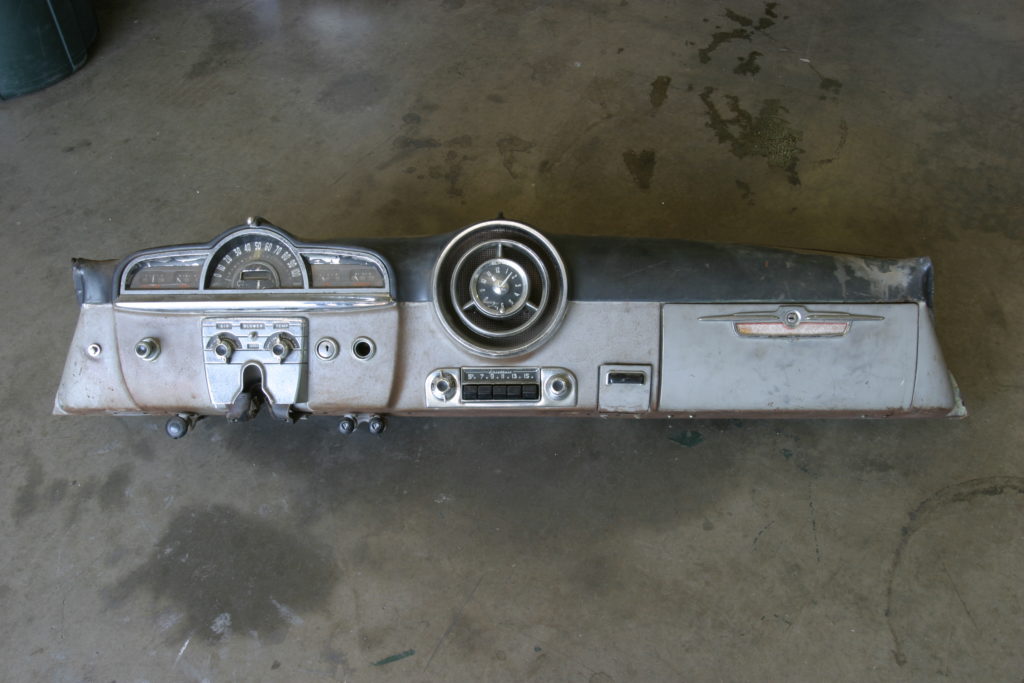
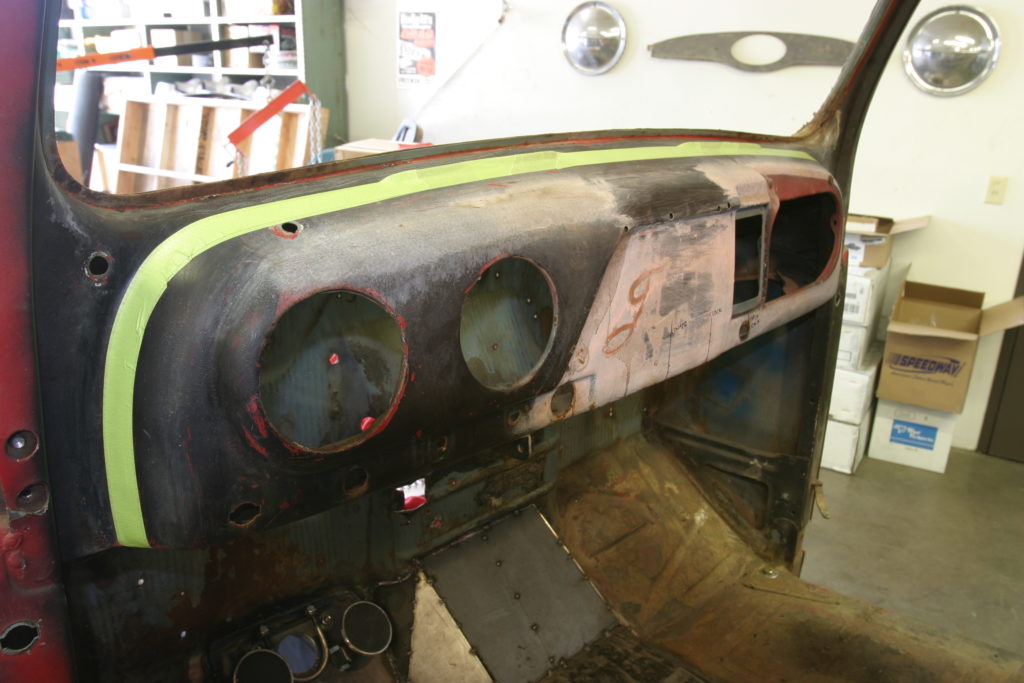
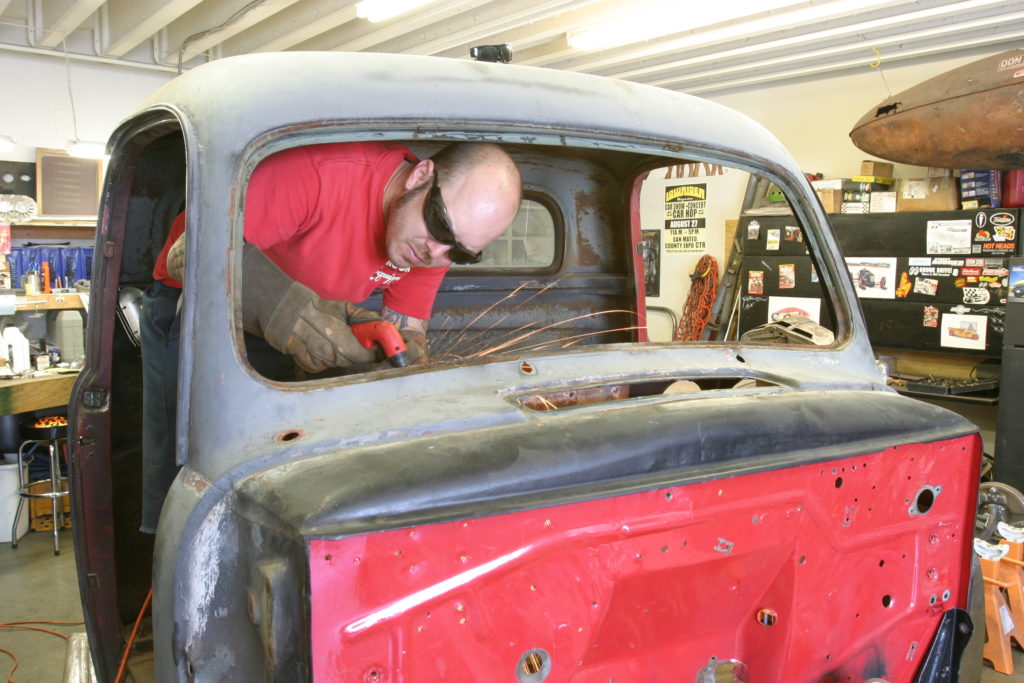
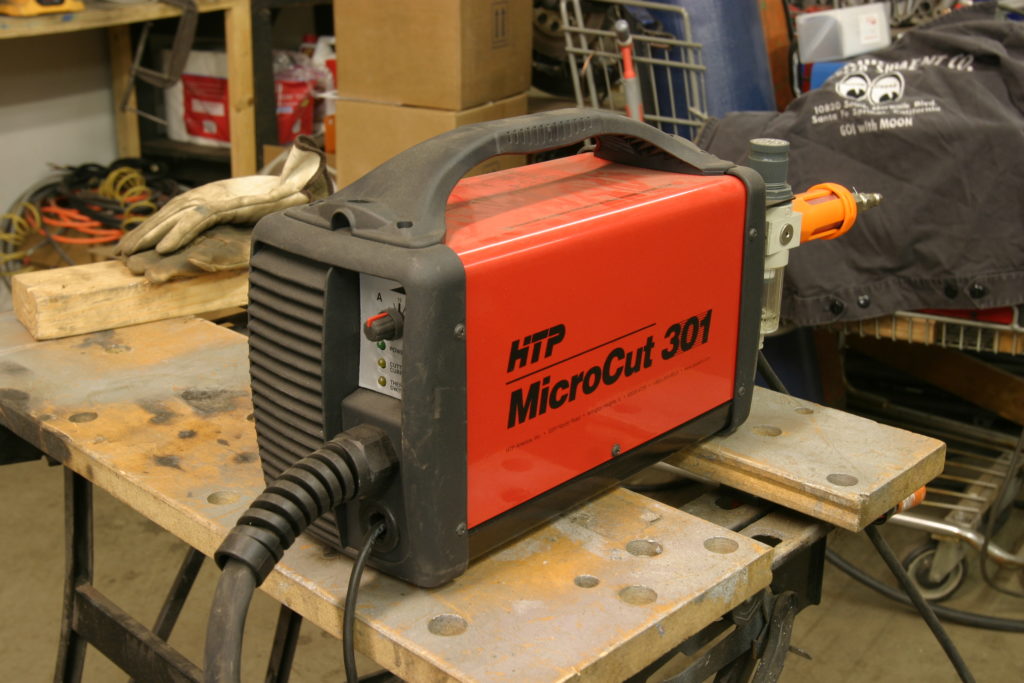
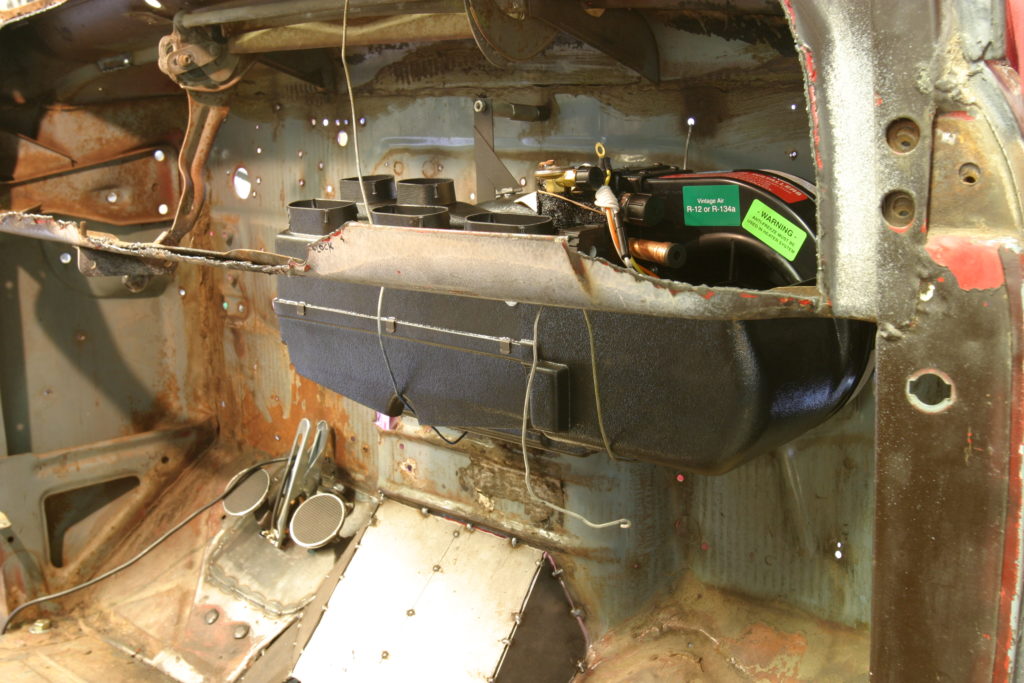
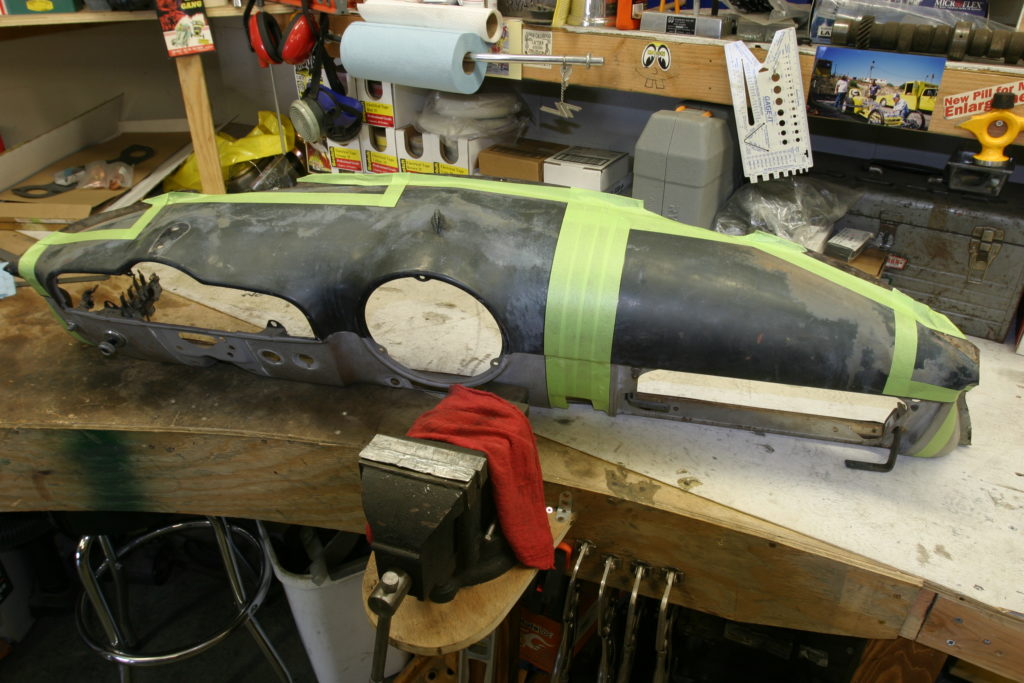
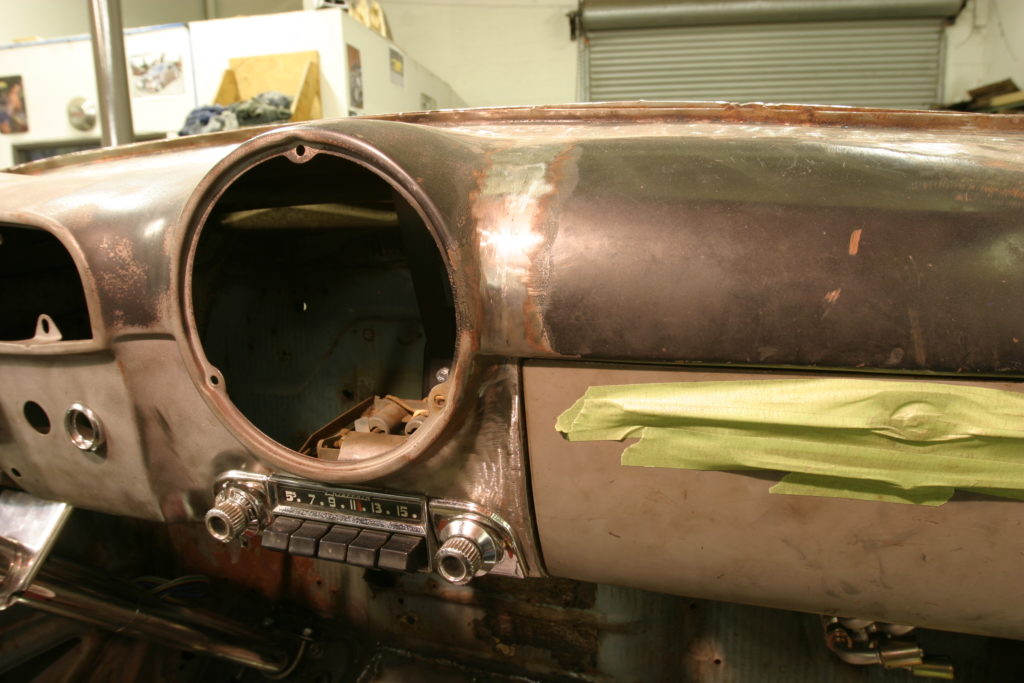
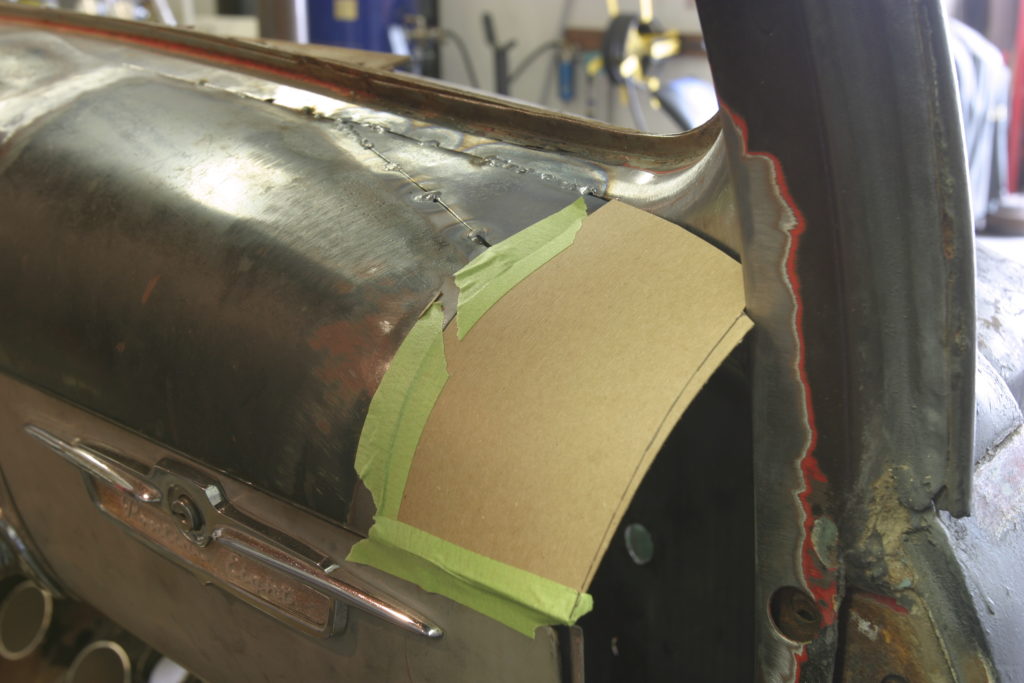
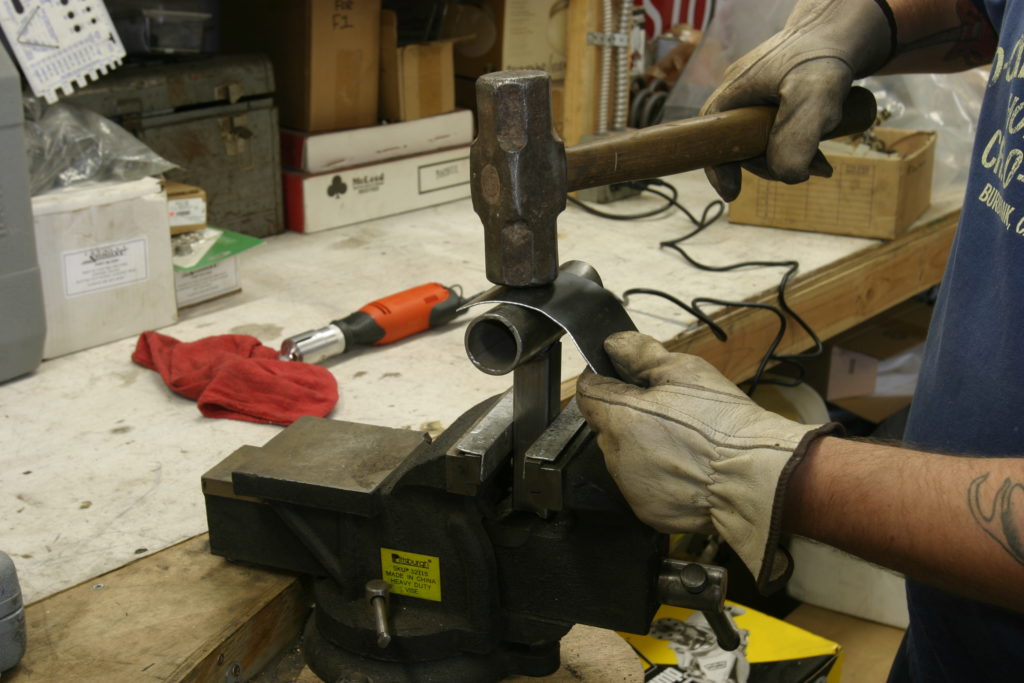
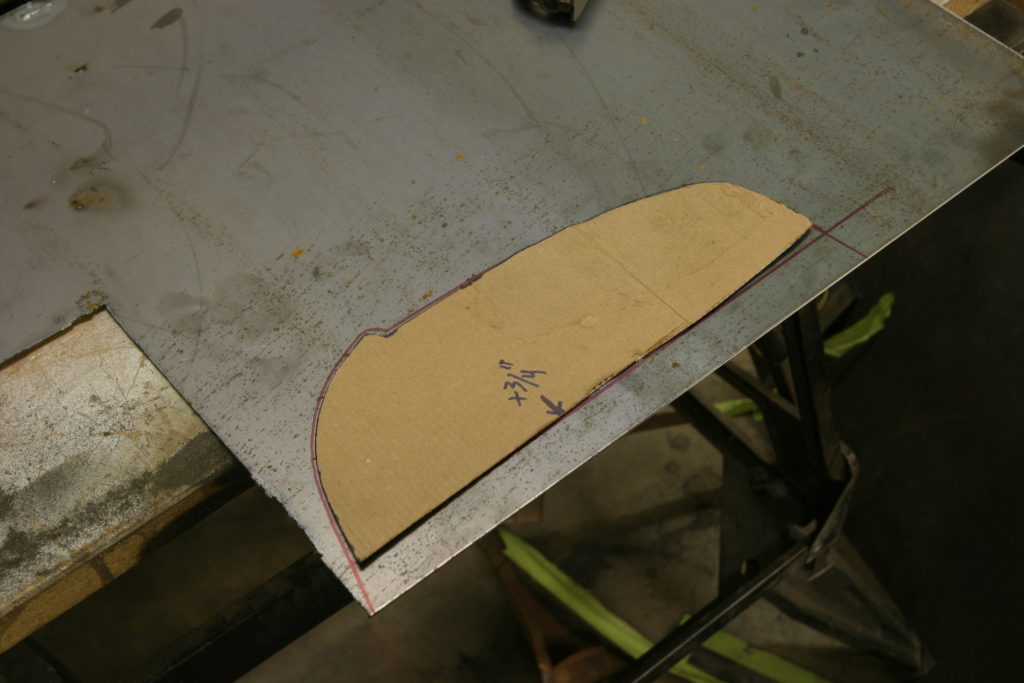
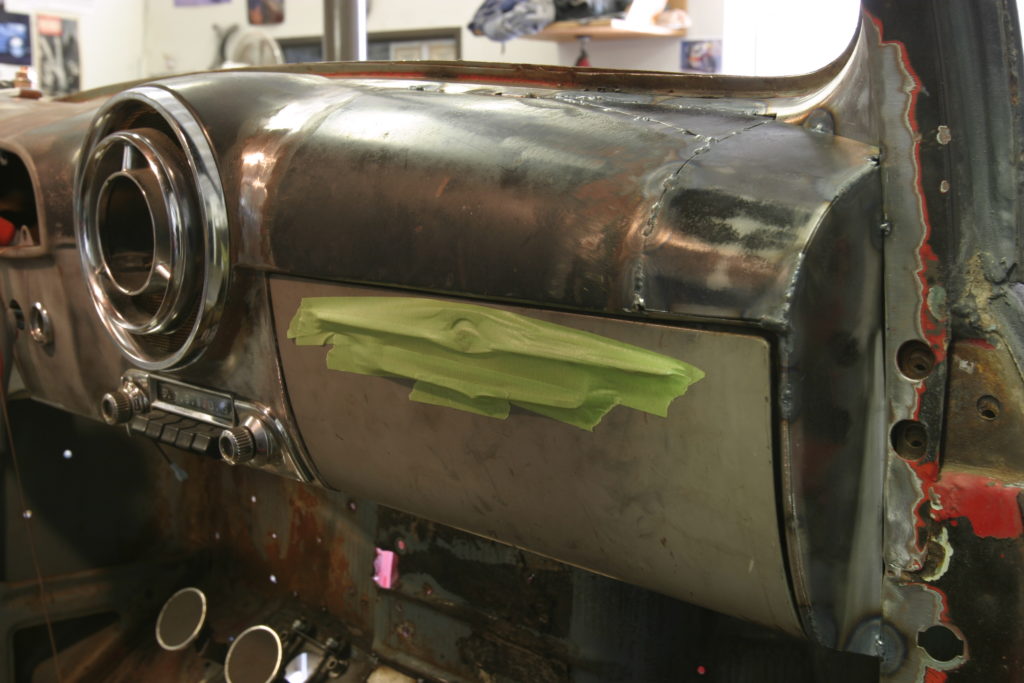
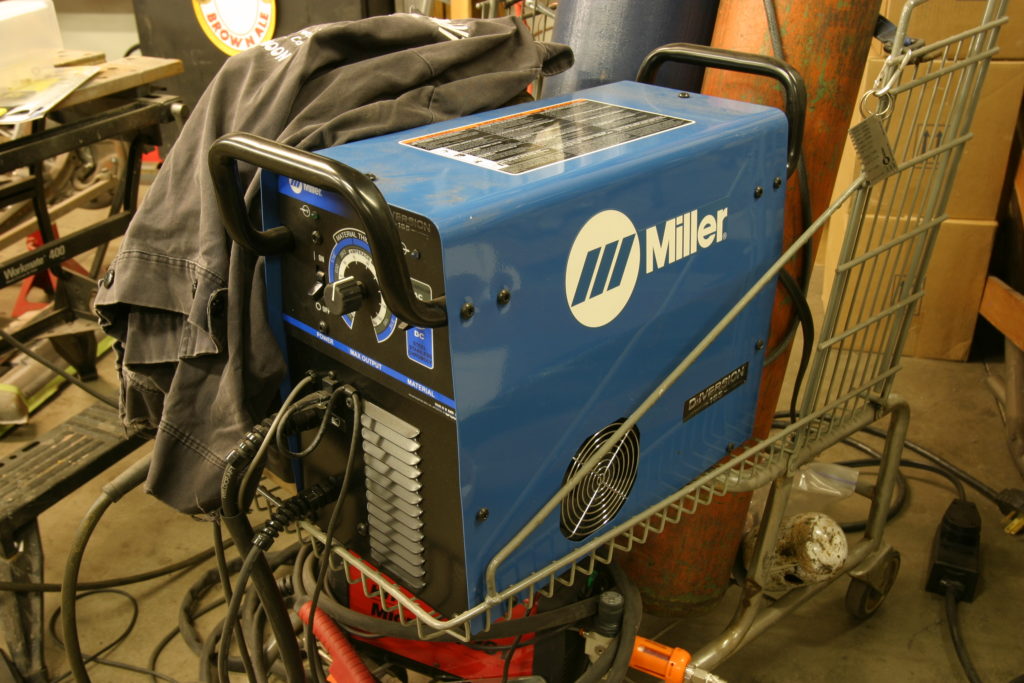
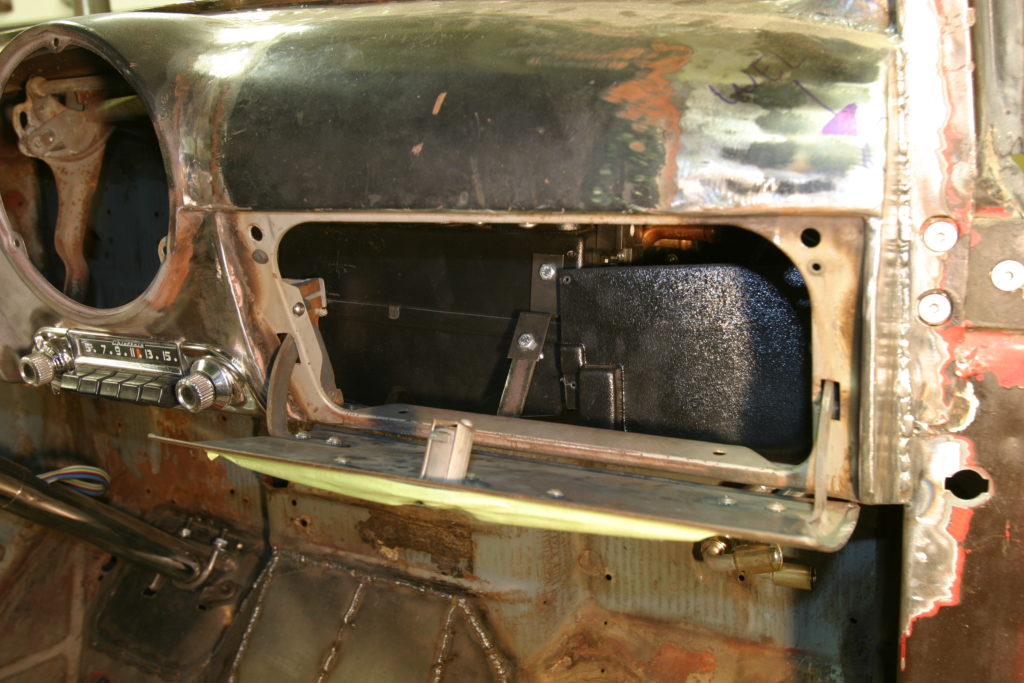
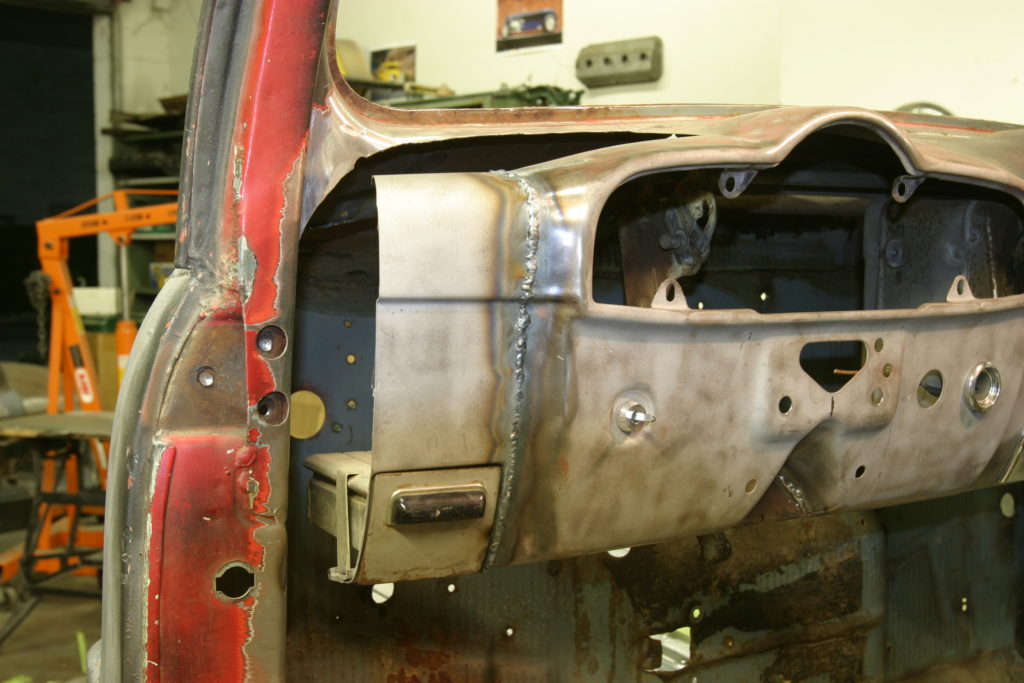
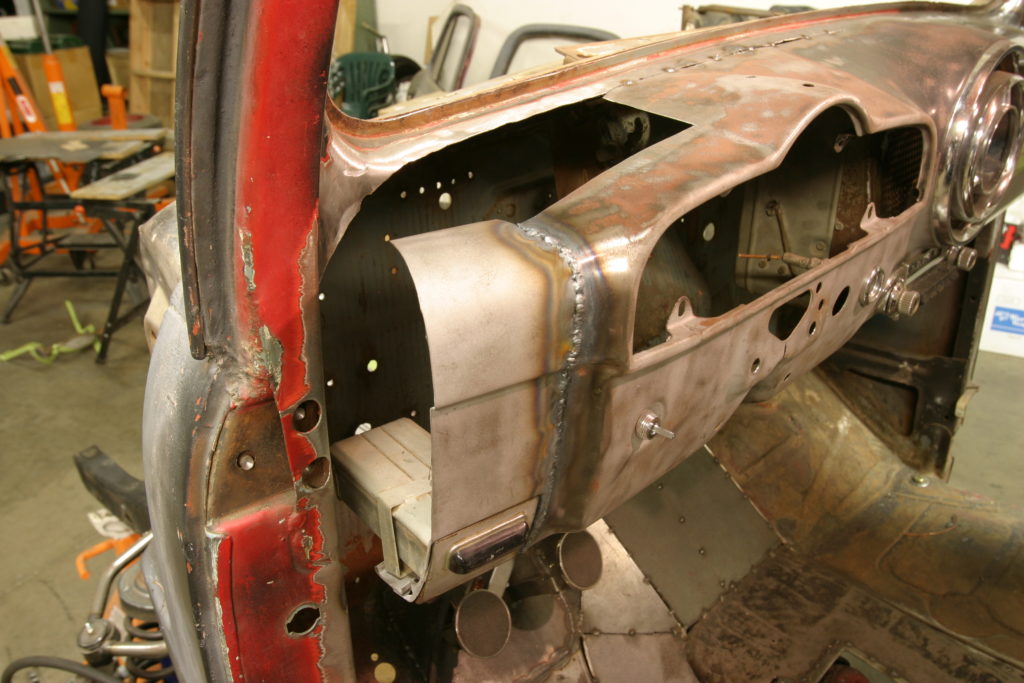
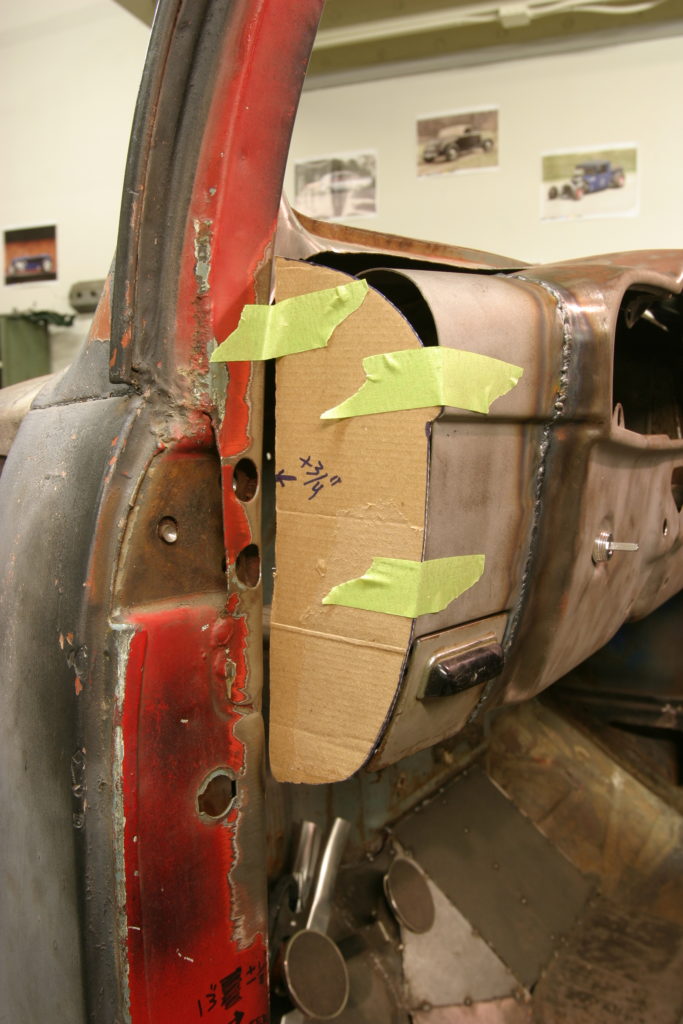
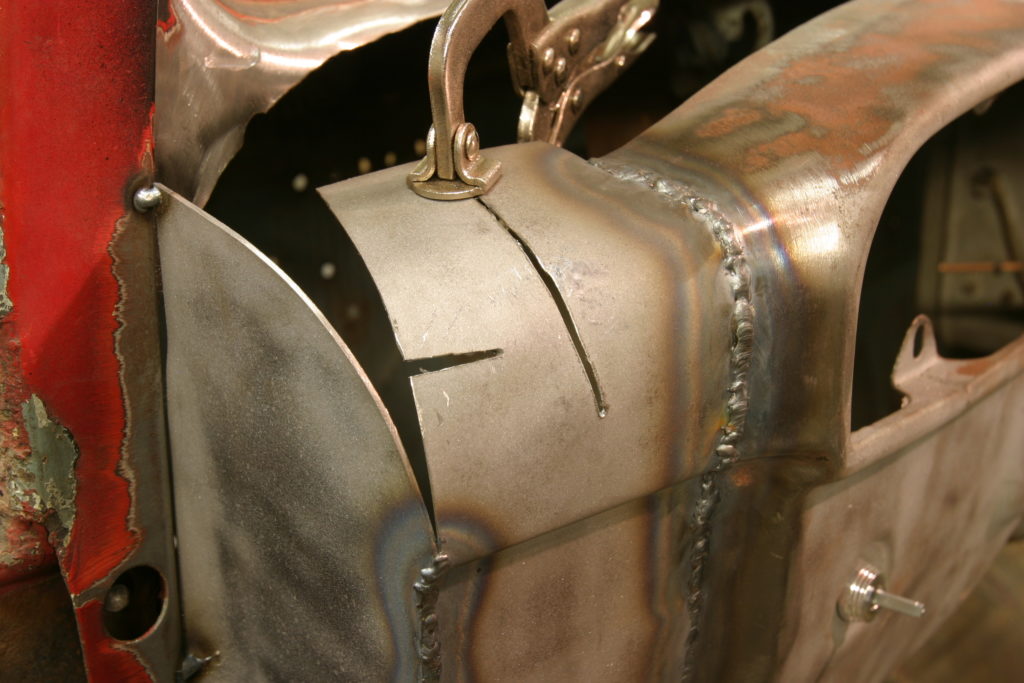
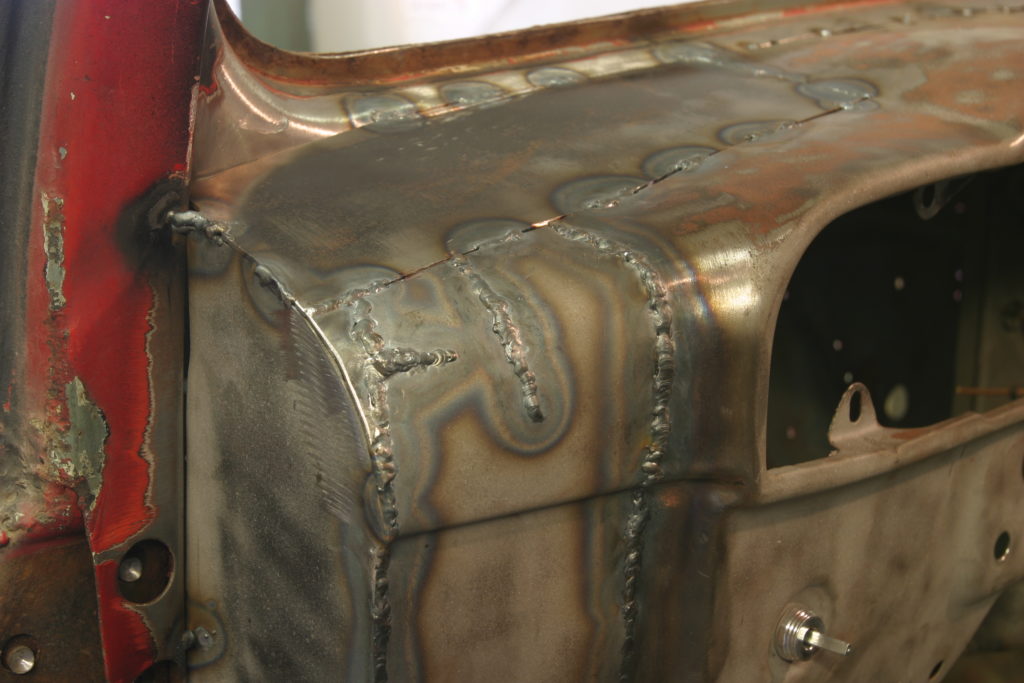
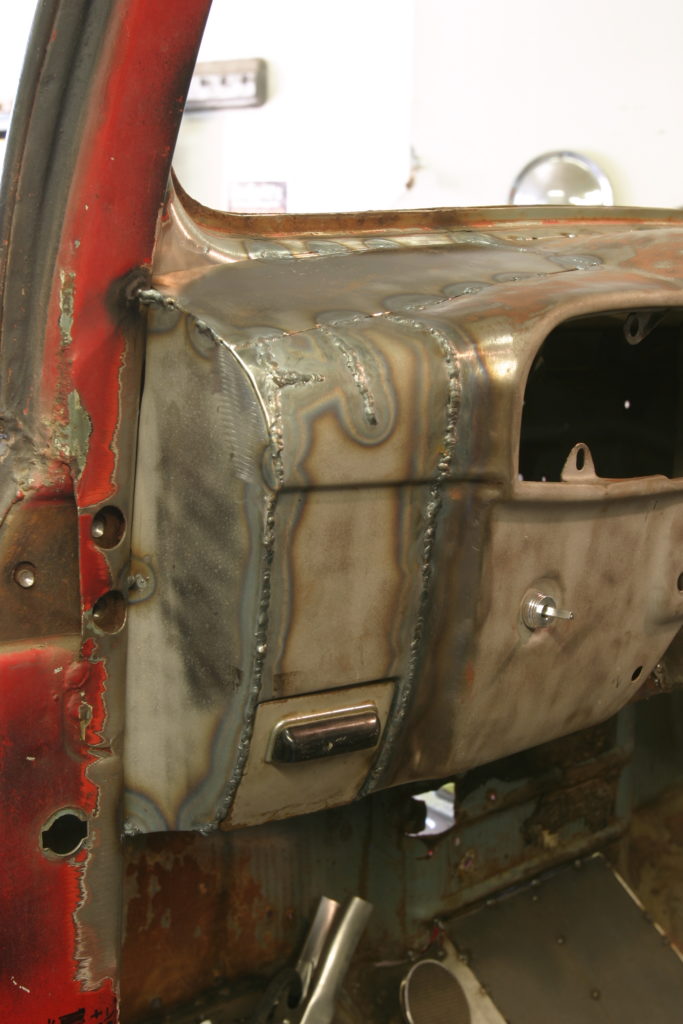
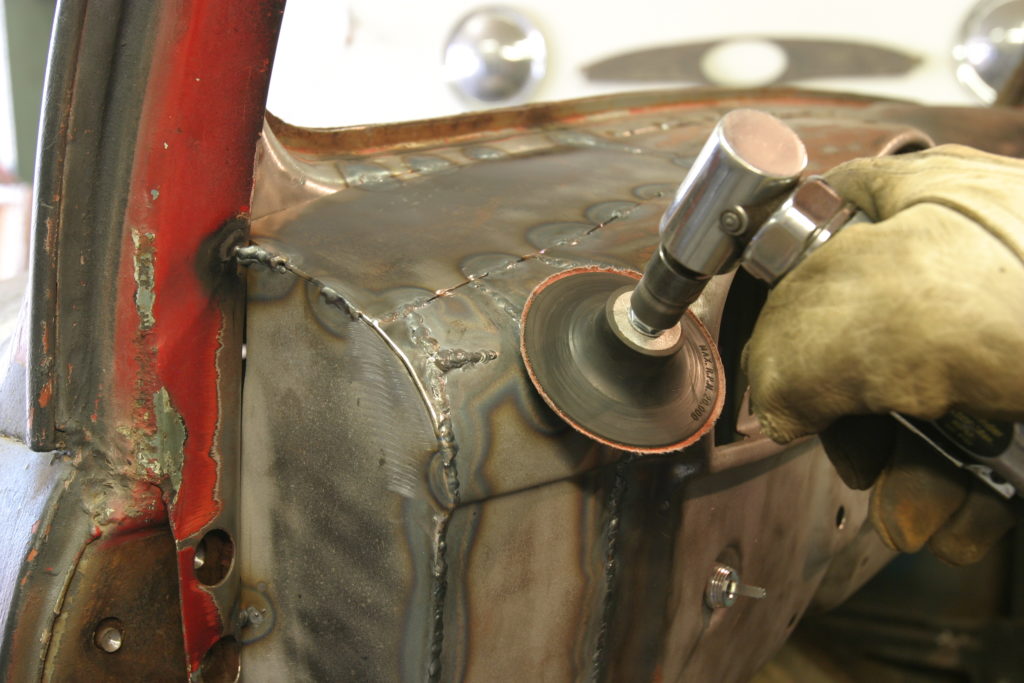
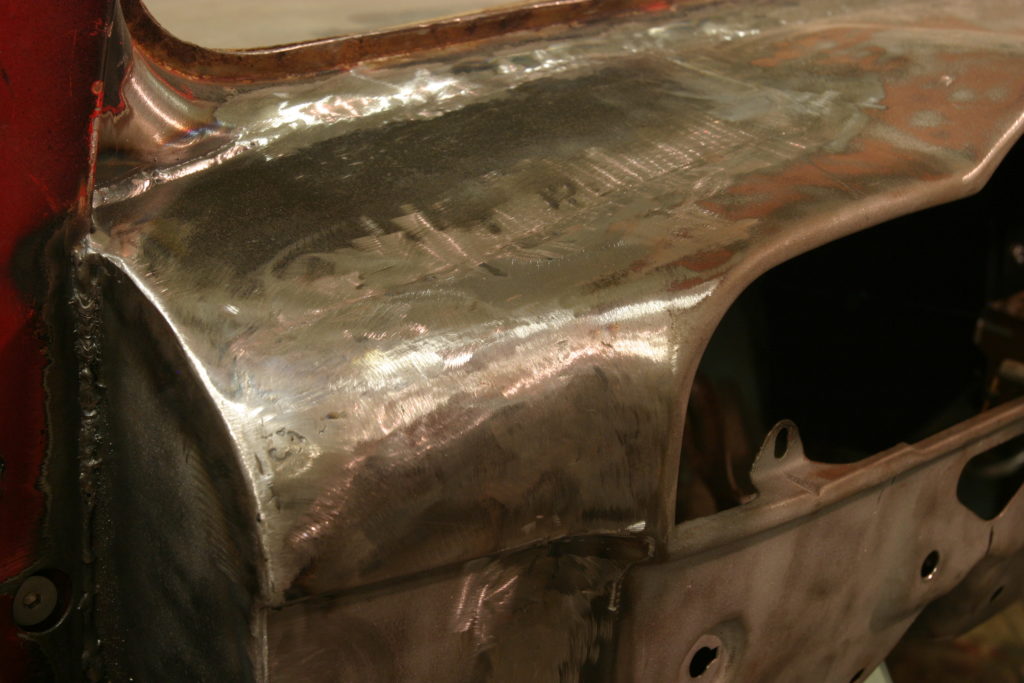
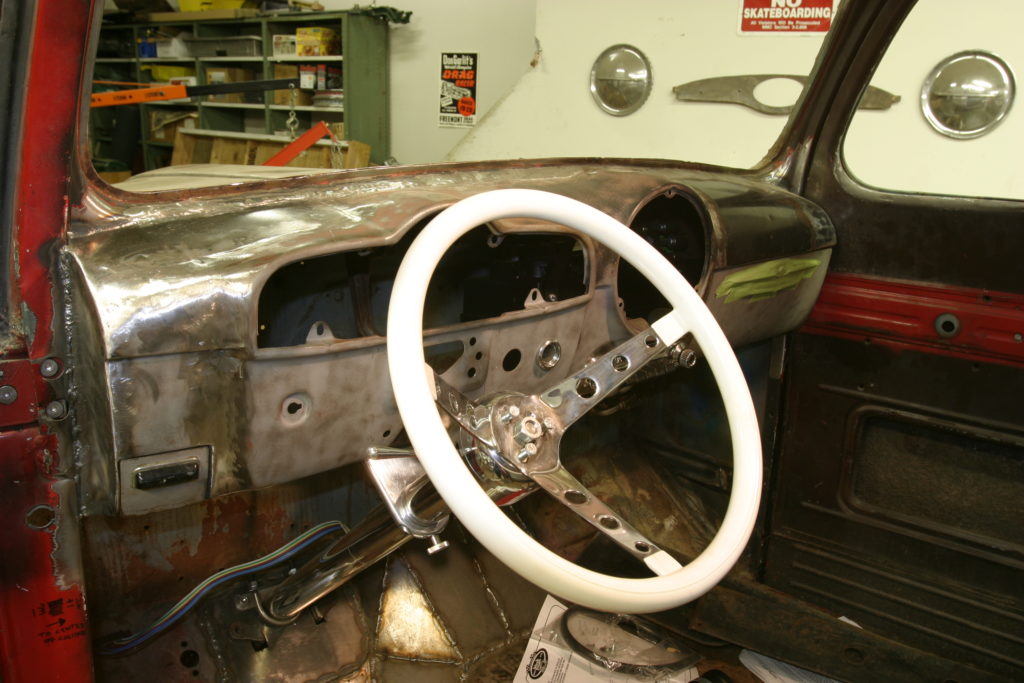
Here’s the ’52 Pontiac dash fresh from the Pomona swap meet with all the stock bits still intact. The first step is to gut the dash and send out the gauge cluster and clock to Classic Instruments where they’ll be giving it a complete restoration.With the Pontiac dash being dismantled, our attention is turned to the F1 cab where we’ve marked the area to be cut out with masking tape.Cutting out the stock dash is made easy using an HTP MicroCut 301 plasma cutter.The stock dash is removed, except for the support brace that runs along the bottom of the dash. It seemed like it a good idea to leave that intact for the time being in case we wanted to tie in the new dash to the support to ensure everything stays nice and stiff.While there’s room to work, we mocked up the Vintage Air GEN-II Compac evaporator unit and checked to see if there was going to be any interference. The ’52 Pontiac that donated the dash is a bit wider than the pickup cab and with the dash mocked in place, it was obvious some trimming would be in order.A few measurements told us that the lower corners of the Poncho dash would need to get the axe, as well as the upper corner areas. A 3-inch strip where the ash tray resides would give us the proper width to fit the F1 cab. The taped off areas show where the trimming will be made. Once the dash was cut apart, it was time to narrow it those 3-inches mentioned before. A file and a straight edge gets the gap as straight as possible before the two halves are welded back together, albeit 3-inches narrower. Compare the relation between the radio bezel and the glove box in this photo to that of the original dash and you get an idea of just how much was taken out to get the dash to fit.With the dash narrowed, we can now mock it into place and begin fitting it into position. This gave us a better idea of how the new dash would fit into place and allowed us to trim the stock dash area further.The next step was to begin attaching the dash to the cowl of the F1. It was first tacked along the top before the lower bracing structure was tied into the a-pillars. Once in place, we threw the dash back together and slid the seat in to see how everything was going to look from the driver’s perspective. Now’s the time to find out if anything’s crooked or tilted too far one way or another. Everything checked out so on we went…The passenger side of the dash looked the simplest so we started there by making a cardboard template of the area between the dash and a-pillar that needed to be filled.The template was then transferred to a piece of 18-gauge sheet metal and formed on a homemade die.For the end cap, the same process was used.The pieces were then tacked in place before being welded and ground smooth. By fabricating an end cap that runs the height of the new dash, this gives it a nice solid attachment point to the a-pillar and preserves a “factory” look.For our welding enjoyment, we’re using the latest and greatest from Miller, a Diversion 165 TIG machine. A peak through the glove box door reveals the Vintage Air evaporator unit we mocked up earlier. We wanted to maintain an original, ‘50s era aesthetic to the interior so the Vintage Air evaporator unit was mounted nice and high in the dash, sacrificing the glove box in the process. On the driver’s side, you can see that there’s a bit more empty space to fill than there was on the passenger’s side.As luck would have it however, the strip we took out of the dash when it was narrowed was just right to fill the void and allowed us to maintain the ashtray, giving us a small storage space for fuses, spare change, or candy (Brennan).To match the opposite side, the same end cap pattern was used for the driver’s side.With the end cap tacked into place, a few relief cuts were made to form the compound curve necessary to meet the end cap. Those relief cuts were then welded up and a bit of hammer and dolly work was used to get the corner just right. A final patch panel was then made and tacked into place to finish up the area.Here’s a good shot of the corner and where the welds (albeit a bit shoddy!) were made.To grind the welds, we used a die grinder with a cut off wheel to get them fairly flat (a little secret shared by our buddy Cal Tanaka)… …before sanding them nice and smooth with a 120-grit sanding disc. The corner turned out pretty nice and with a bit of body filler, will look great. Here’s the bare dash welded up and eagerly awaiting the return of the gauges from Classic Instruments. Not a bad upgrade from the relatively utilitarian, stock F1 dash to a flashier ‘50s Pontiac number. Bodyworked, painted and with the new Classic Instruments gauges installed, the beauty of our dash conversion can be appreciated in full!
Related posts:
Replacing an Under Decklid Panel on a 1940 Ford coupe Replacing an Under Decklid Panel on a 1940 Ford Coupe Battered, Bruised, and Broken By Ryan Manson * clampdowncomp@gmail.com One of the most common troublesome areas on a 1935-40 Ford coupe has got to be the panel under the decklid. Whether damaged from collision, rot, or rust, this panel seems...
How to Rebuild a 1932 Ford Model B Zenith Carburetor for a Model A 4-Banger How to Rebuild a 1932 Ford Model B Zenith Carburetor for a Model A 4-Banger Motor Big Improvements for the Little Banger By Ryan Manson * clampdowncomp@gmail.com When Ford introduced the Model A in late 1927, it was remarkably different from other automobiles offered at the time, even Ford’s own...
How to Rebuild a Model A Two-Tooth Steering Box How to Rebuild a Model A Two-Tooth Steering Box Upgrade and Improve Your Model A’s Driveability By Ryan Manson * clampdowncomp@gmail.com When it comes to owning a 90 year old car, one thing is for certain: there’s always going to be something to work on! That has been the case...
Installing an Overdrive T5 Transmission in a Model A Ford Installing an Overdrive T5 Transmission in a Model A Ford Five Forward Gears for a Model A By Ryan Manson * clampdowncomp@gmail.com A Model A Ford can be one of the simplest machines in which to work. That’s a good thing becuase if you own one, chances are there’s something...