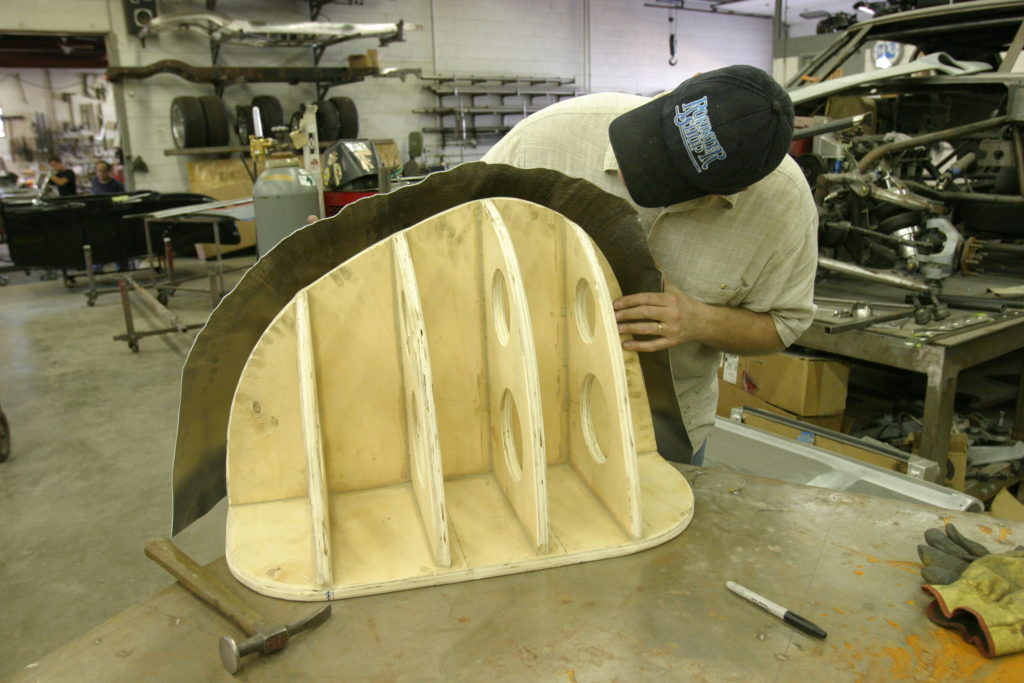
The track nose for the Project Potvin roadster is starting to take shape
By Ryan Manson * clampdowncomp@gmail.com
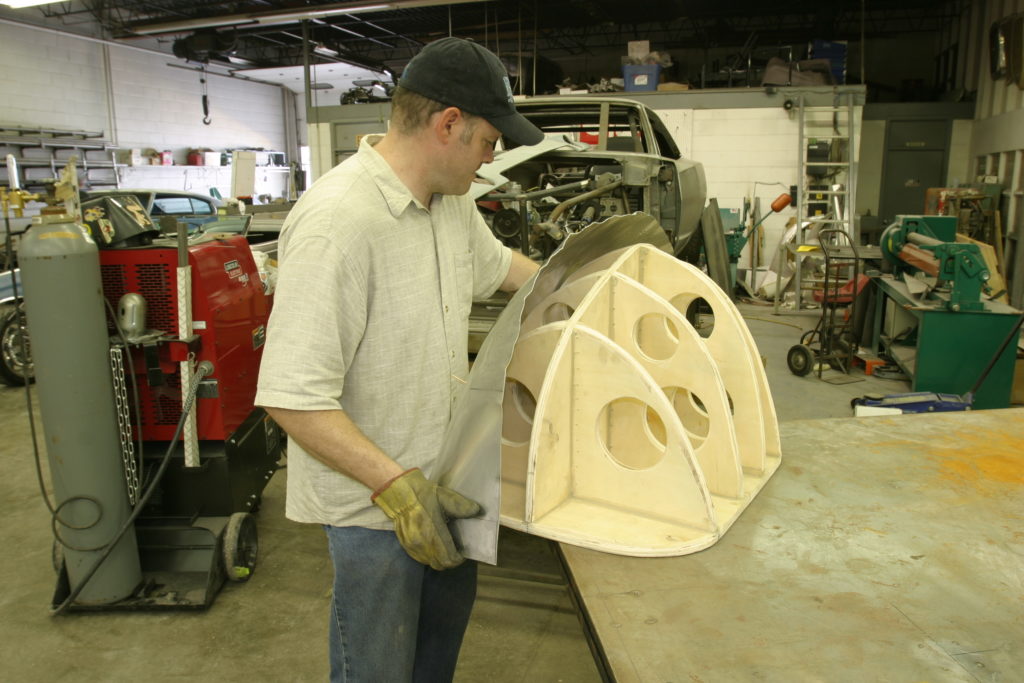
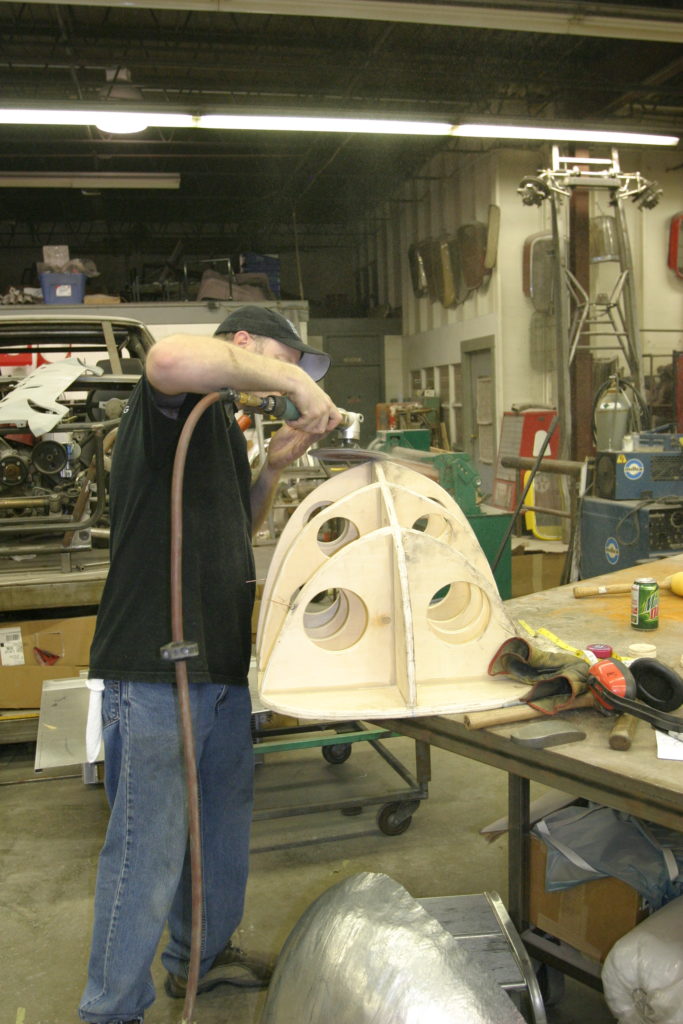
Our last story laid the foundation for the front end of the Project Potvin Roadster in the form of building a buck in which to shape the track nose over. The buck turned out great and after a little bit of tweaking and fine tuning, it was shipped to Elgin, Illinois where Sam Waltermire at the Roadster Shop will be handling the aluminum work on the track nose. We met up with the boys at the Roadster Shop and followed along as Sam started to bang out the aluminum nose.
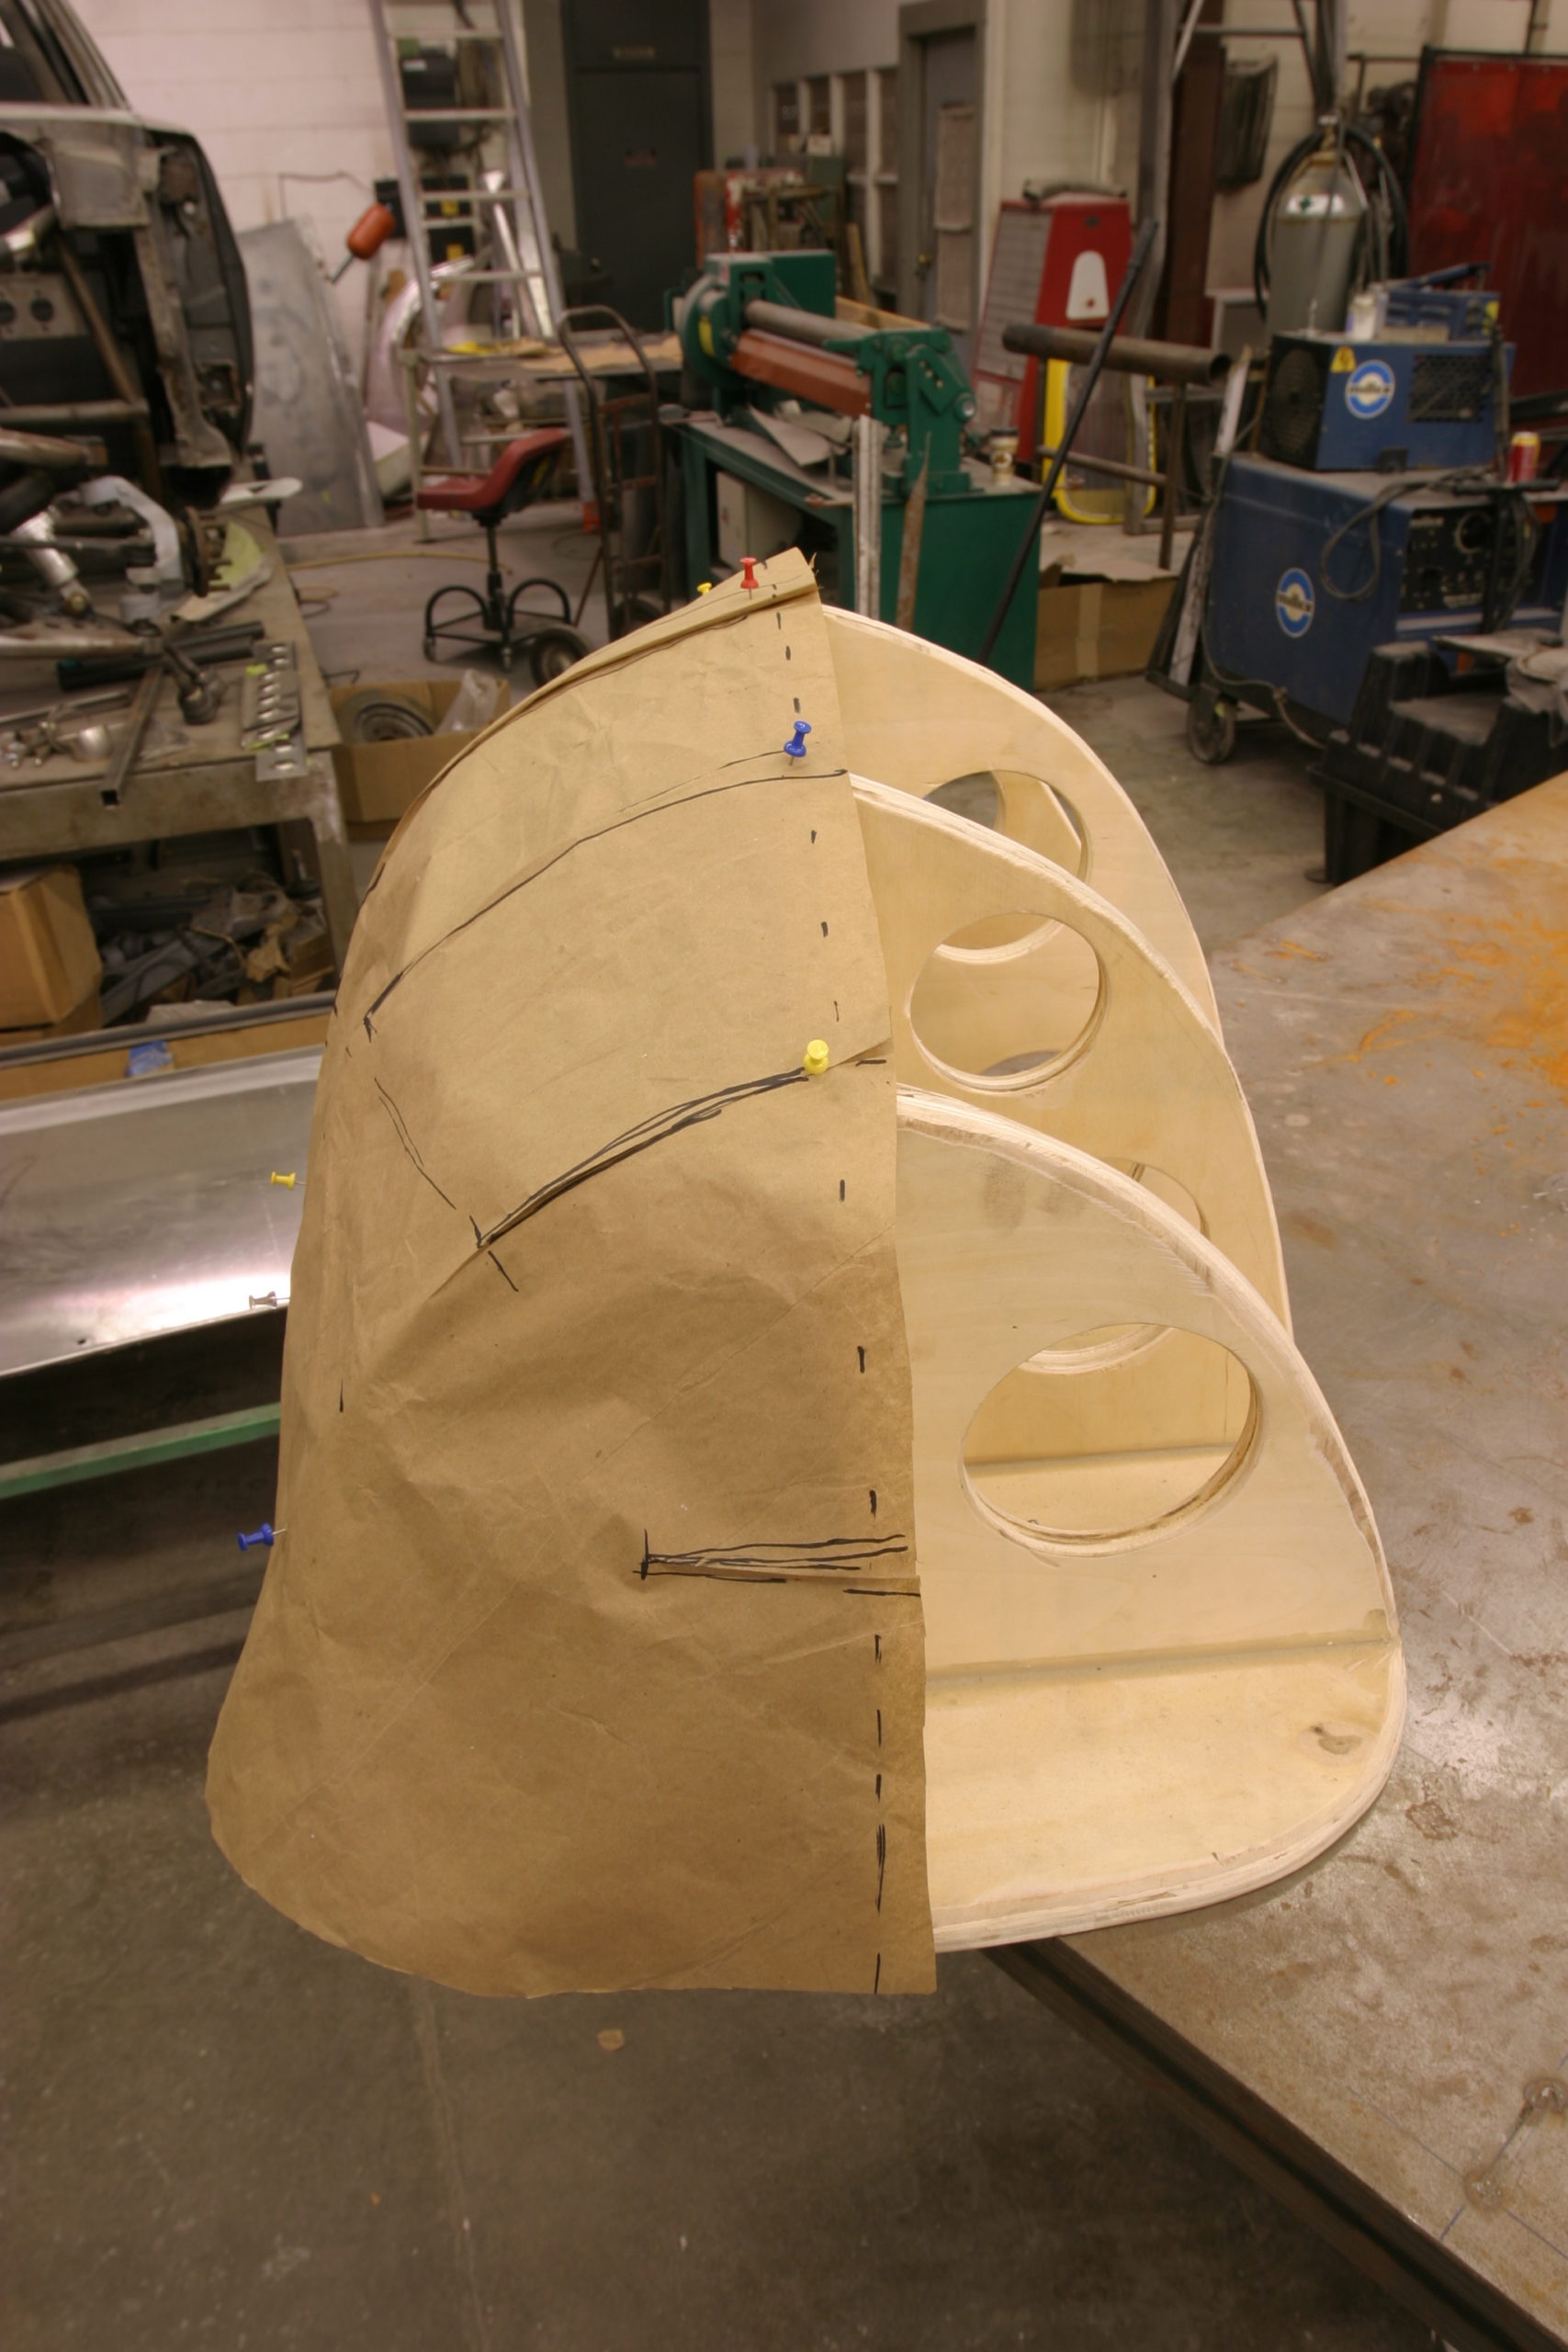
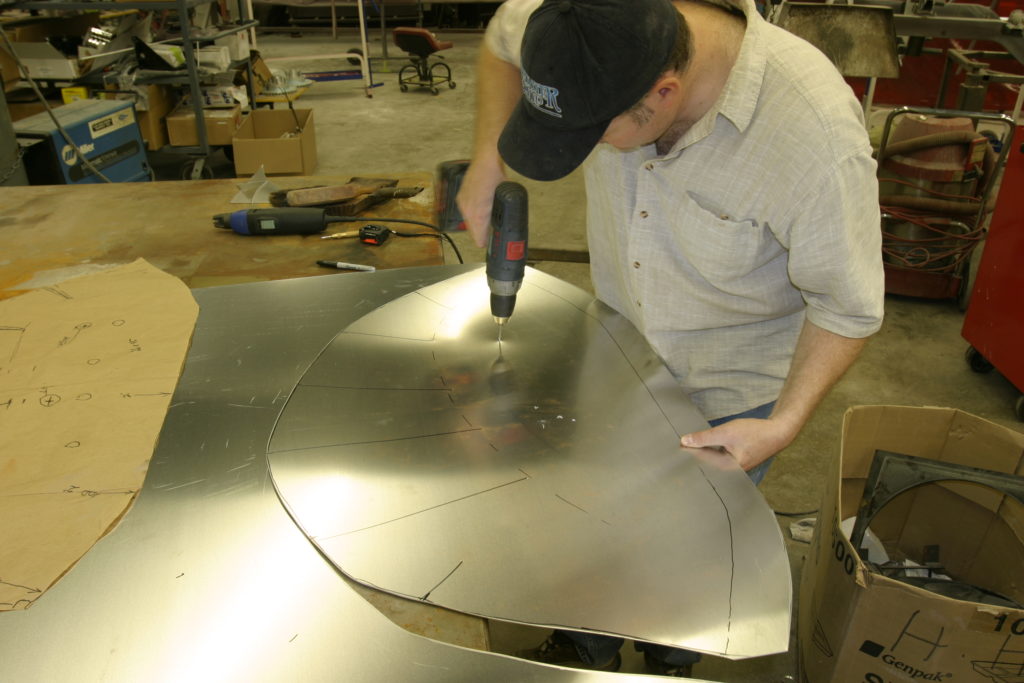
The first step in transforming the wooden buck into an actual aluminum piece, was to make a pattern. Using various points on the buck as reference, a pattern was made and transferred to a sheet of aluminum. These reference points will tell Sam a number of things. Two points will correspond with two pins located on the buck. These will serve to locate the work piece as it’s being shaped in relation to the buck. A set of lines running perpendicular to the work piece mark the location where the pattern was folded to conform to the shape of the buck. These lines will communicate to Sam the location and approximate amount of shrinking needed on the work piece. These few lines will get the shape started and “rough form” the work piece to the shape of the buck.
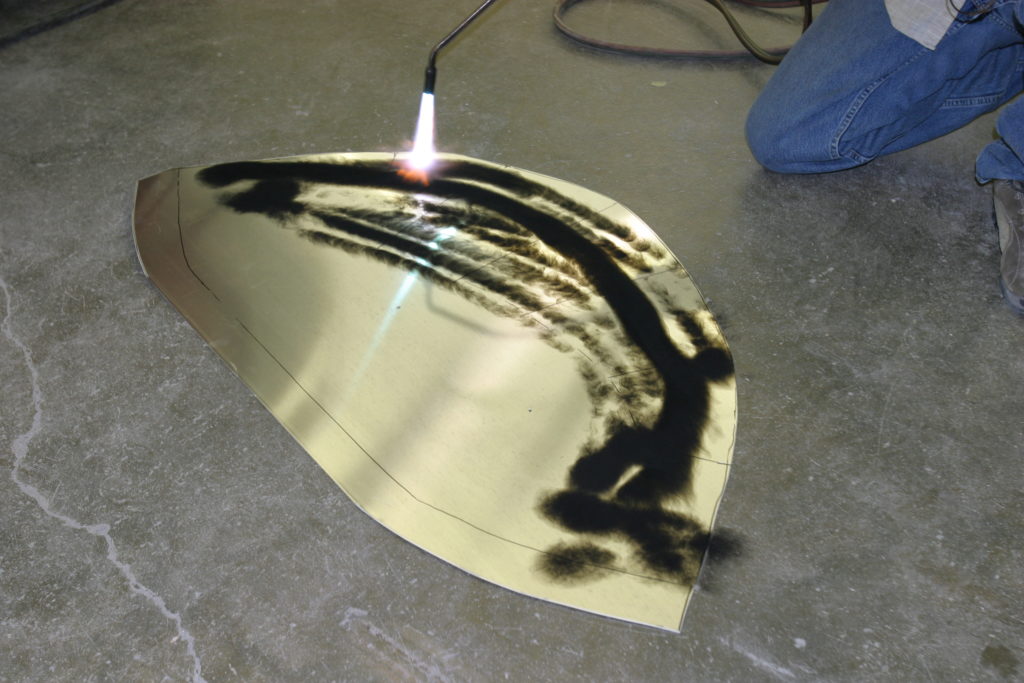
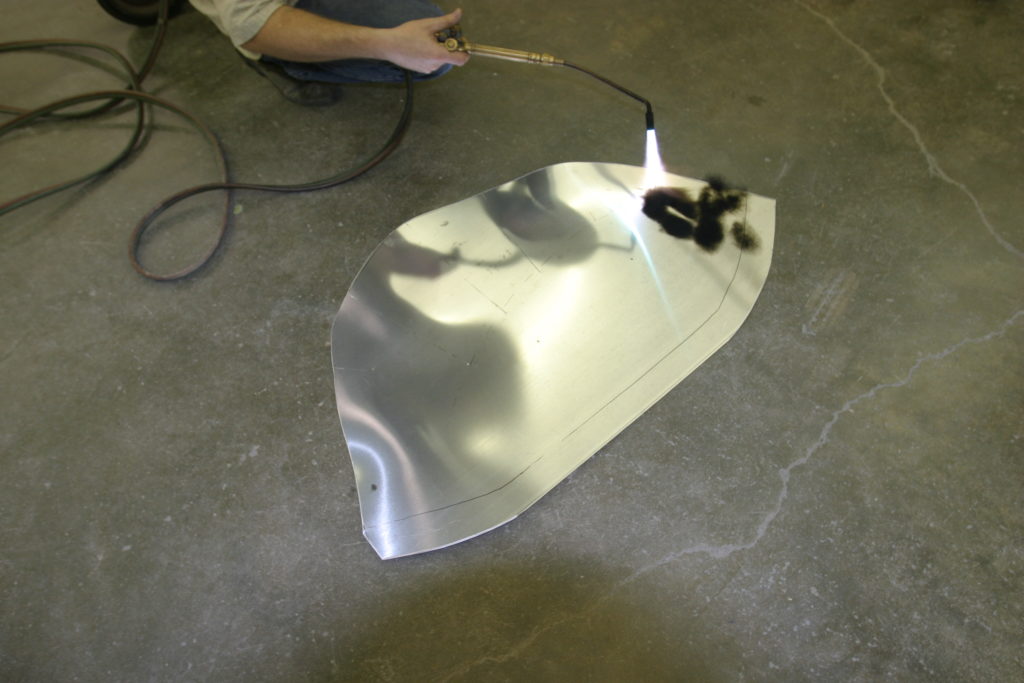
Before any forming is done to the aluminum, Sam anneals it to make it easier to work with. Common aluminum is annealed by heating it to its critical temperature, which is near 800-degrees Fahrenheit. The easiest way to anneal aluminum in the garage is to use an oxy-acetylene torch. A pure acetylene flame is applied to the surface, coating it with a light layer of soot. Once the entire work surface is covered, a neutral flame is used to burn the soot off. You can also buy temperature-indicating crayons at welding supply stores to more closely monitor the temperature of the metal as it is heated.
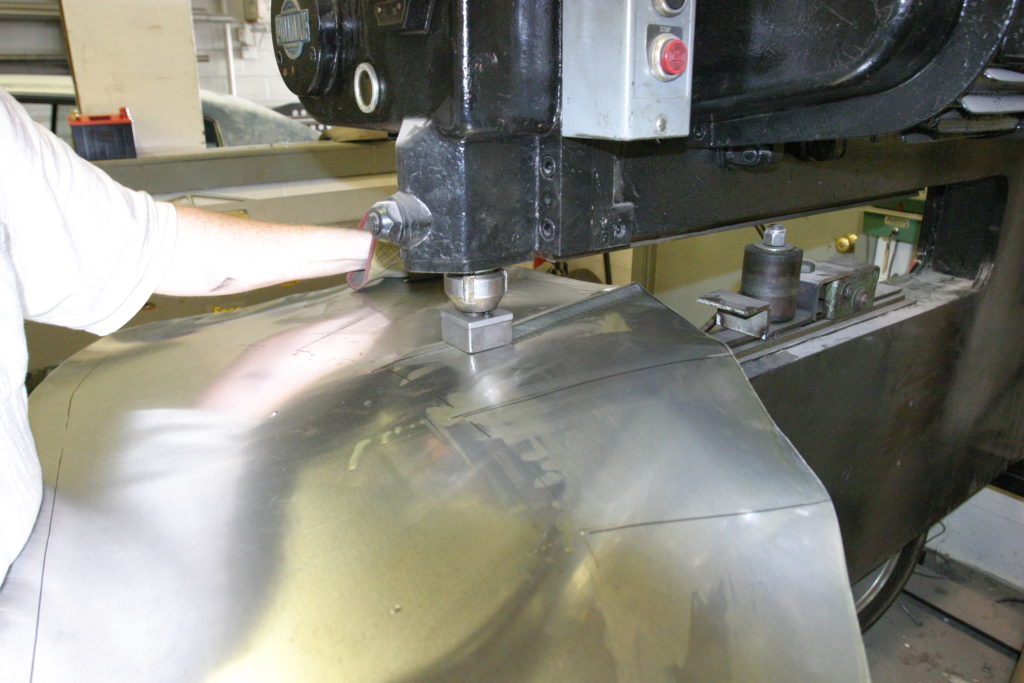
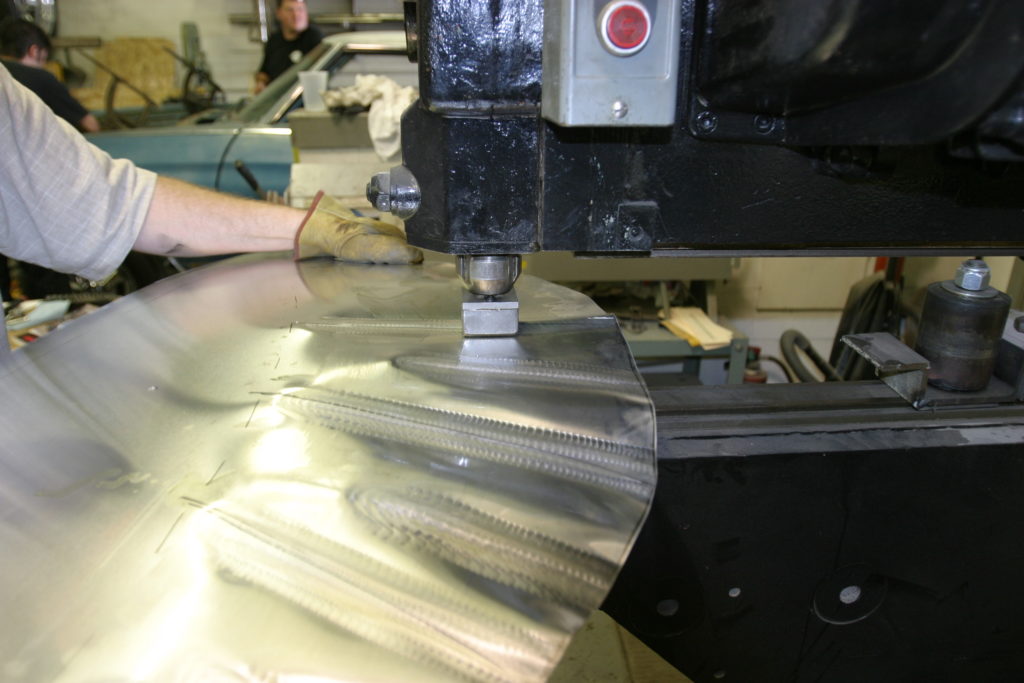
The first step in shaping the aluminum work piece takes place in a Pullmax machine. Though originally designed to shear sheet metal, numerous additional uses from punching louvers to forming beads have been devised for the Pullmax. Since the work piece for the track nose needs to be shrunk on the edge, a set of thumbnail dies are installed in the jaws of the Pullmax. More commonly used in a power hammer, the Pullmax works great for smaller-scale work like the track nose pieces. The thumbnail dies work by shrinking the material from the edge in. When the work piece is pushed through the dies, a tuck or peak is formed. On the way back out, the tuck is hammered flat, shrinking that area. A common misconception is that the Pullmax and it’s larger brethren the power hammer is beating on the material. While contact is made, it’s not beating on it so much as it’s working it to the desired effect. Most machines can be adjusted in both the stroke of the plunger unit and the height of the dies, adjusting the amount of severity that the work piece endures when the dies close. This allows the user total control over how much each stroke effects the work piece.
While the Pullmax and a few body hammers work great in shaping the work piece, the surface finish that results leaves something to be desired. All that shrinking and hammering needs to be smoothed out to a glass-like finish and that’s where the pneumatic planishing hammer comes in. Using a low-crown set of dies, the planishing hammer gently hammers the work piece smooth, using a process similar to a typical handheld hammer and dolly process, only much quicker. The finish created by the planishing hammer can be massaged into a finish fit to polish, if the operator so desires.
These three techniques were used to form the two halves that will be joined to form the track nose of the ’29; shrinking in the Pullmax, freehand hammer forming using a variety of rubber mallets, and air planishing to massage the surface smooth. Both halves were fabricated using the buck as the foundation, resulting in an almost identical pair to form the one-piece nose. Next time, we’ll join the two halves and mount the finished nose onto the front of the ’29 where the rhinoplasty on the Potvin Roadster will be complete. CC
The first step in creating the track nose is to take a pattern off the wooden buck that will be transferred to a sheet of aluminum.
The black lines designate where the initial shrinking will take place and about how far back to create the front silhouette. You can see by the top folded area how much the aluminum will need to be shrunk to take the flat shape and make it round to fit the buck.
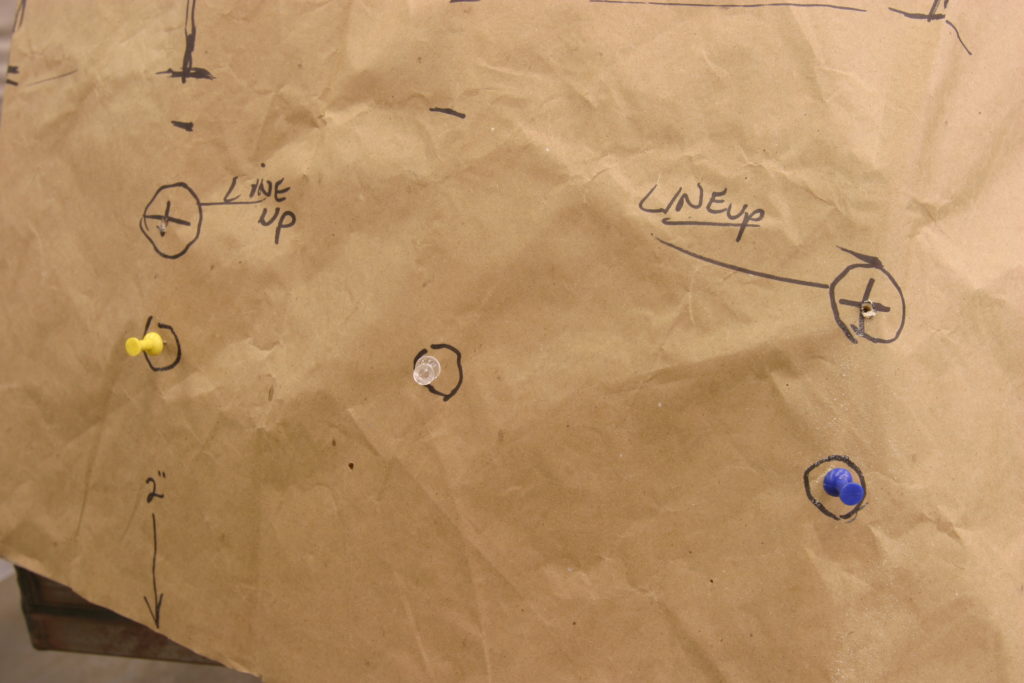
Lineup marks are made on the pattern and will be transferred to the sheet of aluminum.
These will correspond to two pins installed on the buck that will serve to lineup the aluminum material in the same place on the buck every time as the piece is being formed.
The pattern is complete and ready to be transferred to the sheet of aluminum. The triangular marks at the top represents where the paper was folded to conform to the buck and will be approximately the amount of shrinking to get the aluminum to do the same.
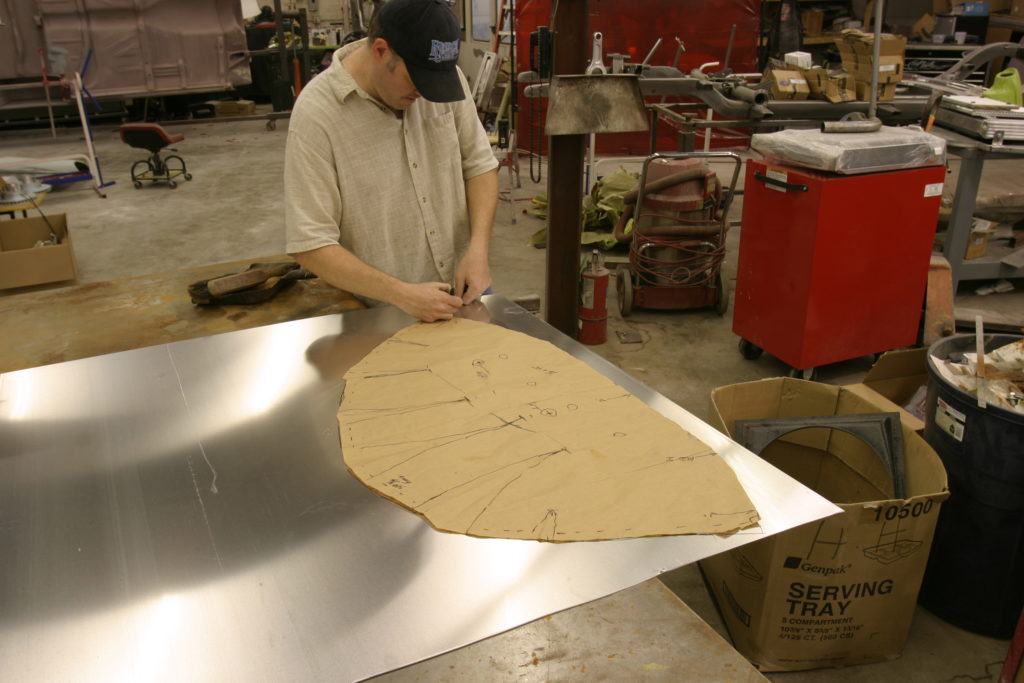
After tracing the pattern to the aluminum sheet, it’s cut out using a sheet metal nibbler. Notice that all the corresponding marks have been transferred to the aluminum, including the stretch pattern and locating pins. Two-inches extra material was included at the back side of the aluminum piece so as to have plenty of material leftover in the case of over shrinking any particular area.
Before any of the metalwork is begun, the aluminum pieces are annealed. A light coat of carbon is applied using a pure acetylene flame. A neutral flame is then applied to the surface and when all the soot is burned off…
…the aluminum piece is annealed and thus, much easier to work with.
To get that big compound curve at the front of the nose, it’s going to take a lot of shrinking. That’s a job for a Pullmax machine equipped with a set of thumbnail shrinking dies. The shrinking process happens in two steps. In the first step, the dies form a peak in the aluminum as it’s pushed through the dies from the edge towards the center, all the while the Pullmax is working the jaws of the dies up and down on the panel. This gathers the material and pulls it upward as you can see here.
This next step is where the material is actually shrunk. Walked back through the jaws in the opposite direction, the jaws hold the peak in place while simultaneously forcing the material into itself, ultimately shrinking it in the process.
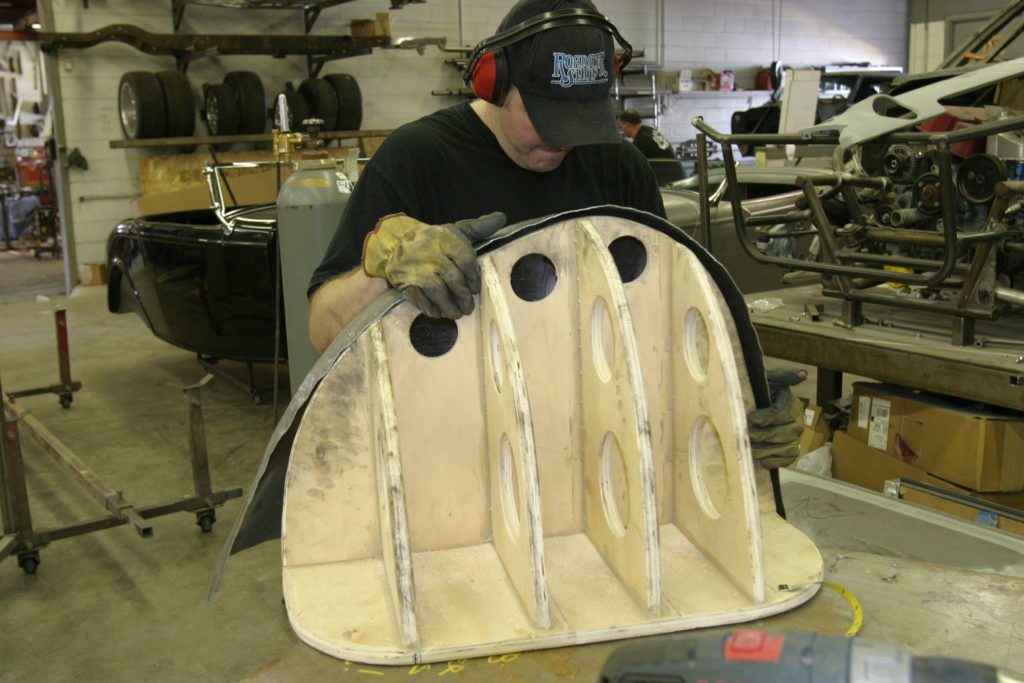
After some time on the Pullmax, the panel is starting to take shape. While the Pullmax offers a lot of control in terms of how fast or slow it gets the job done, it’s still important to periodically check the work piece against the buck. This is when those locating pins installed on the buck come into play.
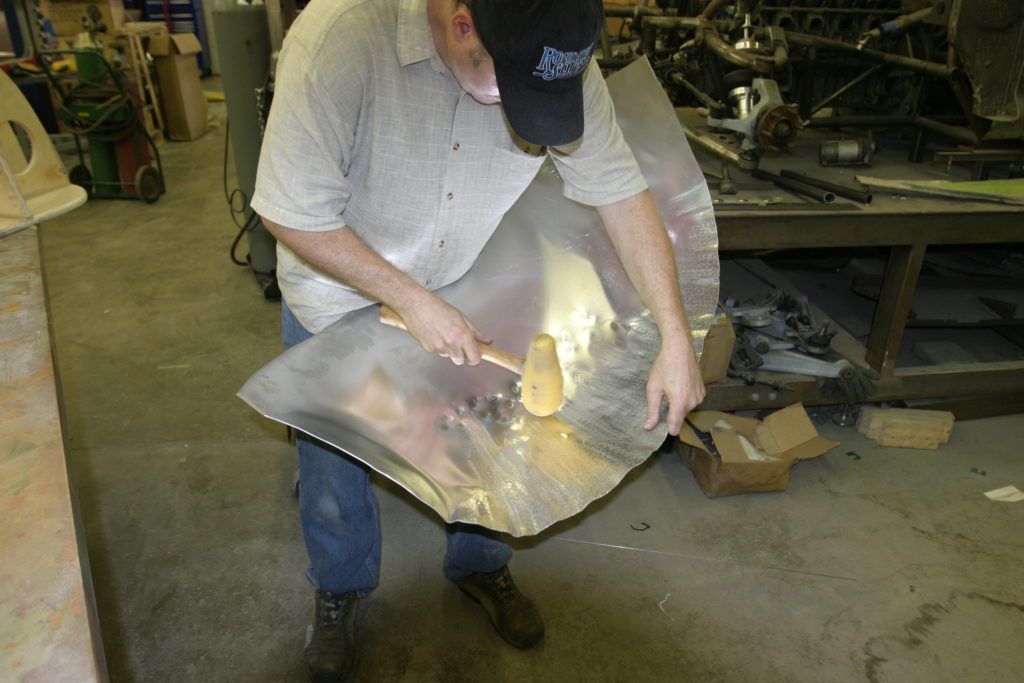
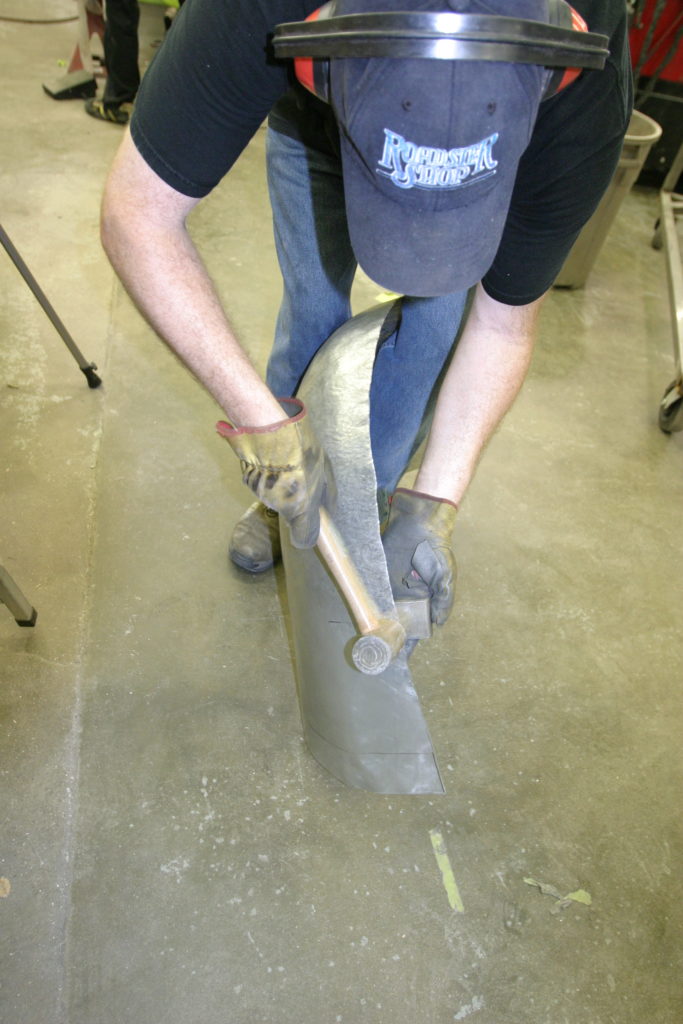
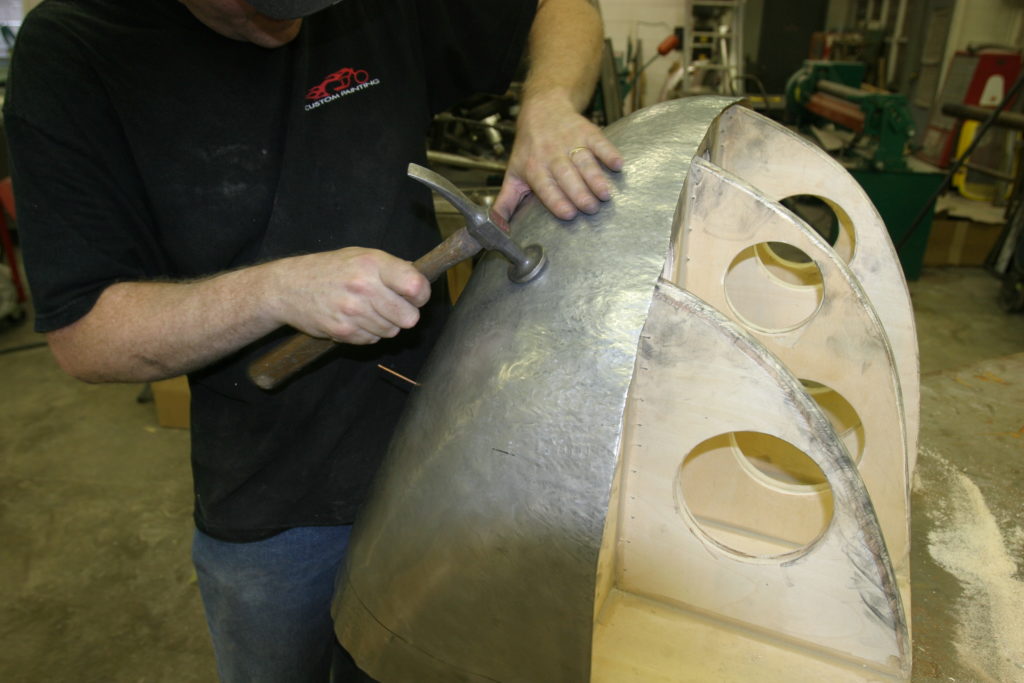
While the shrinking process is doing a great job at shaping the outer edge, the inner area needed to be massaged using a tear-dropped plastic mallet.
The work piece is really starting to take shape, so it’s off to the planishing hammer where the rather rough work from the Pullmax and plastic mallet can be massaged.
After a few minutes on the planishing hammer, the work piece is starting to follow the silhouette of the buck much better and all the abrupt curves put into it by the Pullmax have been worked into a consistent compound curve.
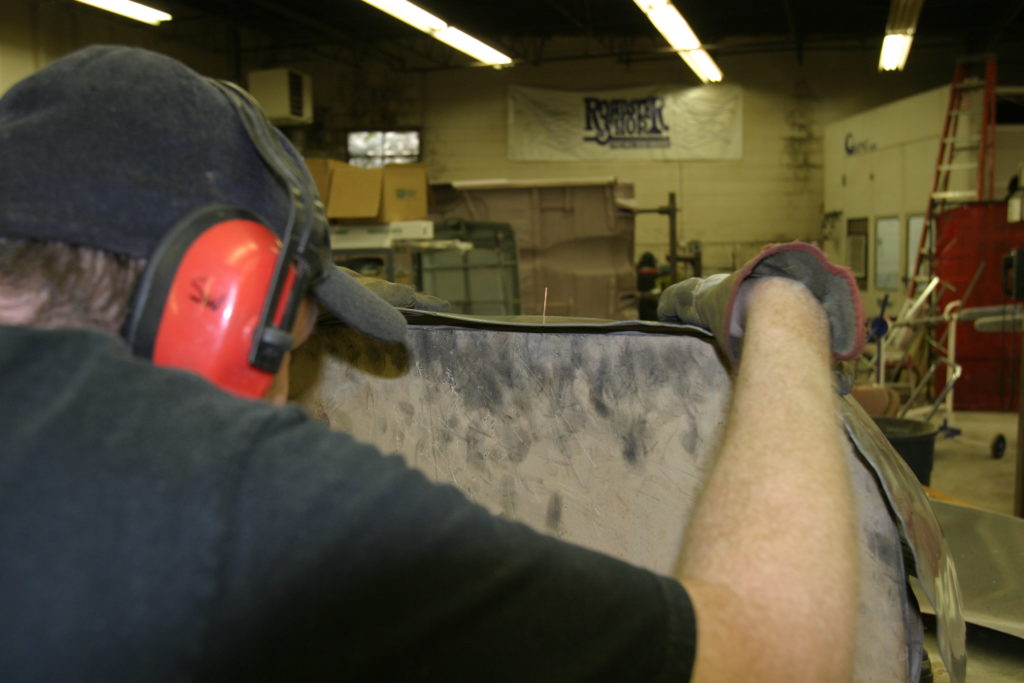
The edge was still a little rough, so a hammer and dolly was used to get it nice and straight
It’s impossible to describe how much time was spent on the planishing hammer, but suffice to say that after every strike of a hammer, it was back in between the jaws of the planishing hammer to then work it smooth.
Once the work piece really started to take shape, it became apparent that a few spots on the buck needed to be massaged. As the metal began to form, it was noticed that the natural curve in the silhouette resulted in a high spot at the center of the buck. Sam knocked that high spot down and the entire work piece settled against the buck perfectly.
With the front side of the panel fitting against the buck pretty good, it was time to start fine tuning the bottom portion. The same process is used here, but on a smaller scale.
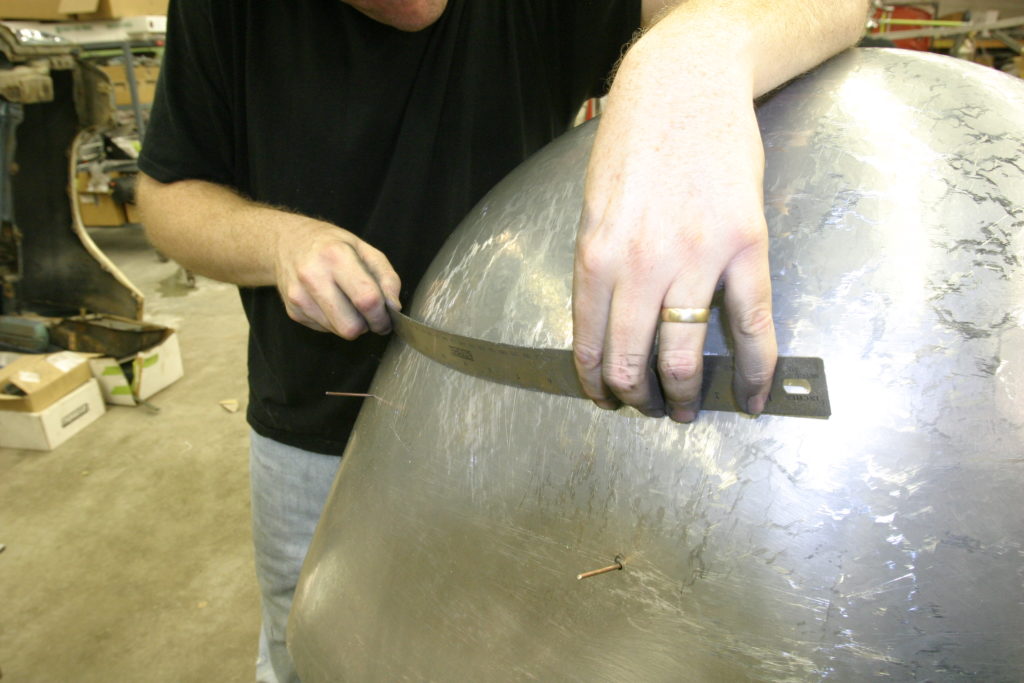
Sam used a flexible steel ruler and drug it along the surface of the work piece, effectively marring the surface and revealing any high and low spots in the process. Also notice the locating pins that ensure the work piece is placed in the same relation to the buck every time.
With the high spots revealed, a few light blows with a body hammer can coax them down. This process is commonly done with a file, effectively removing material in the process. By using the steel ruler method, no material was removed and the same outcome was reached.
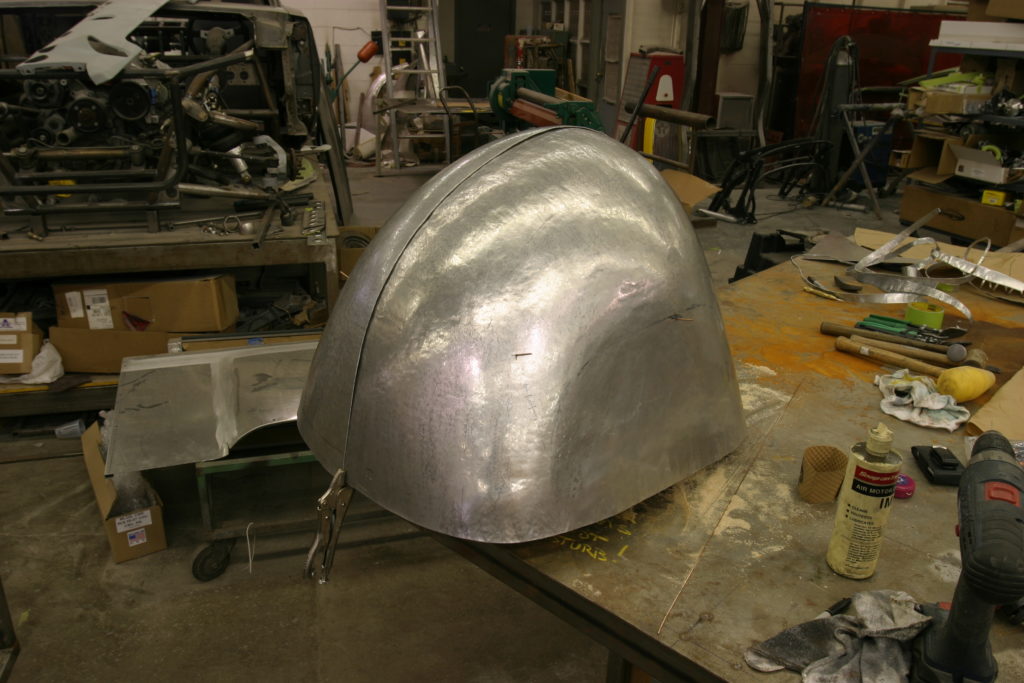
The second half of the track nose was made in the same manner as the first, albeit quite a bit quicker since most of the forethought had already been figured out on the first piece. Here, you can see the two pieces clamped together on the buck, ready to be trimmed, mated, and installed.
Related posts:
Roadster Rhinoplasty, Part III Roadster Rhinoplasty, Part III Wrapping up the track nose for the Project Potvin roadster By Ryan Manson * clampdowncomp@gmail.com One of the most exciting aspects of any project is when it really begins to take shape and form and begin to actually look like something. For the past year or...
Roadster Rhinoplasty Part I Roadster Rhinoplasty, Part I Building a track nose for a Ford roadster By Ryan Manson * clampdowncomp@gmail.com With the majority of the primary metalwork completed on the Project Potvin ’29 Roadster, it’s time to move forward of the main body and on to the front sheet metal. The body...
1940 Ford Floor Repair Floored! A Rusty Shell of a ’40 Ford Gets Some Much Needed Sheetmetal Repair By Ryan Manson * clampdowncomp@gmail.com Let’s face it, we’ve come to the time in hot rodding’s long history where it’s very rare to find an unmolested early Ford body that doesn’t need a ton of sheetmetal...
Replacing an Under Decklid Panel on a 1940 Ford coupe Replacing an Under Decklid Panel on a 1940 Ford Coupe Battered, Bruised, and Broken By Ryan Manson * clampdowncomp@gmail.com One of the most common troublesome areas on a 1935-40 Ford coupe has got to be the panel under the decklid. Whether damaged from collision, rot, or rust, this panel seems...