Installing an Overdrive T5 Transmission in a Model A Ford

Five Forward Gears for a Model A

By Ryan Manson * clampdowncomp@gmail.com

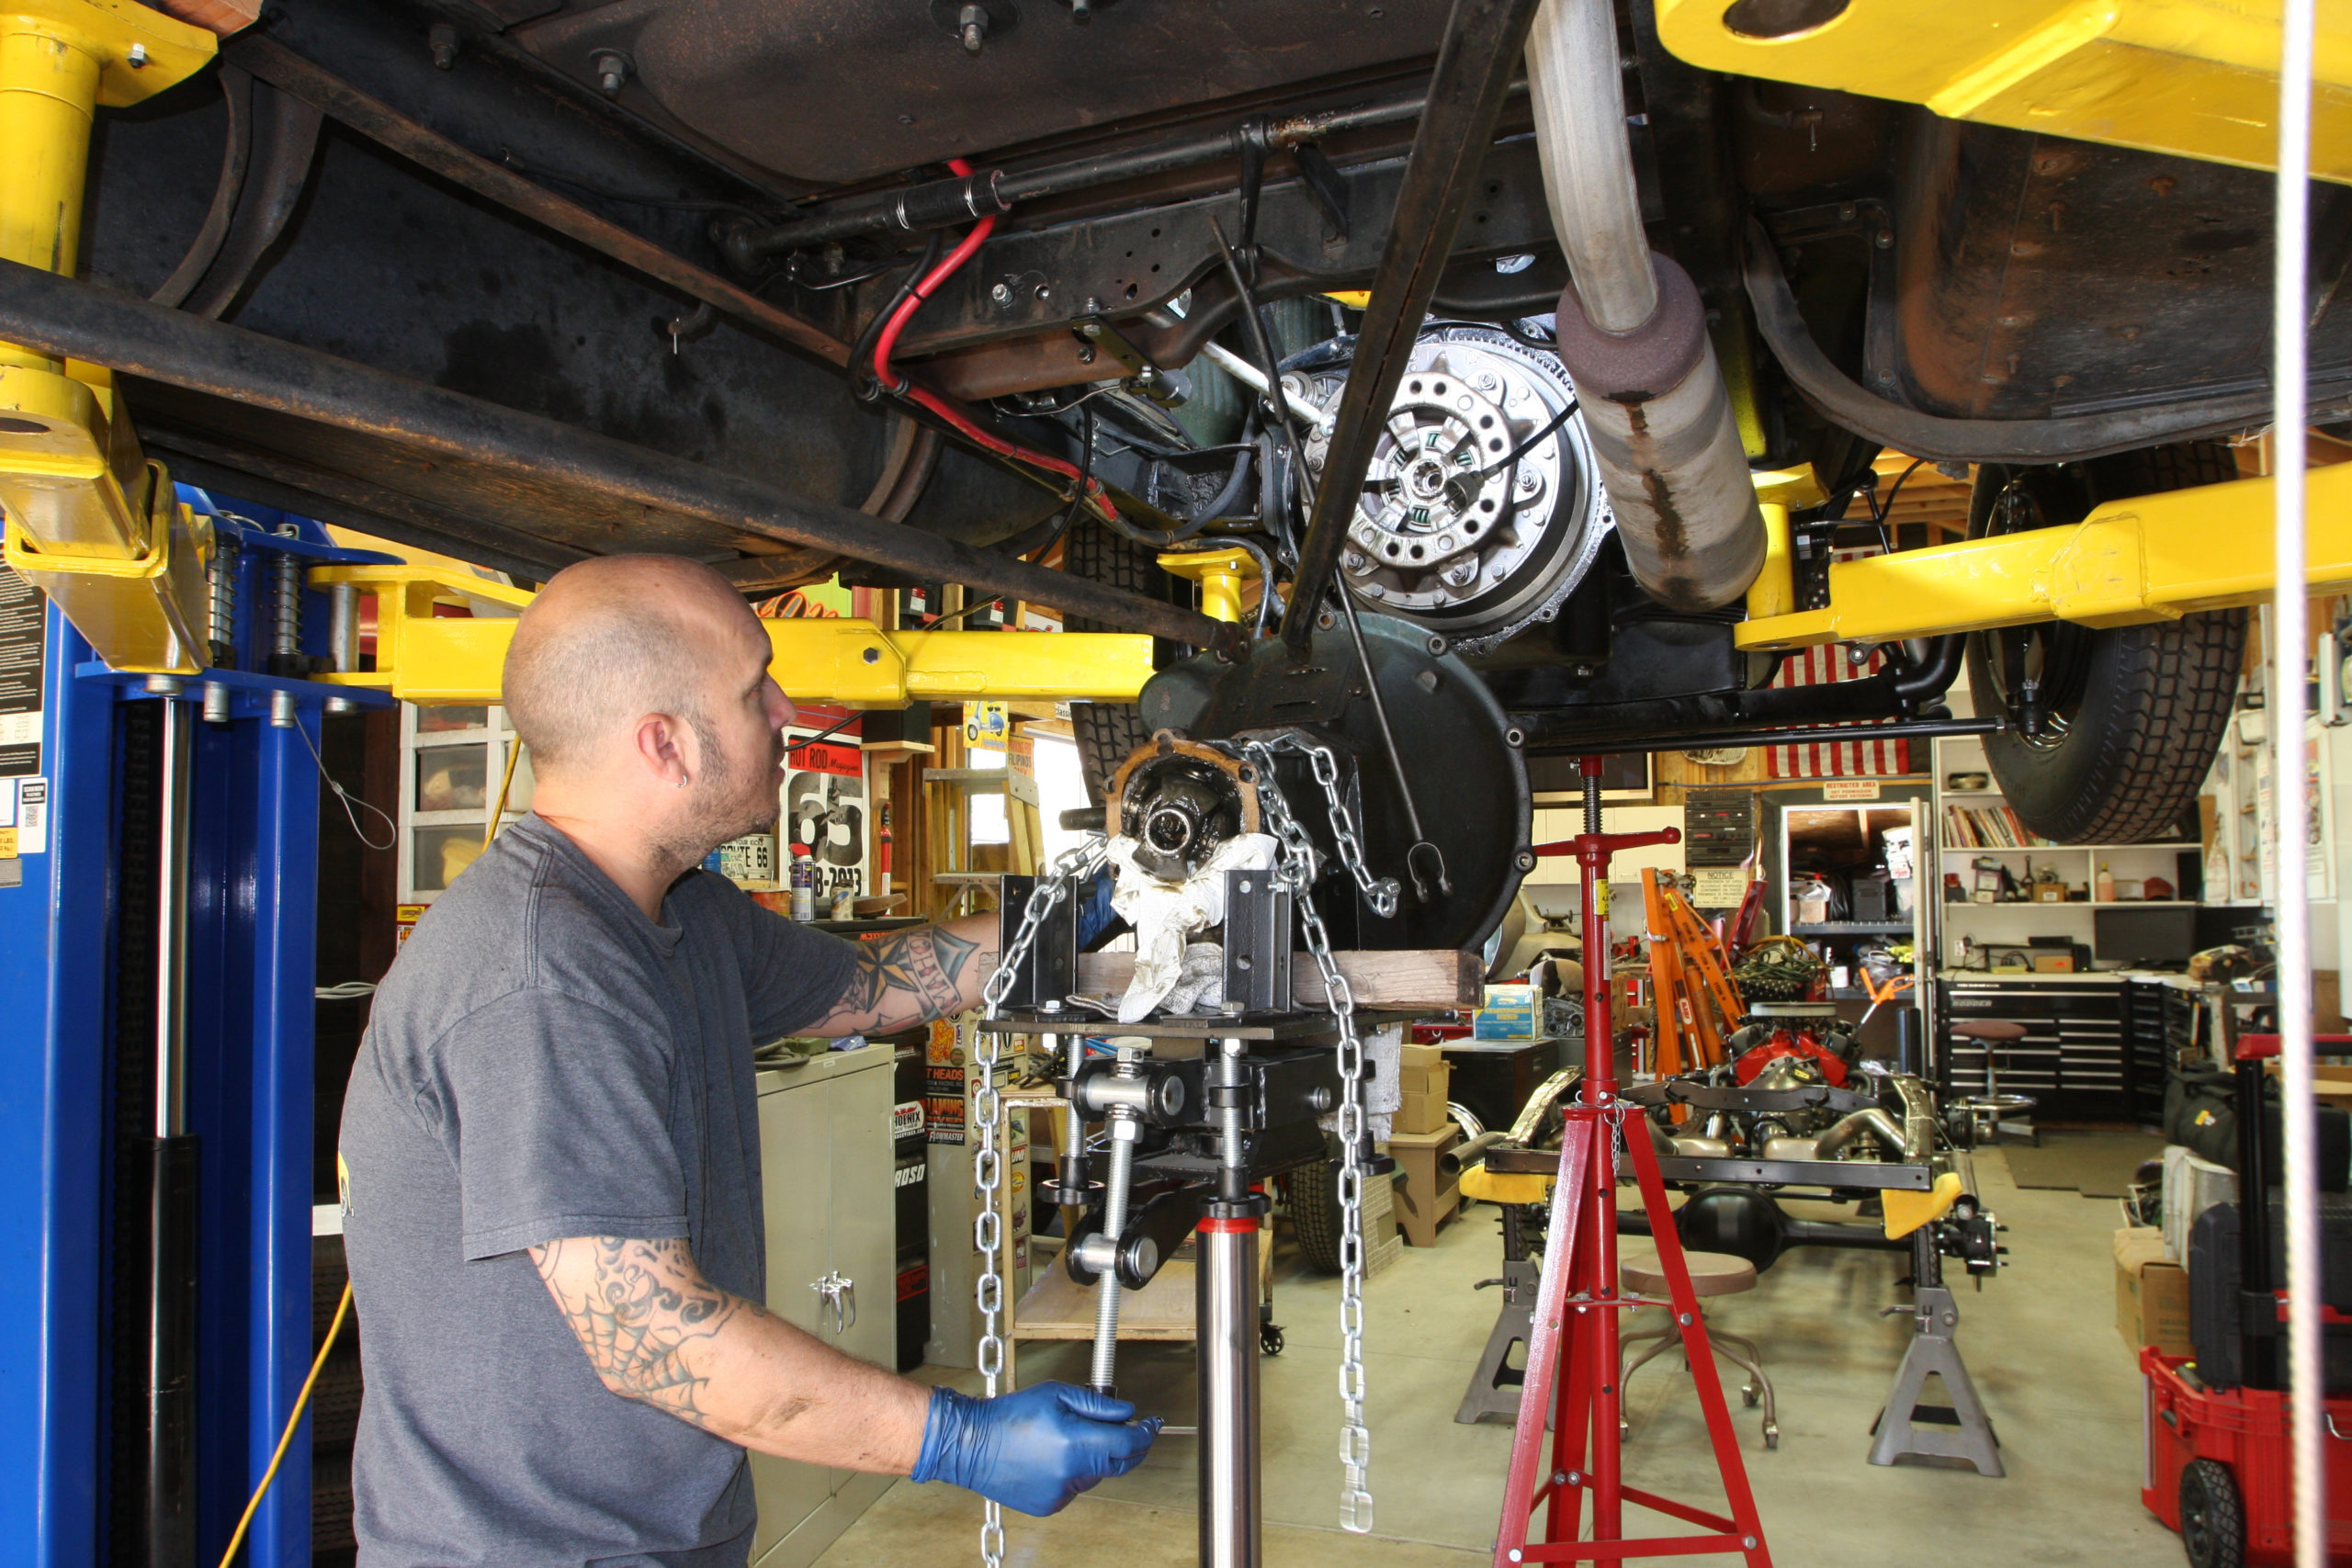
A Model A Ford can be one of the simplest machines in which to work. That’s a good thing becuase if you own one, chances are there’s something that needs to be worked on. When I purchased my ’30 coupe, there was a laundry list of small things that needed to be done and an even larger list of things I wanted done. I tackled that small laundry list first with things like rebuilding the water pump, carb, and updating the ignition and electrical to 12volts. These were things that were necessary; the water pump and carb leaked, while the wiring harness was held together with residential wire nuts. Back on the road, it became painfully obvious by the ever increasing noise emitted from the transmission that it would require my attention next. That’s when I had to make a drastic decision; rebuild the existing transmission or upgrade the stock 3-speed with a T5.

If I’m honest, by the time I was ready to pull the transmission, I had already decided the coupe could use not only a couple more gears, which meant I could now make a slightly safer attempt at highway driving, I was also done with the double clutching, no syncro-shifting driving that occurred using the original transmission. The fact that I had a good T5 with an S10 tailshaft sitting under my work bench made the decision even easier.

There have been a handful of T5 kits available on the aftermarket, but they all seem to lack one thing or another. Some use the stock Model A bellhousing (so as to keep the pedal mount) with an adapter, but that can push the trans too far rearward. Others use a custom bellhousing designed to replace the Model A unit, with the T5 bolt pattern machined in place. Some were fairly inexpensive while others were outwardly the opposite. Most were out of business or unavailable. Unsure on how to proceed, it was while surfing the ‘net one night looking for a solution that I came upon the website for Vintage Metalworks. I jotted down the phone number and gave Dave Farwell a call that following morning. Turns out they not only had a kit to do the swap, but also offered a couple other solutions I hadn’t thought of.

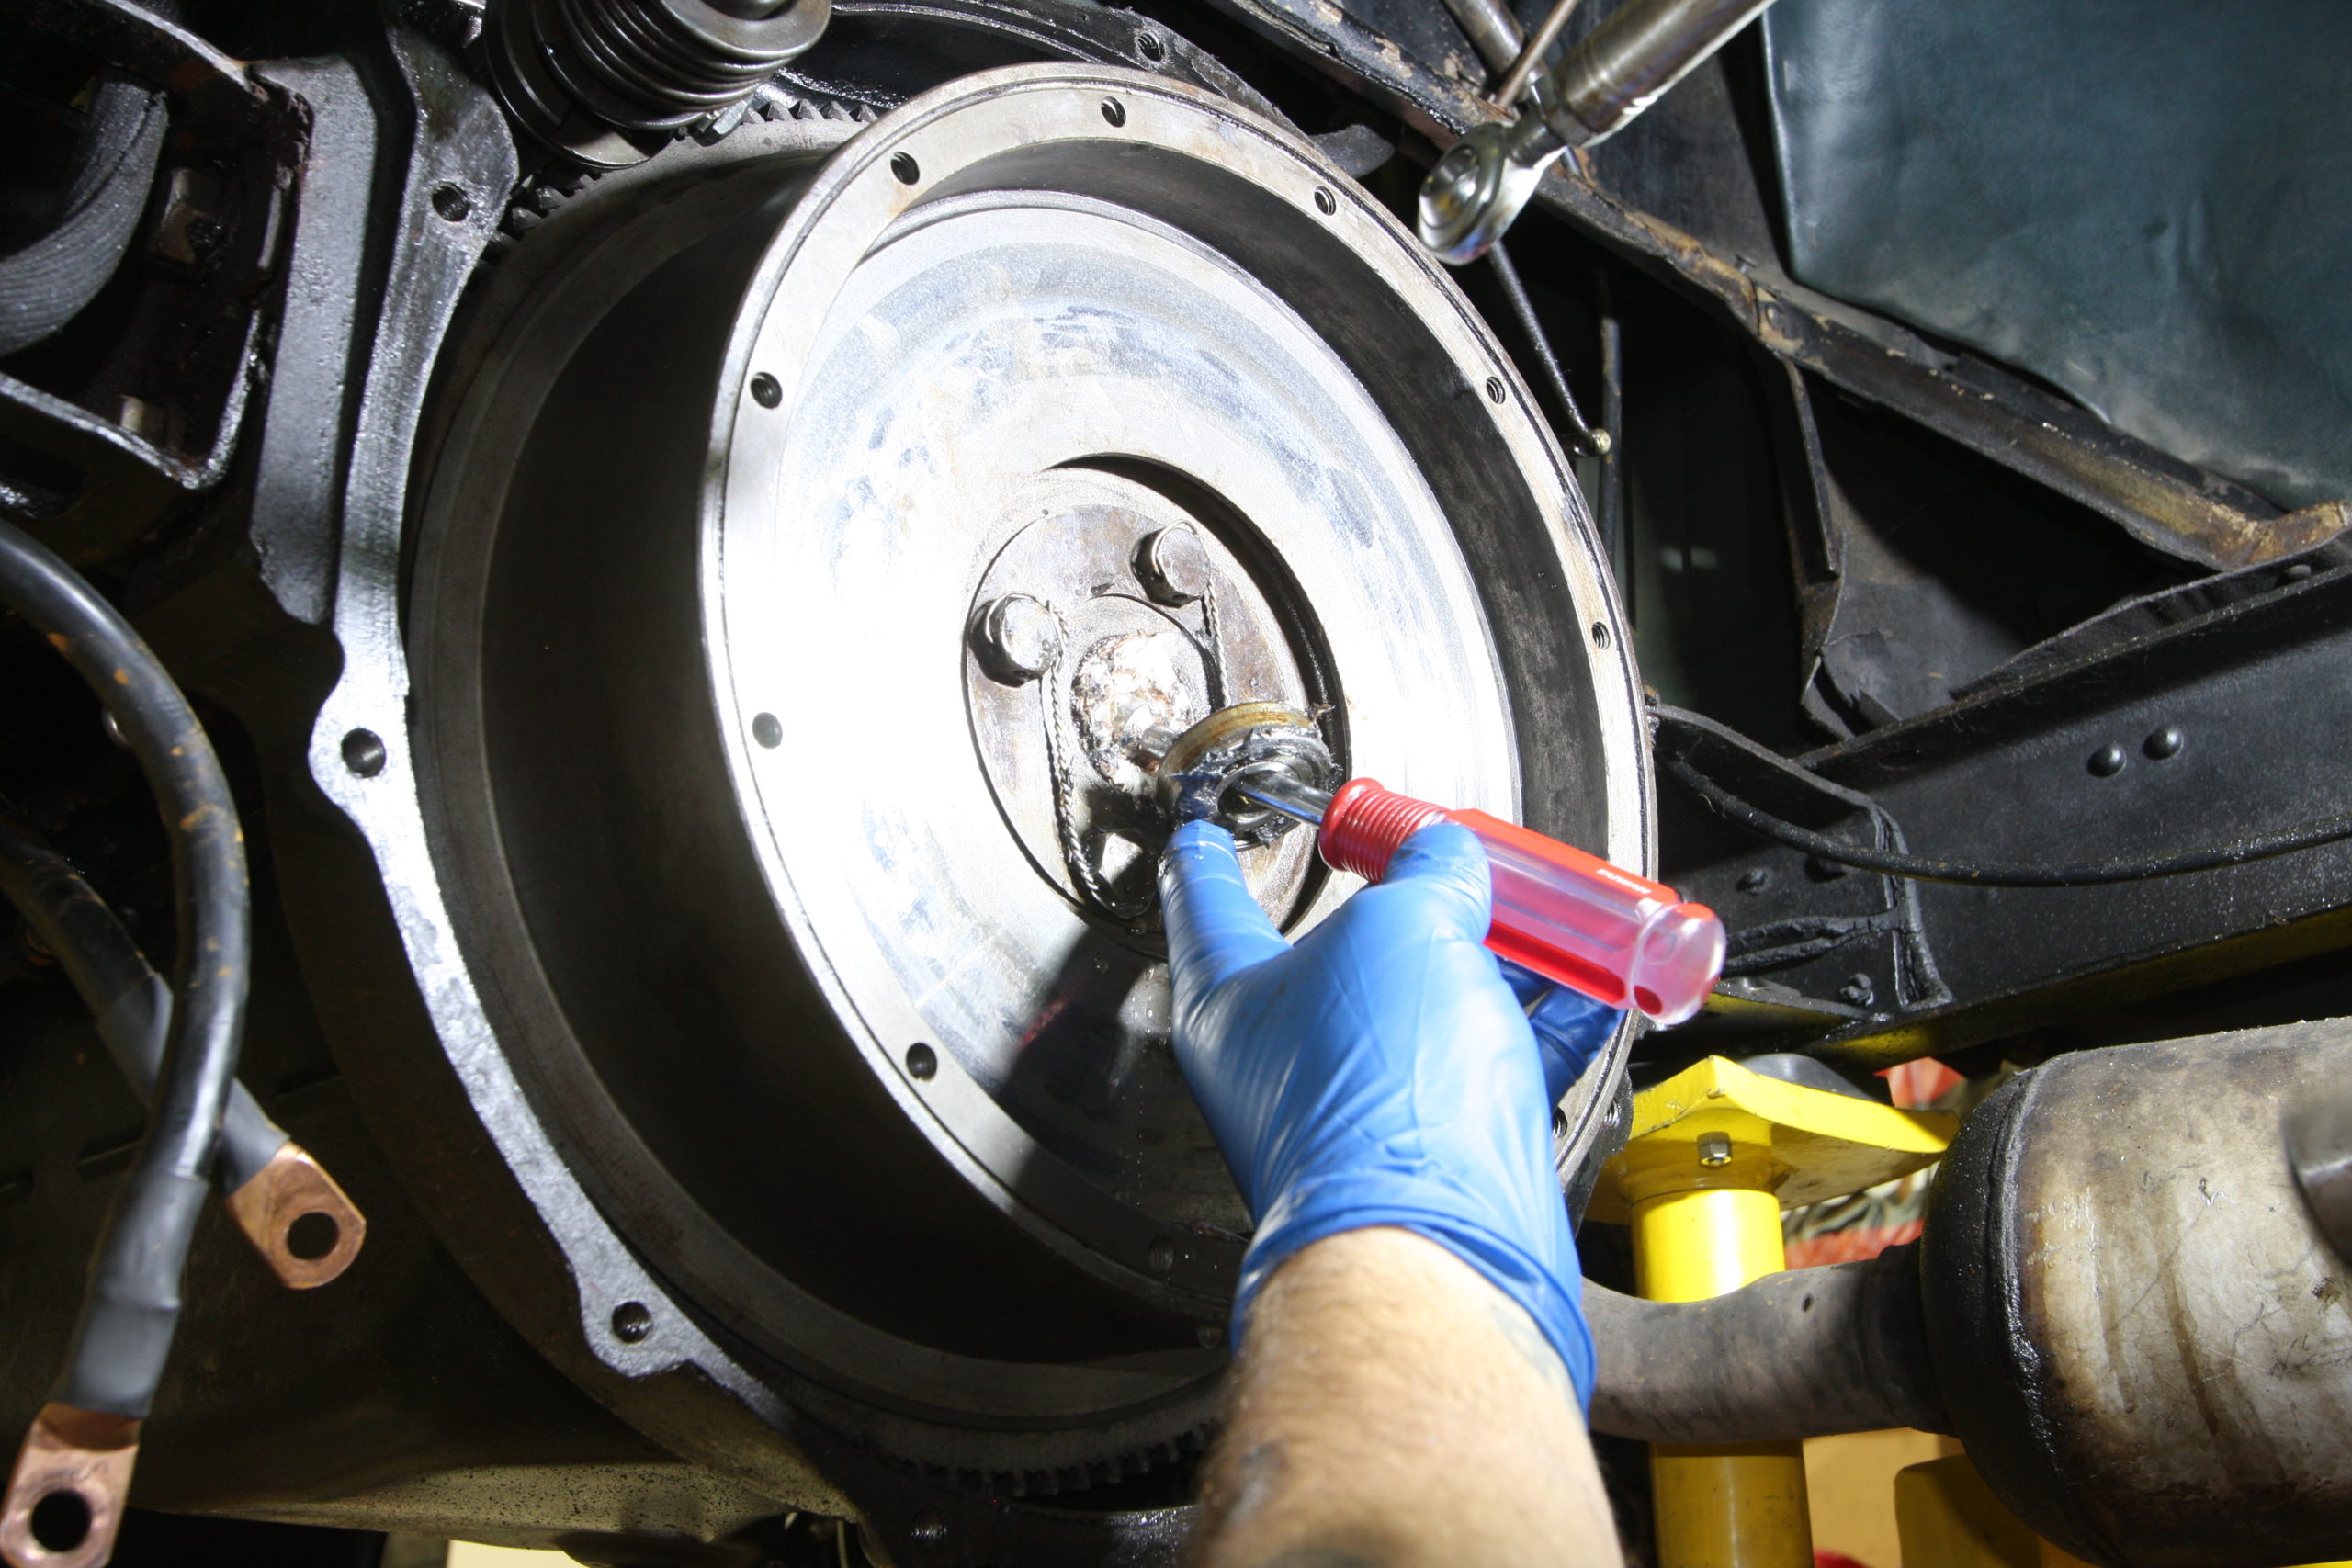
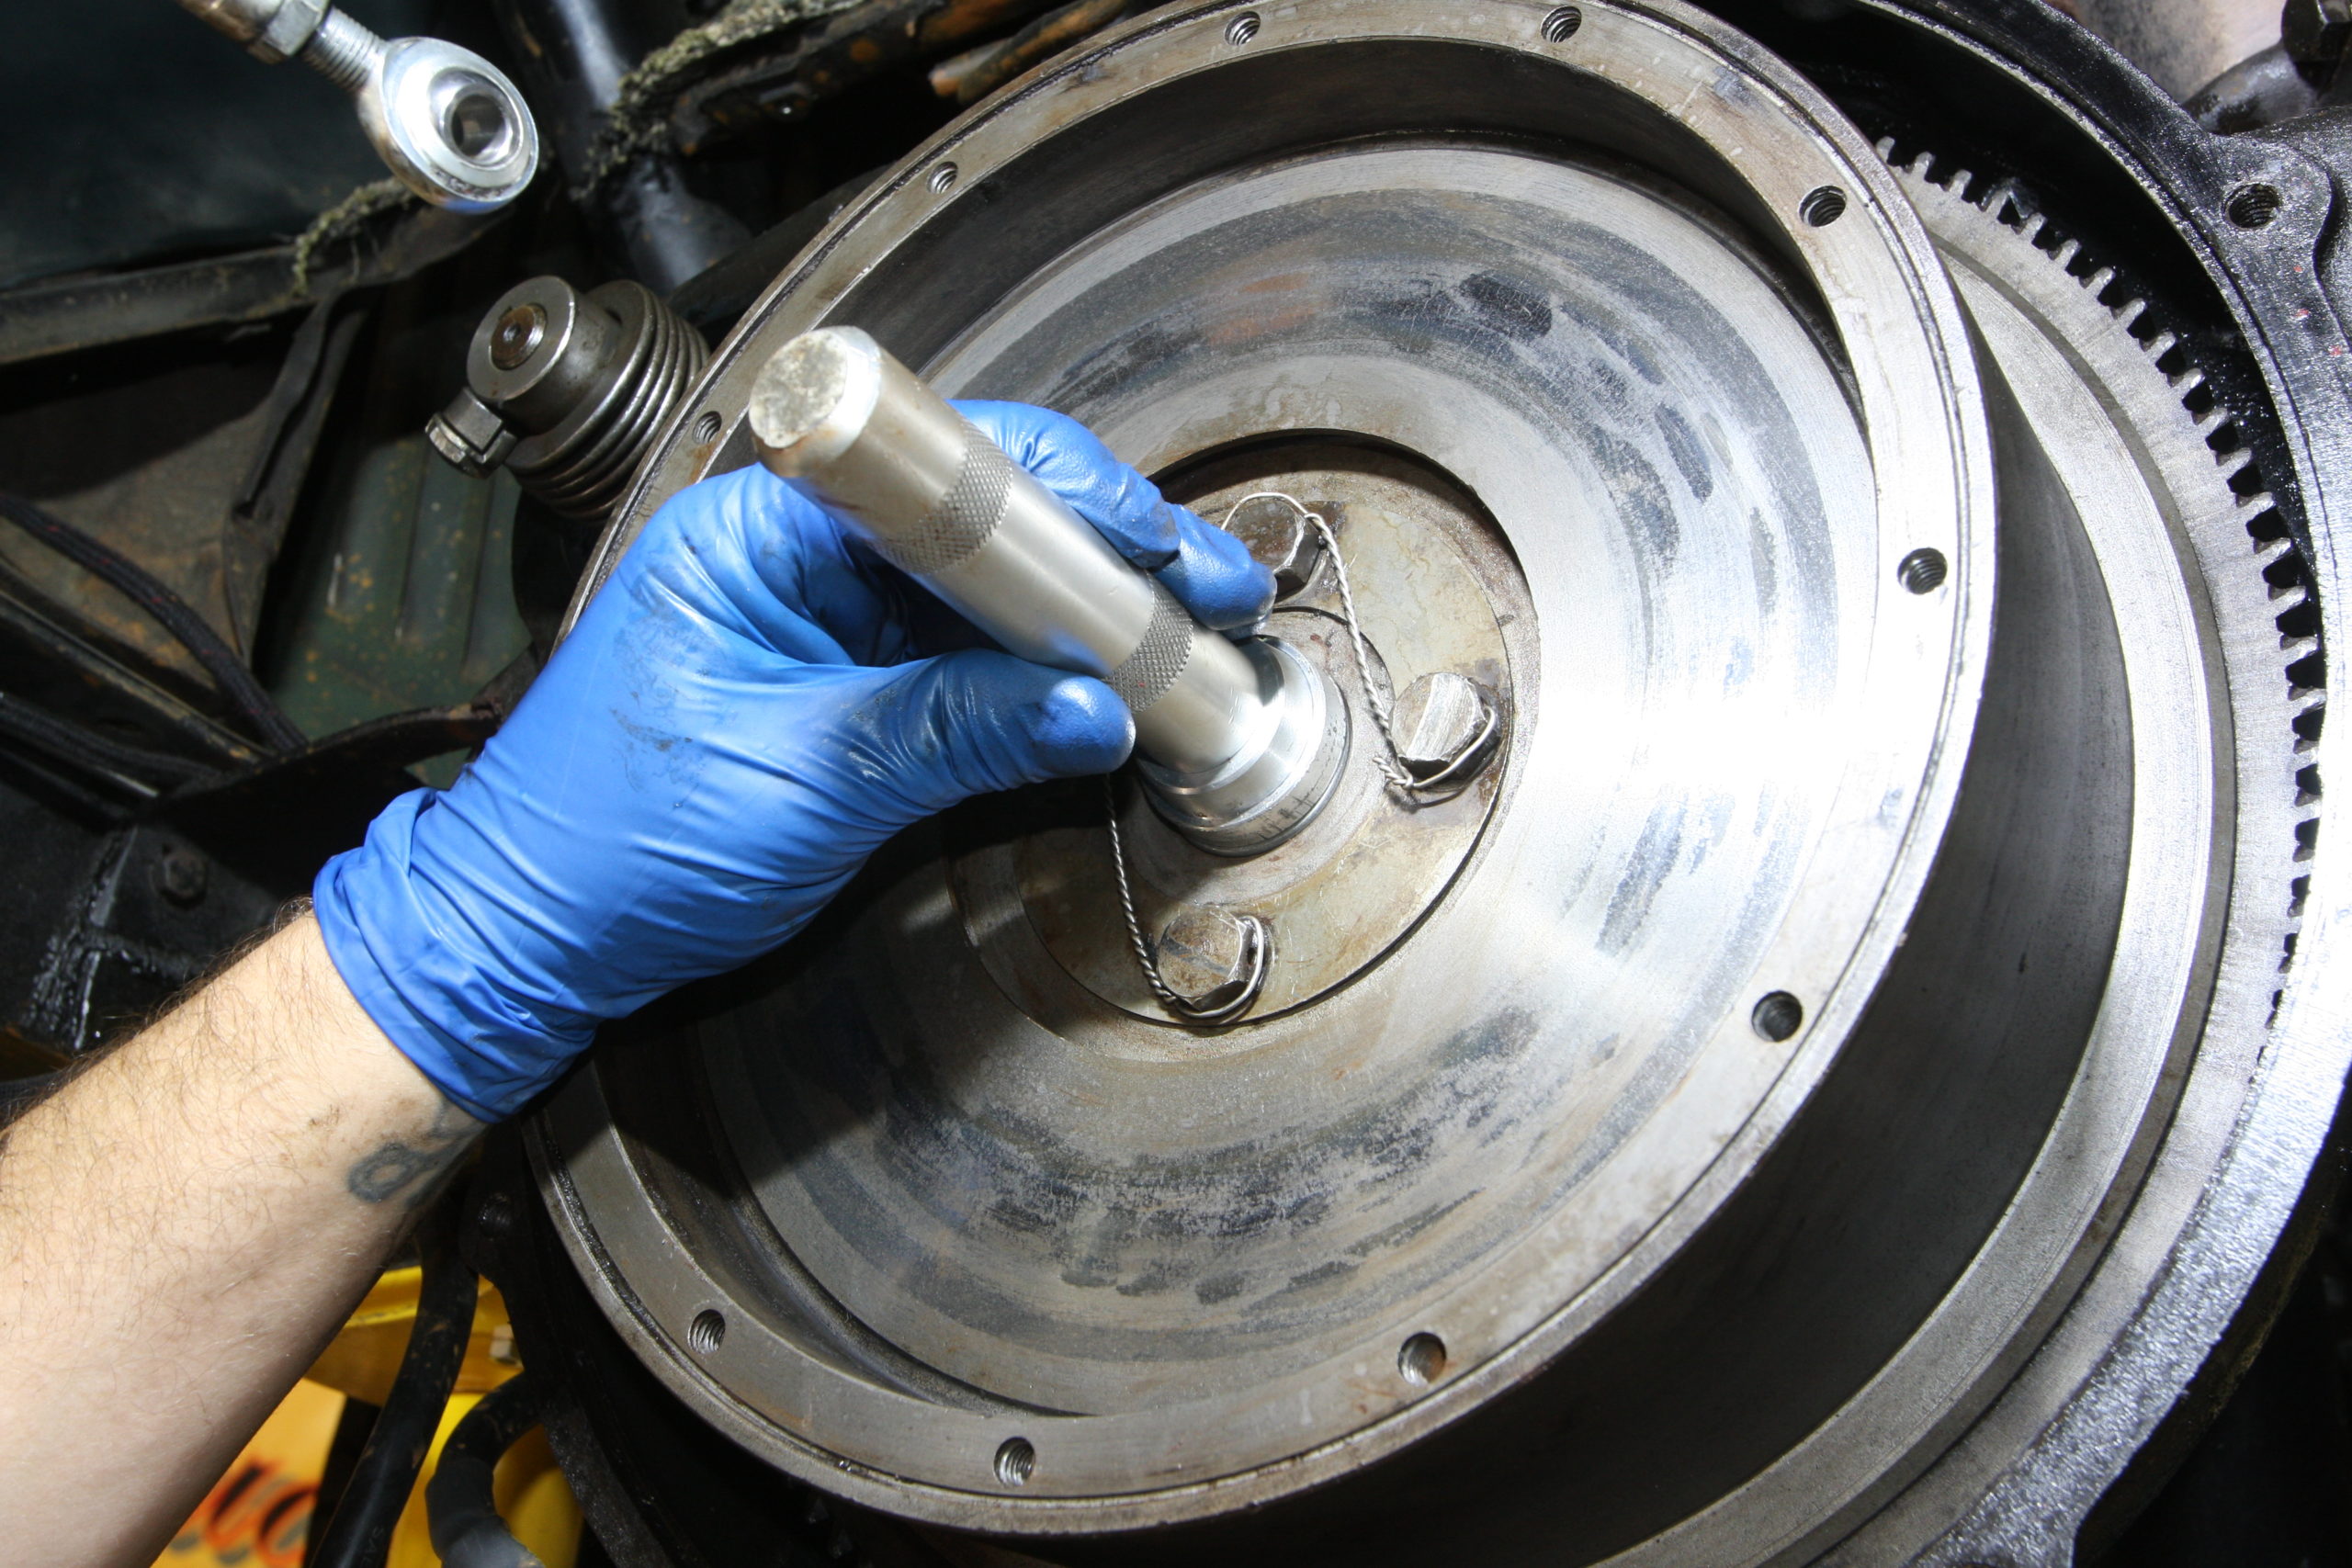
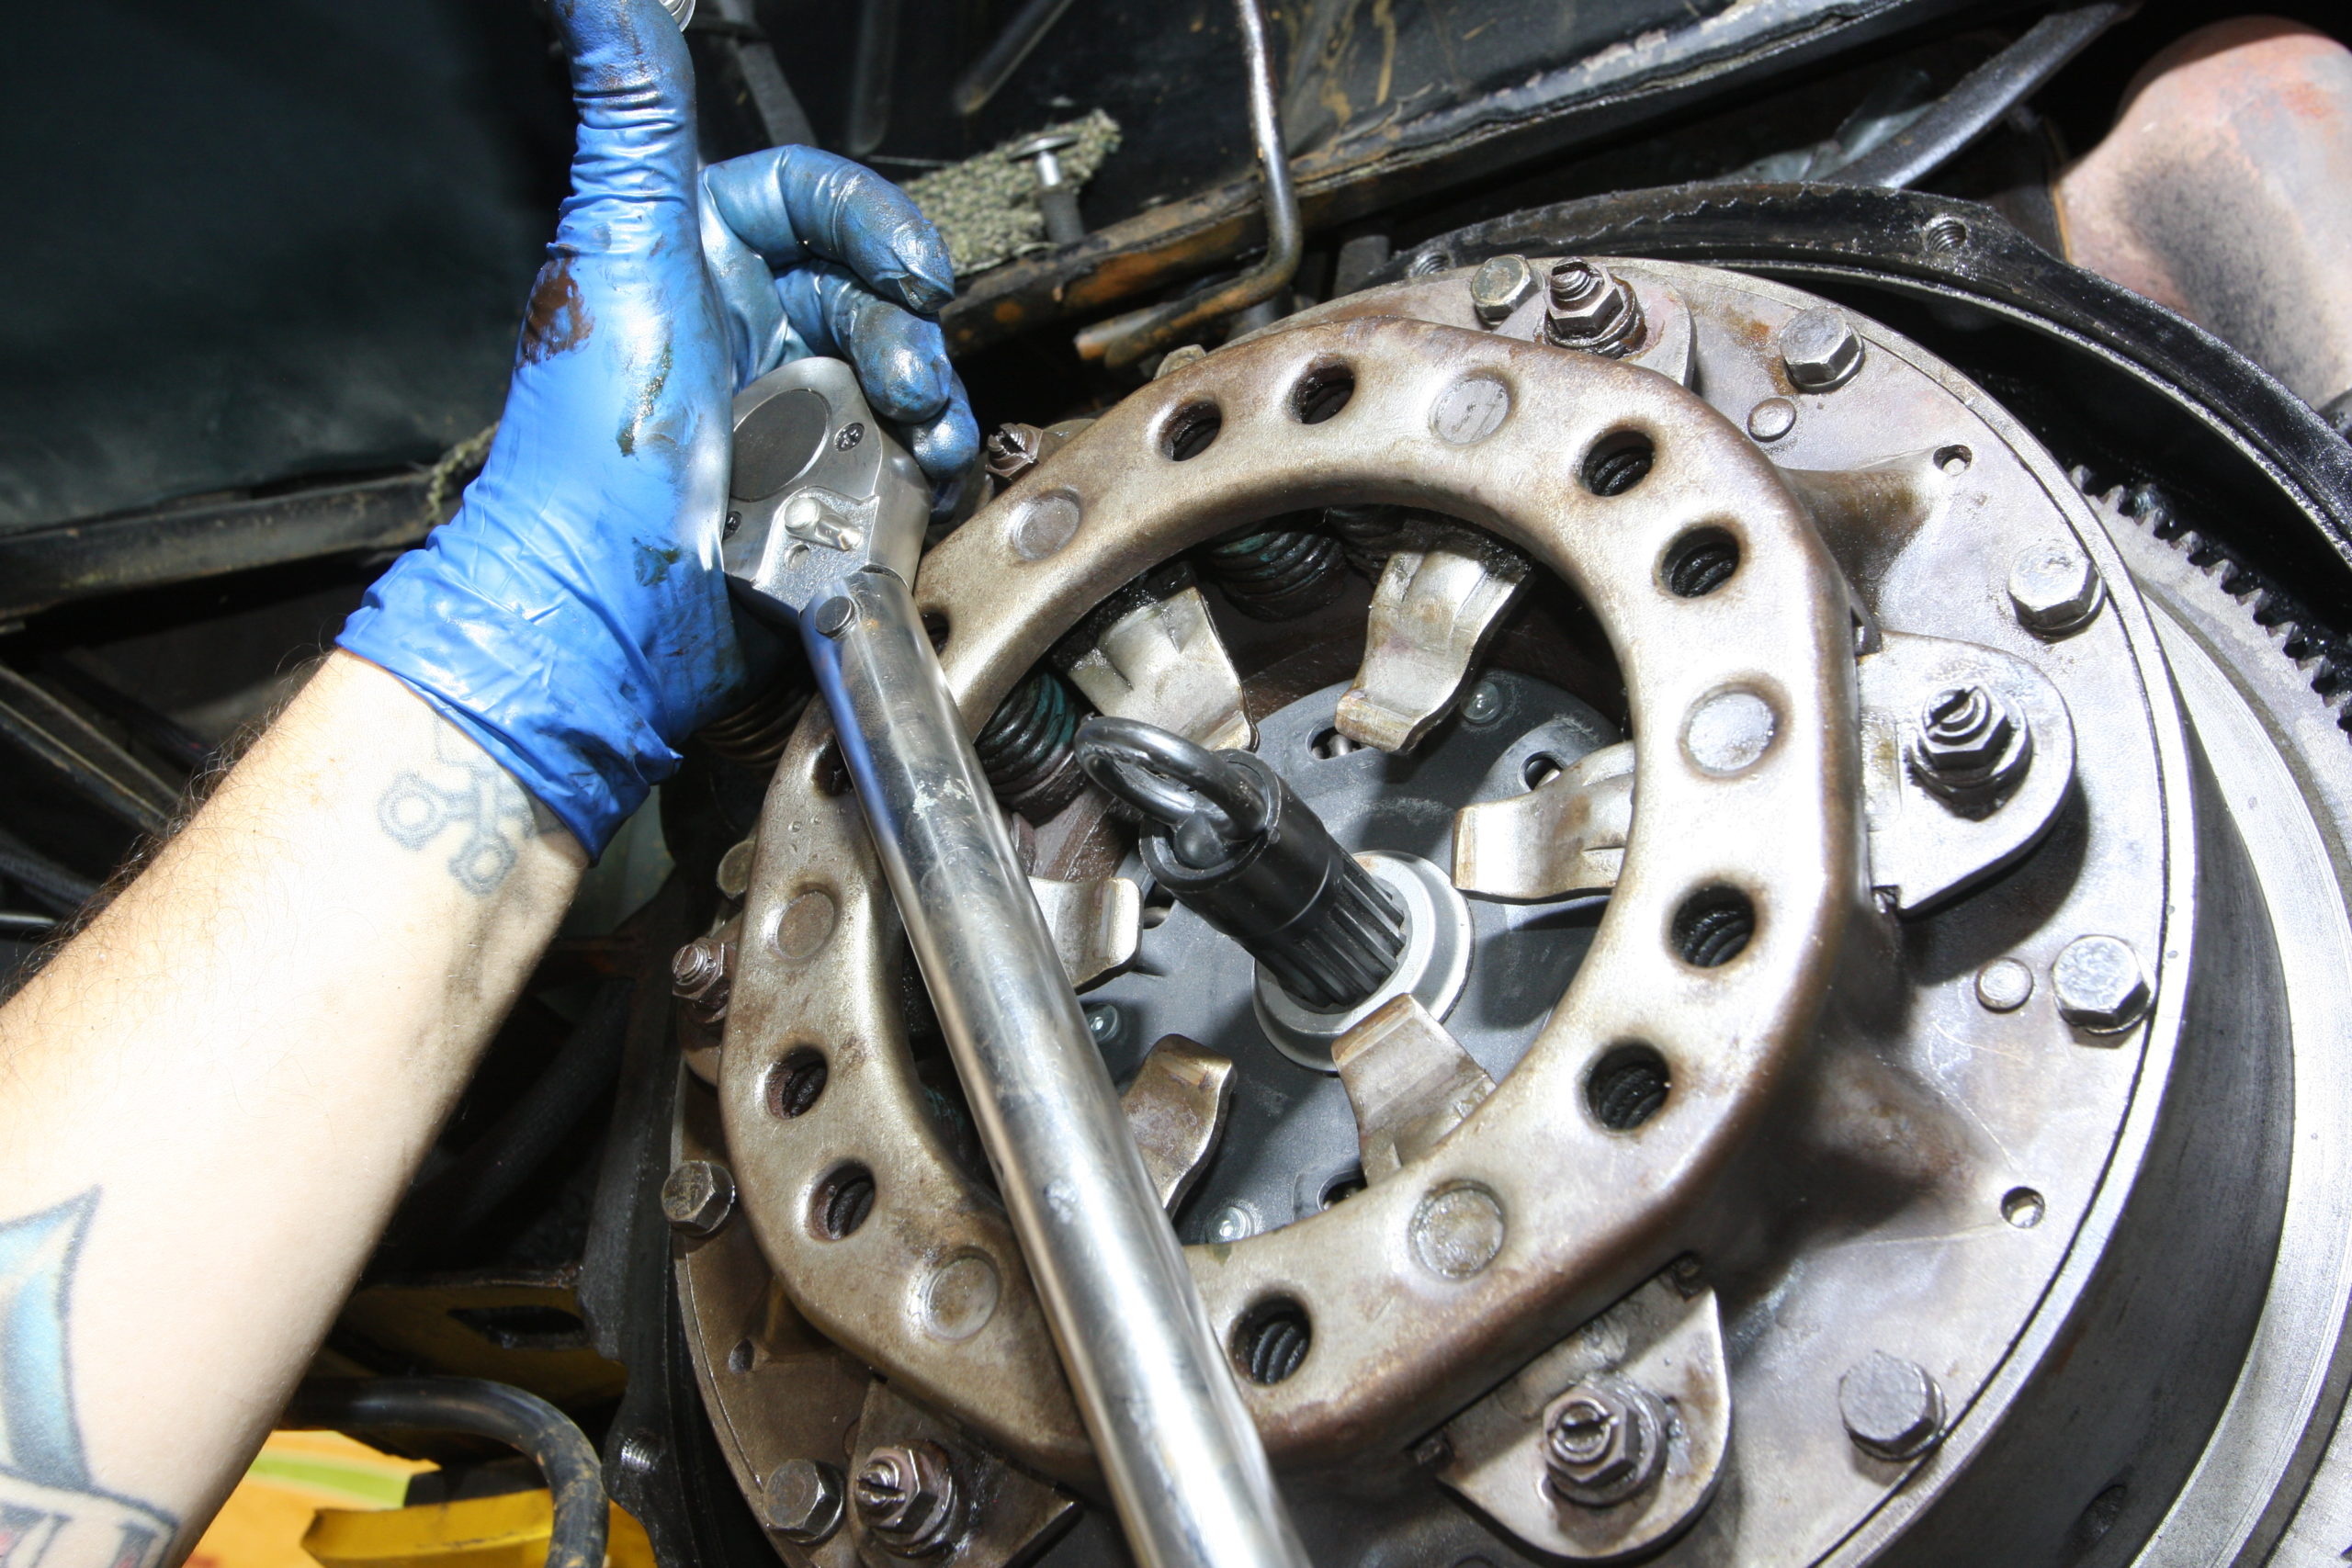
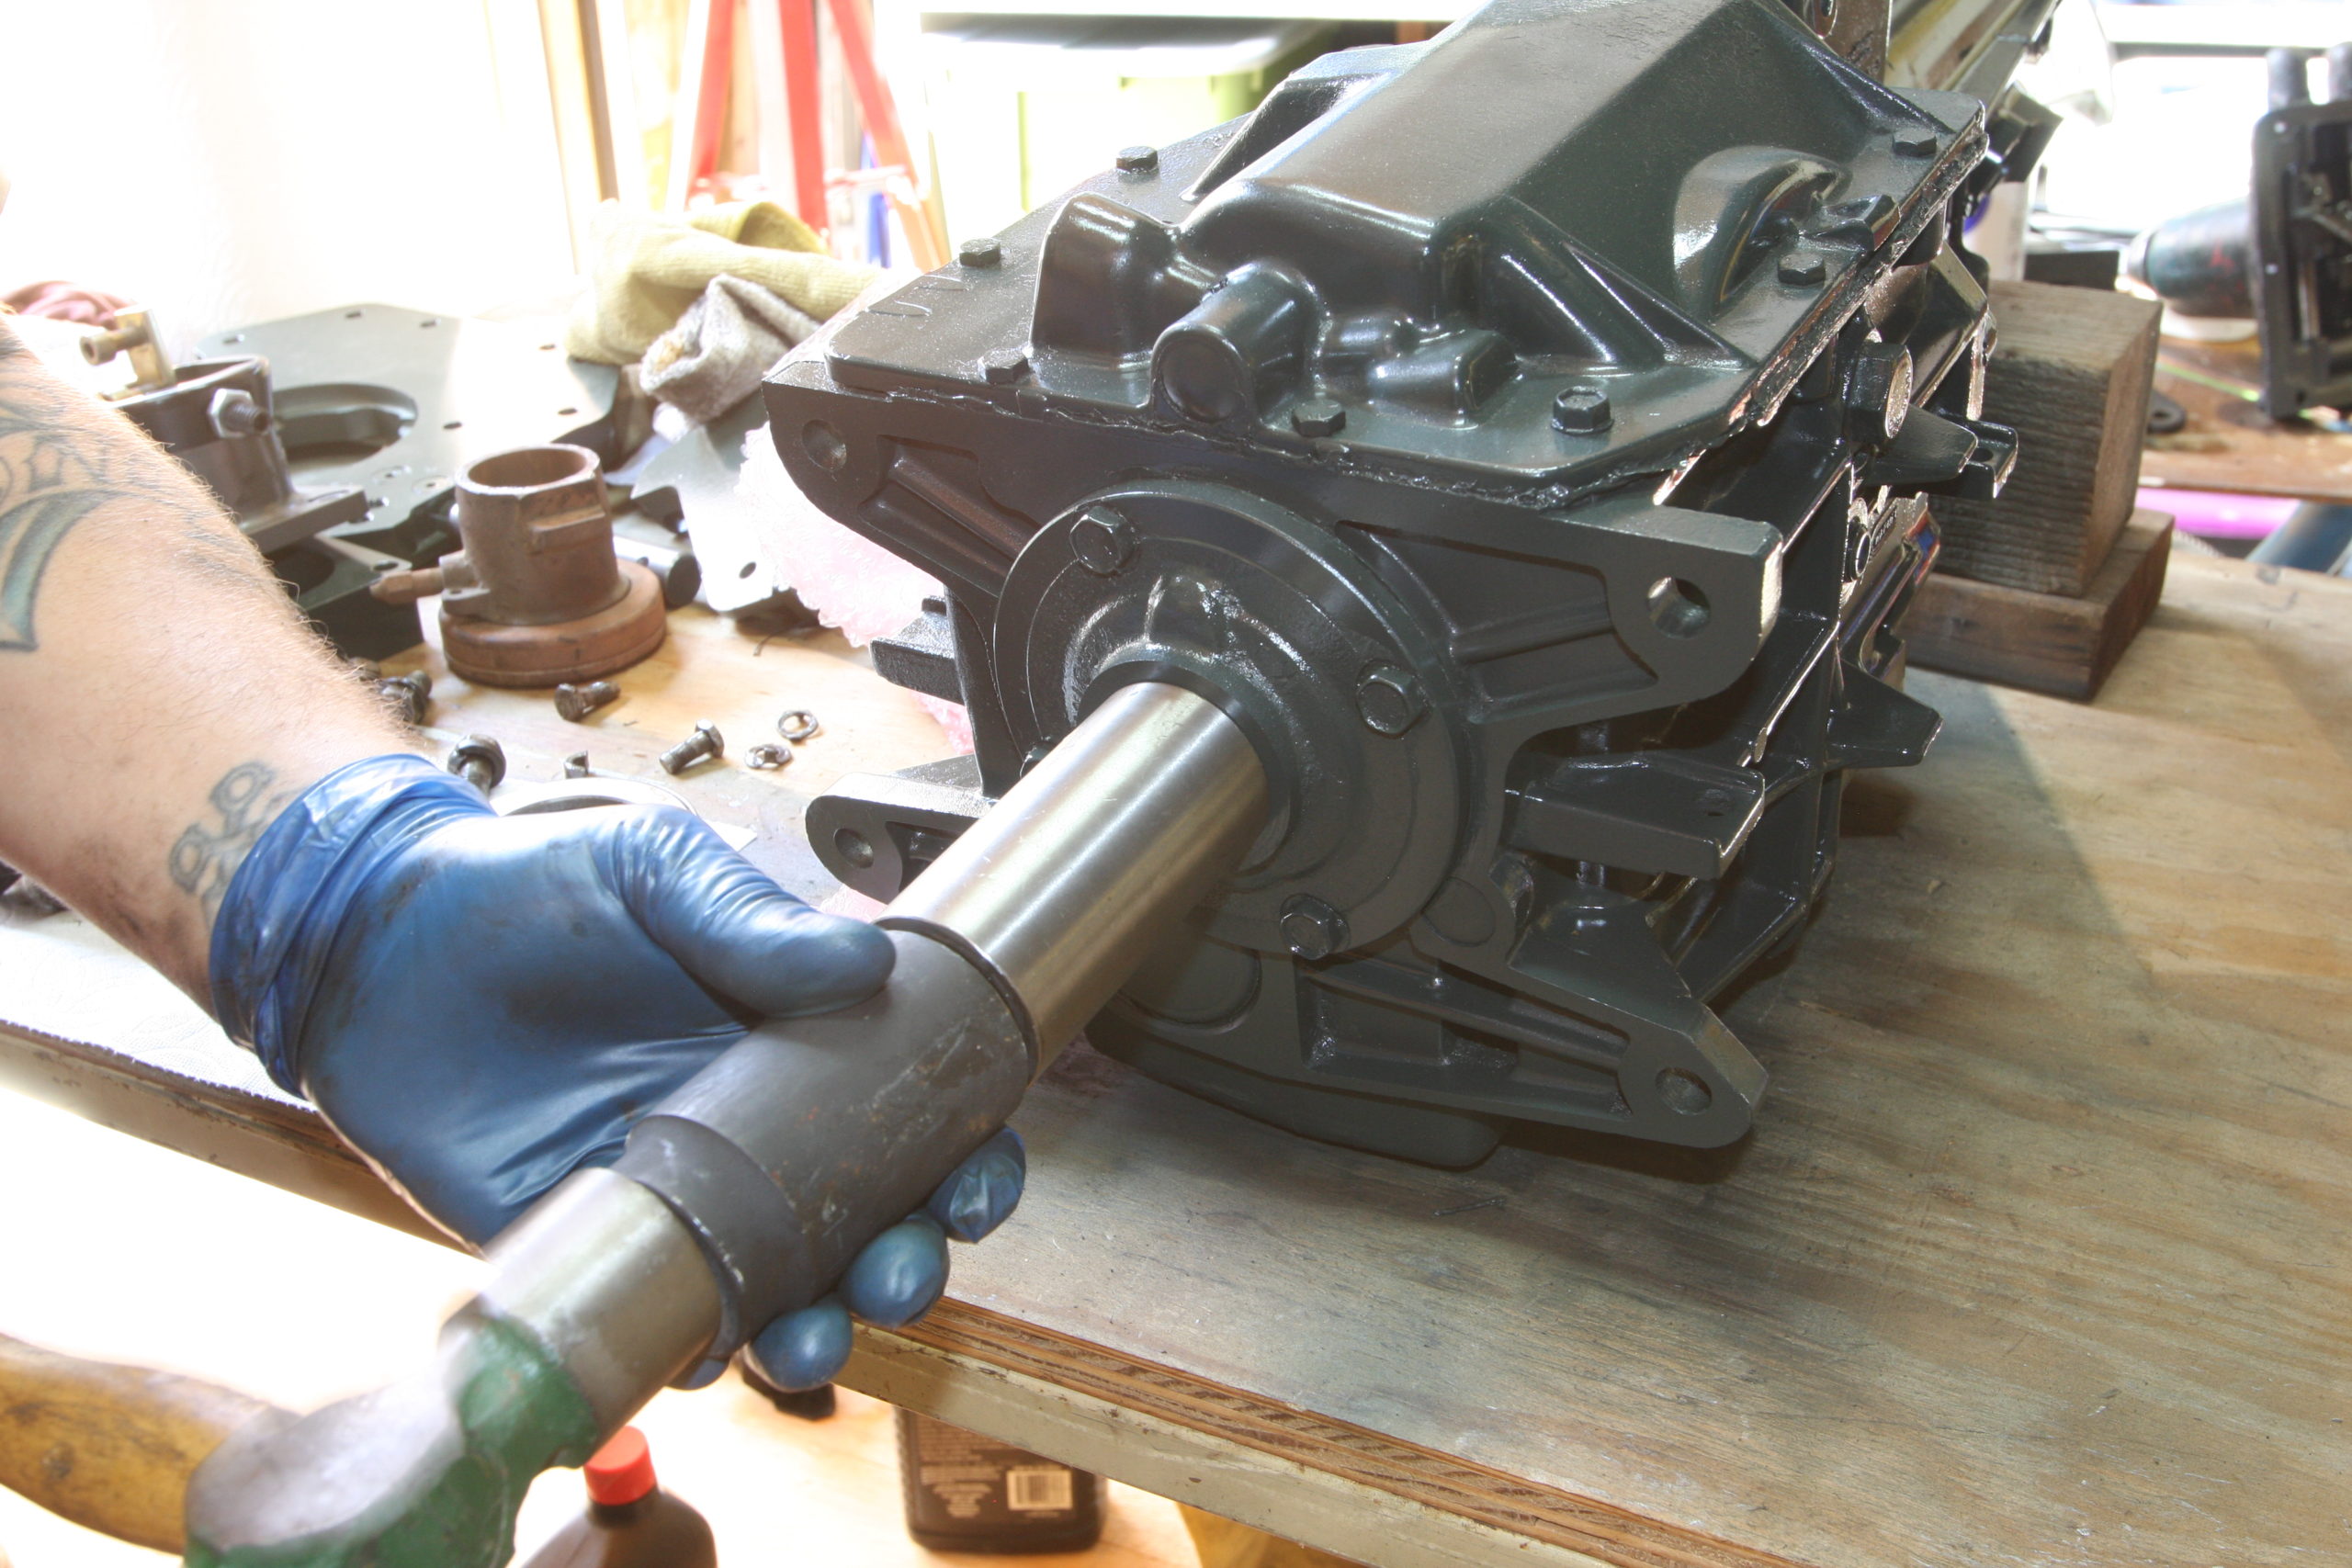
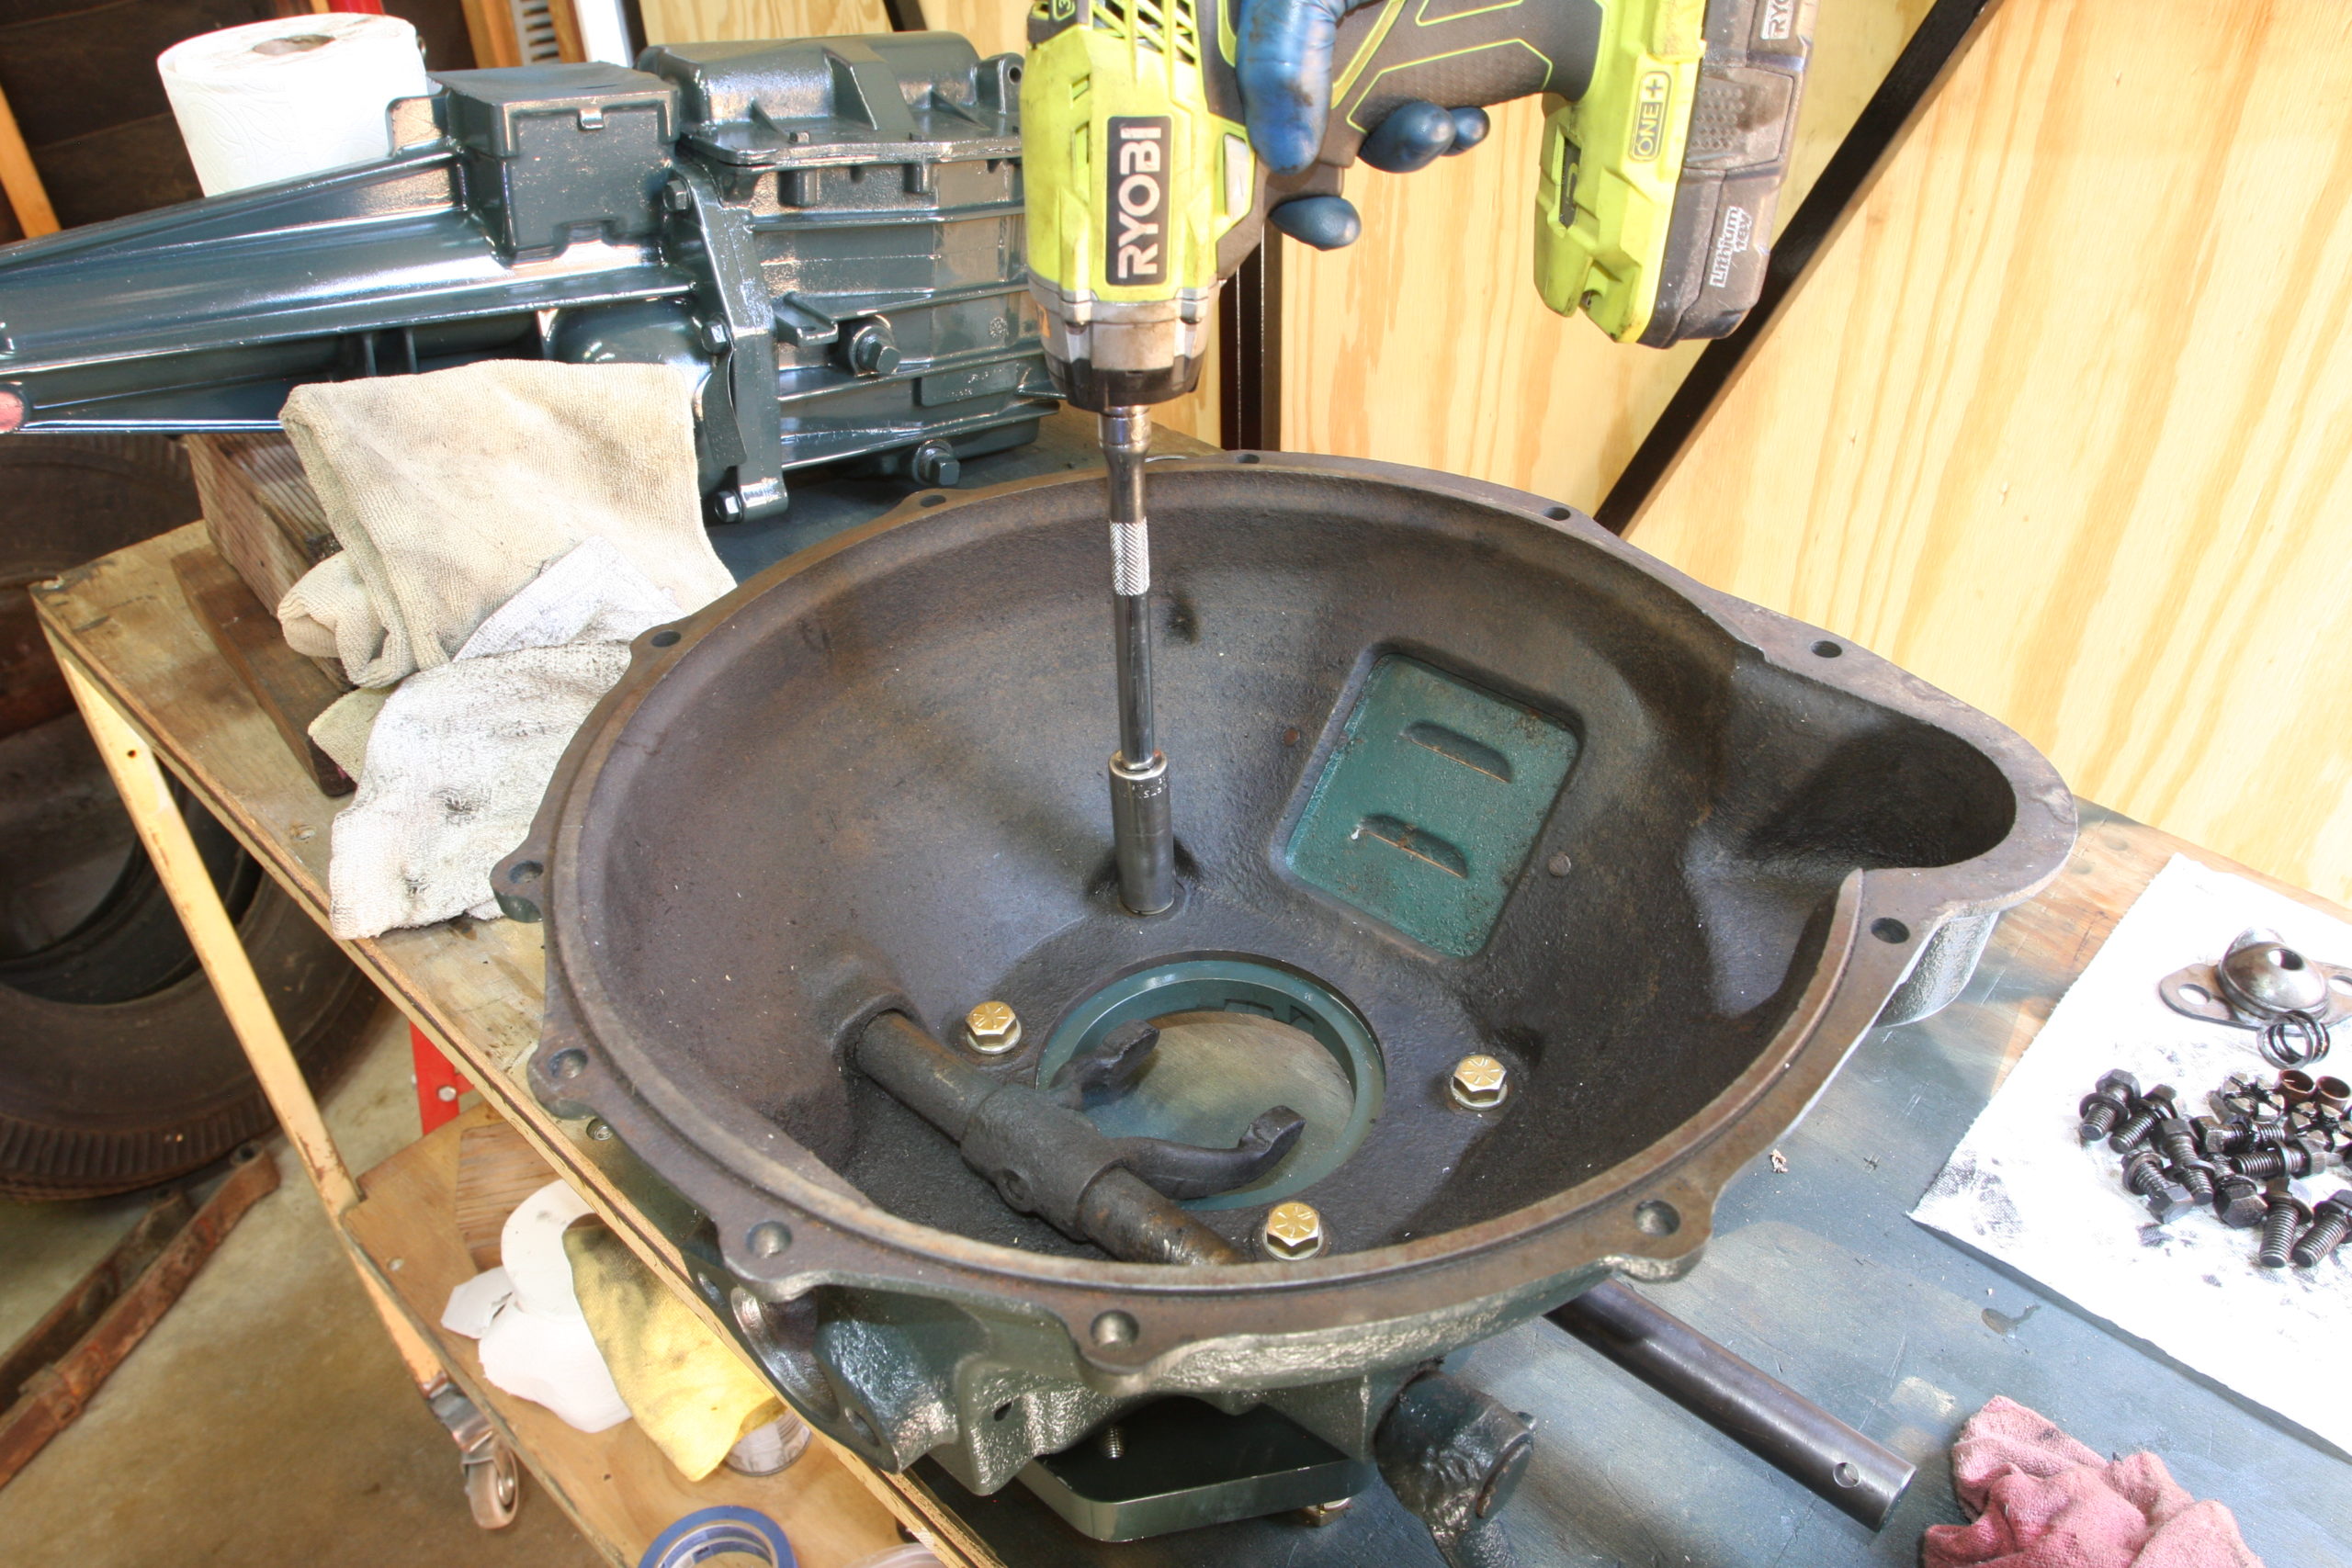
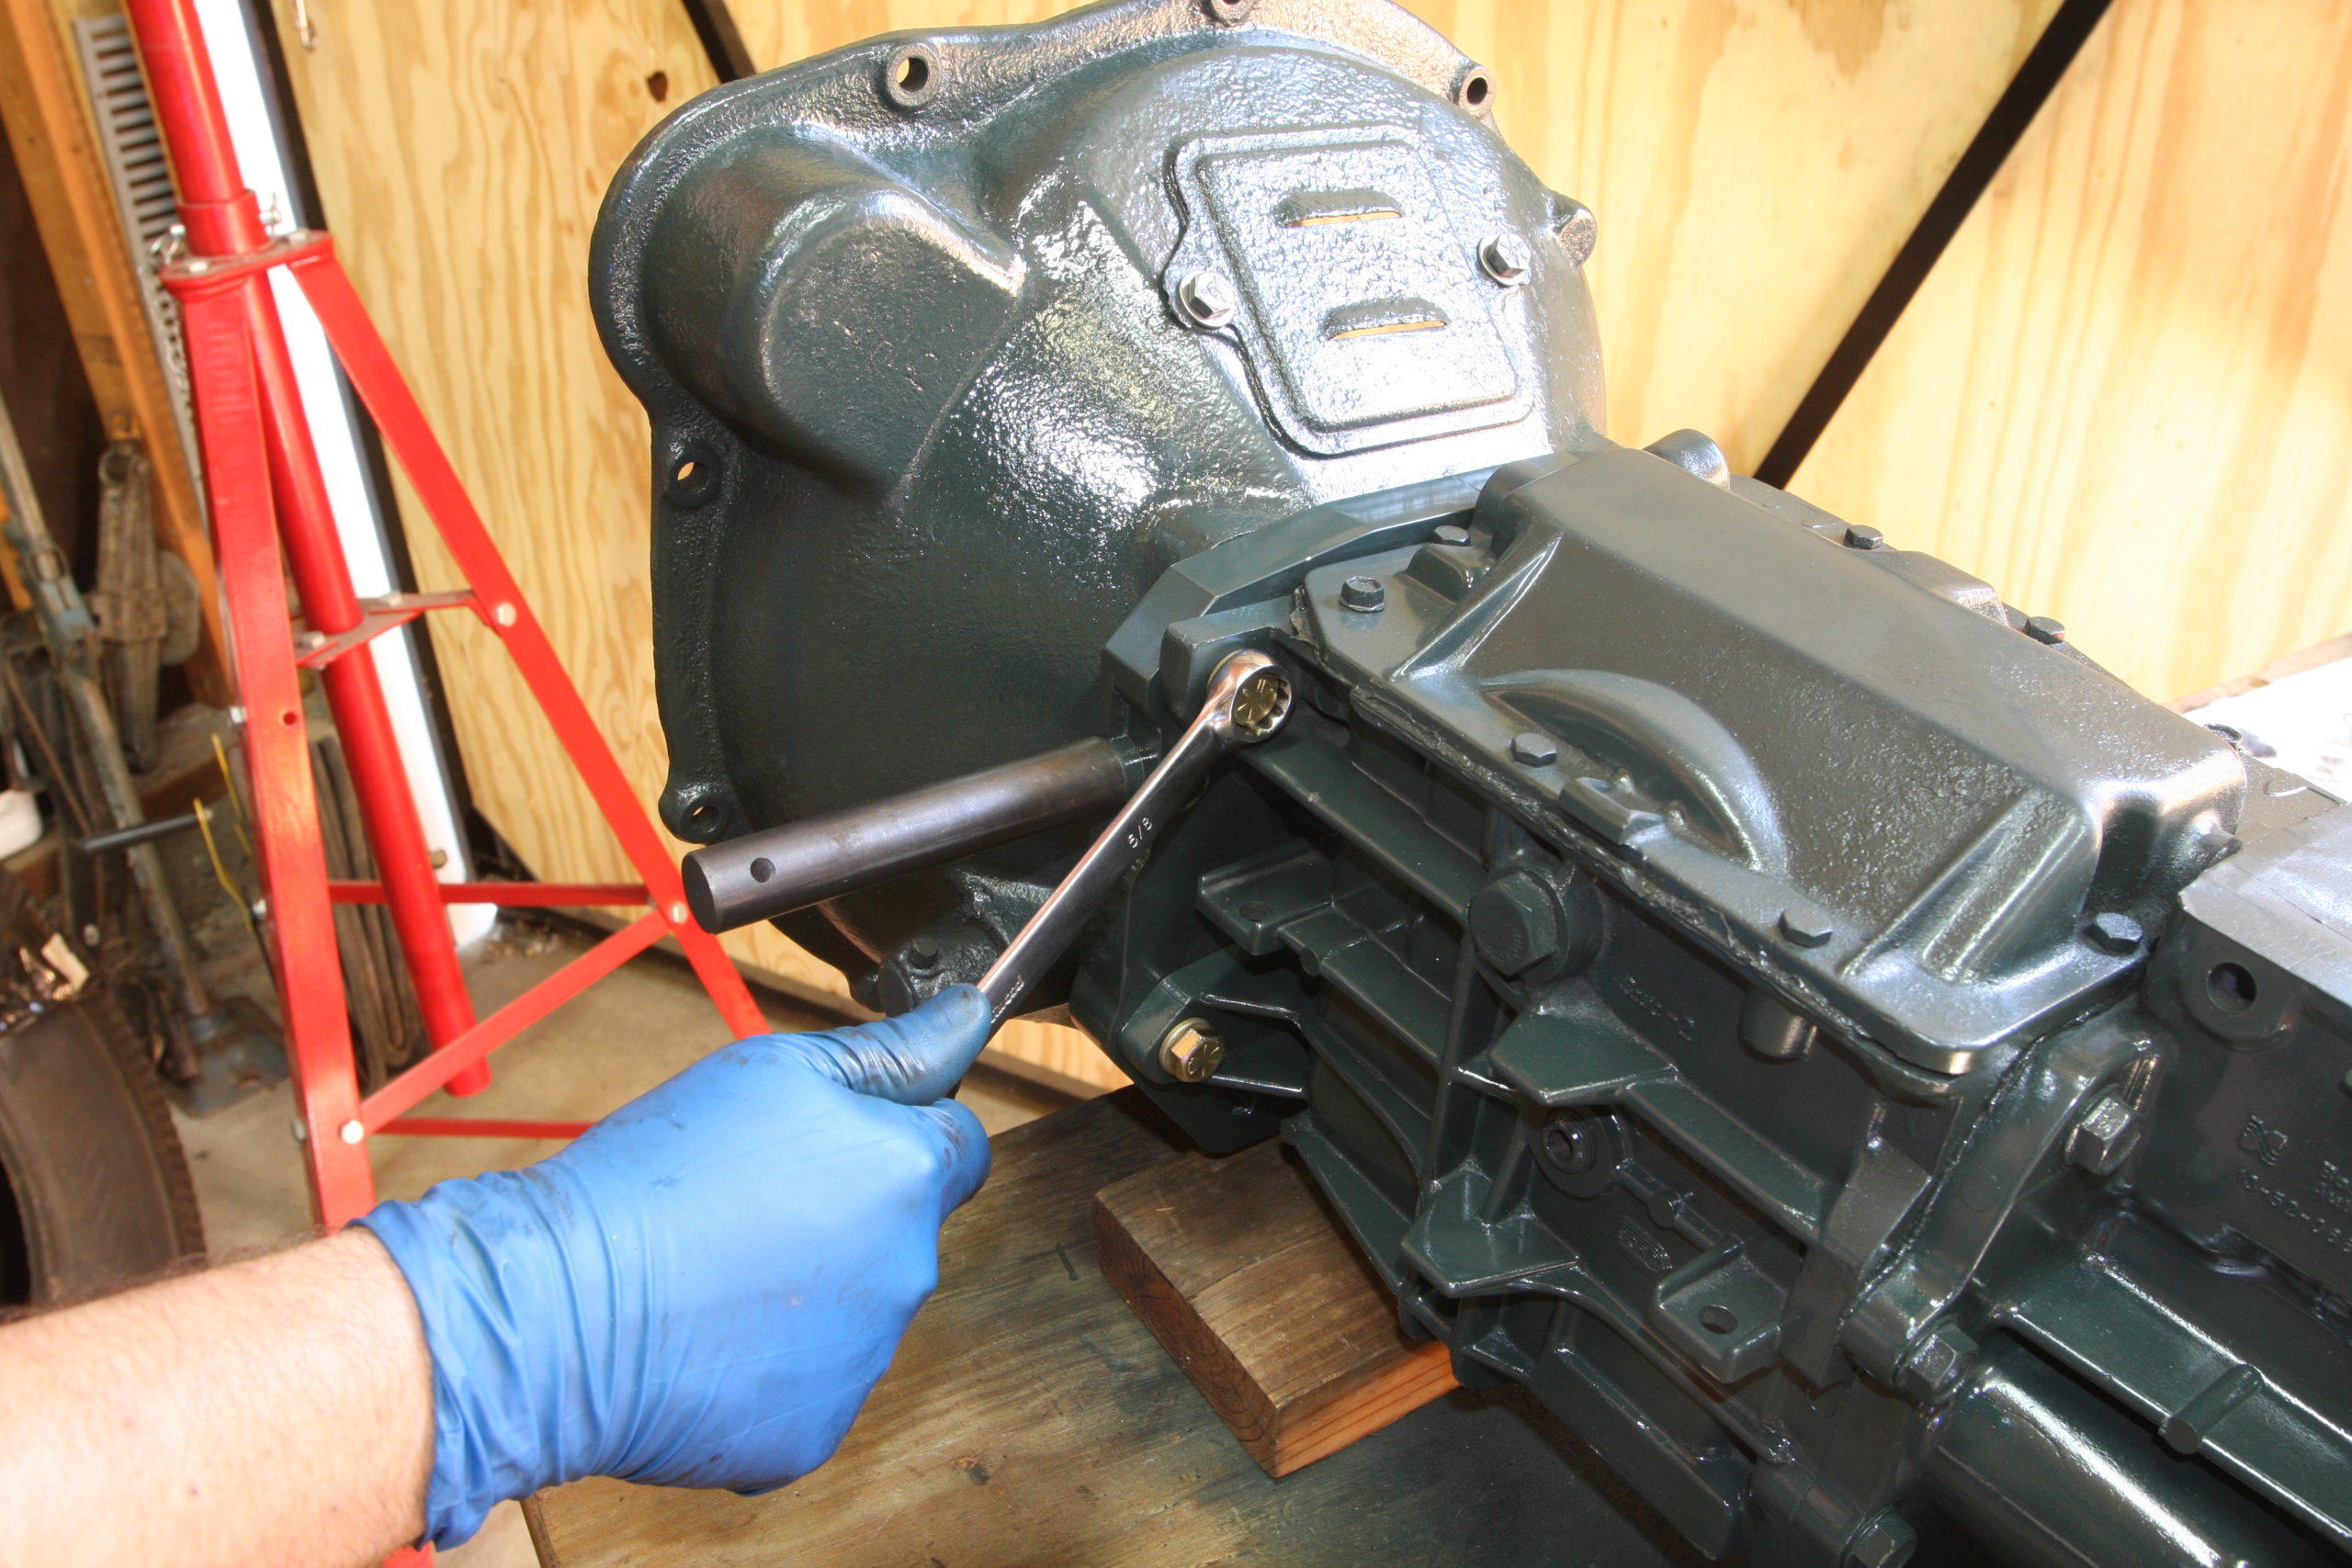
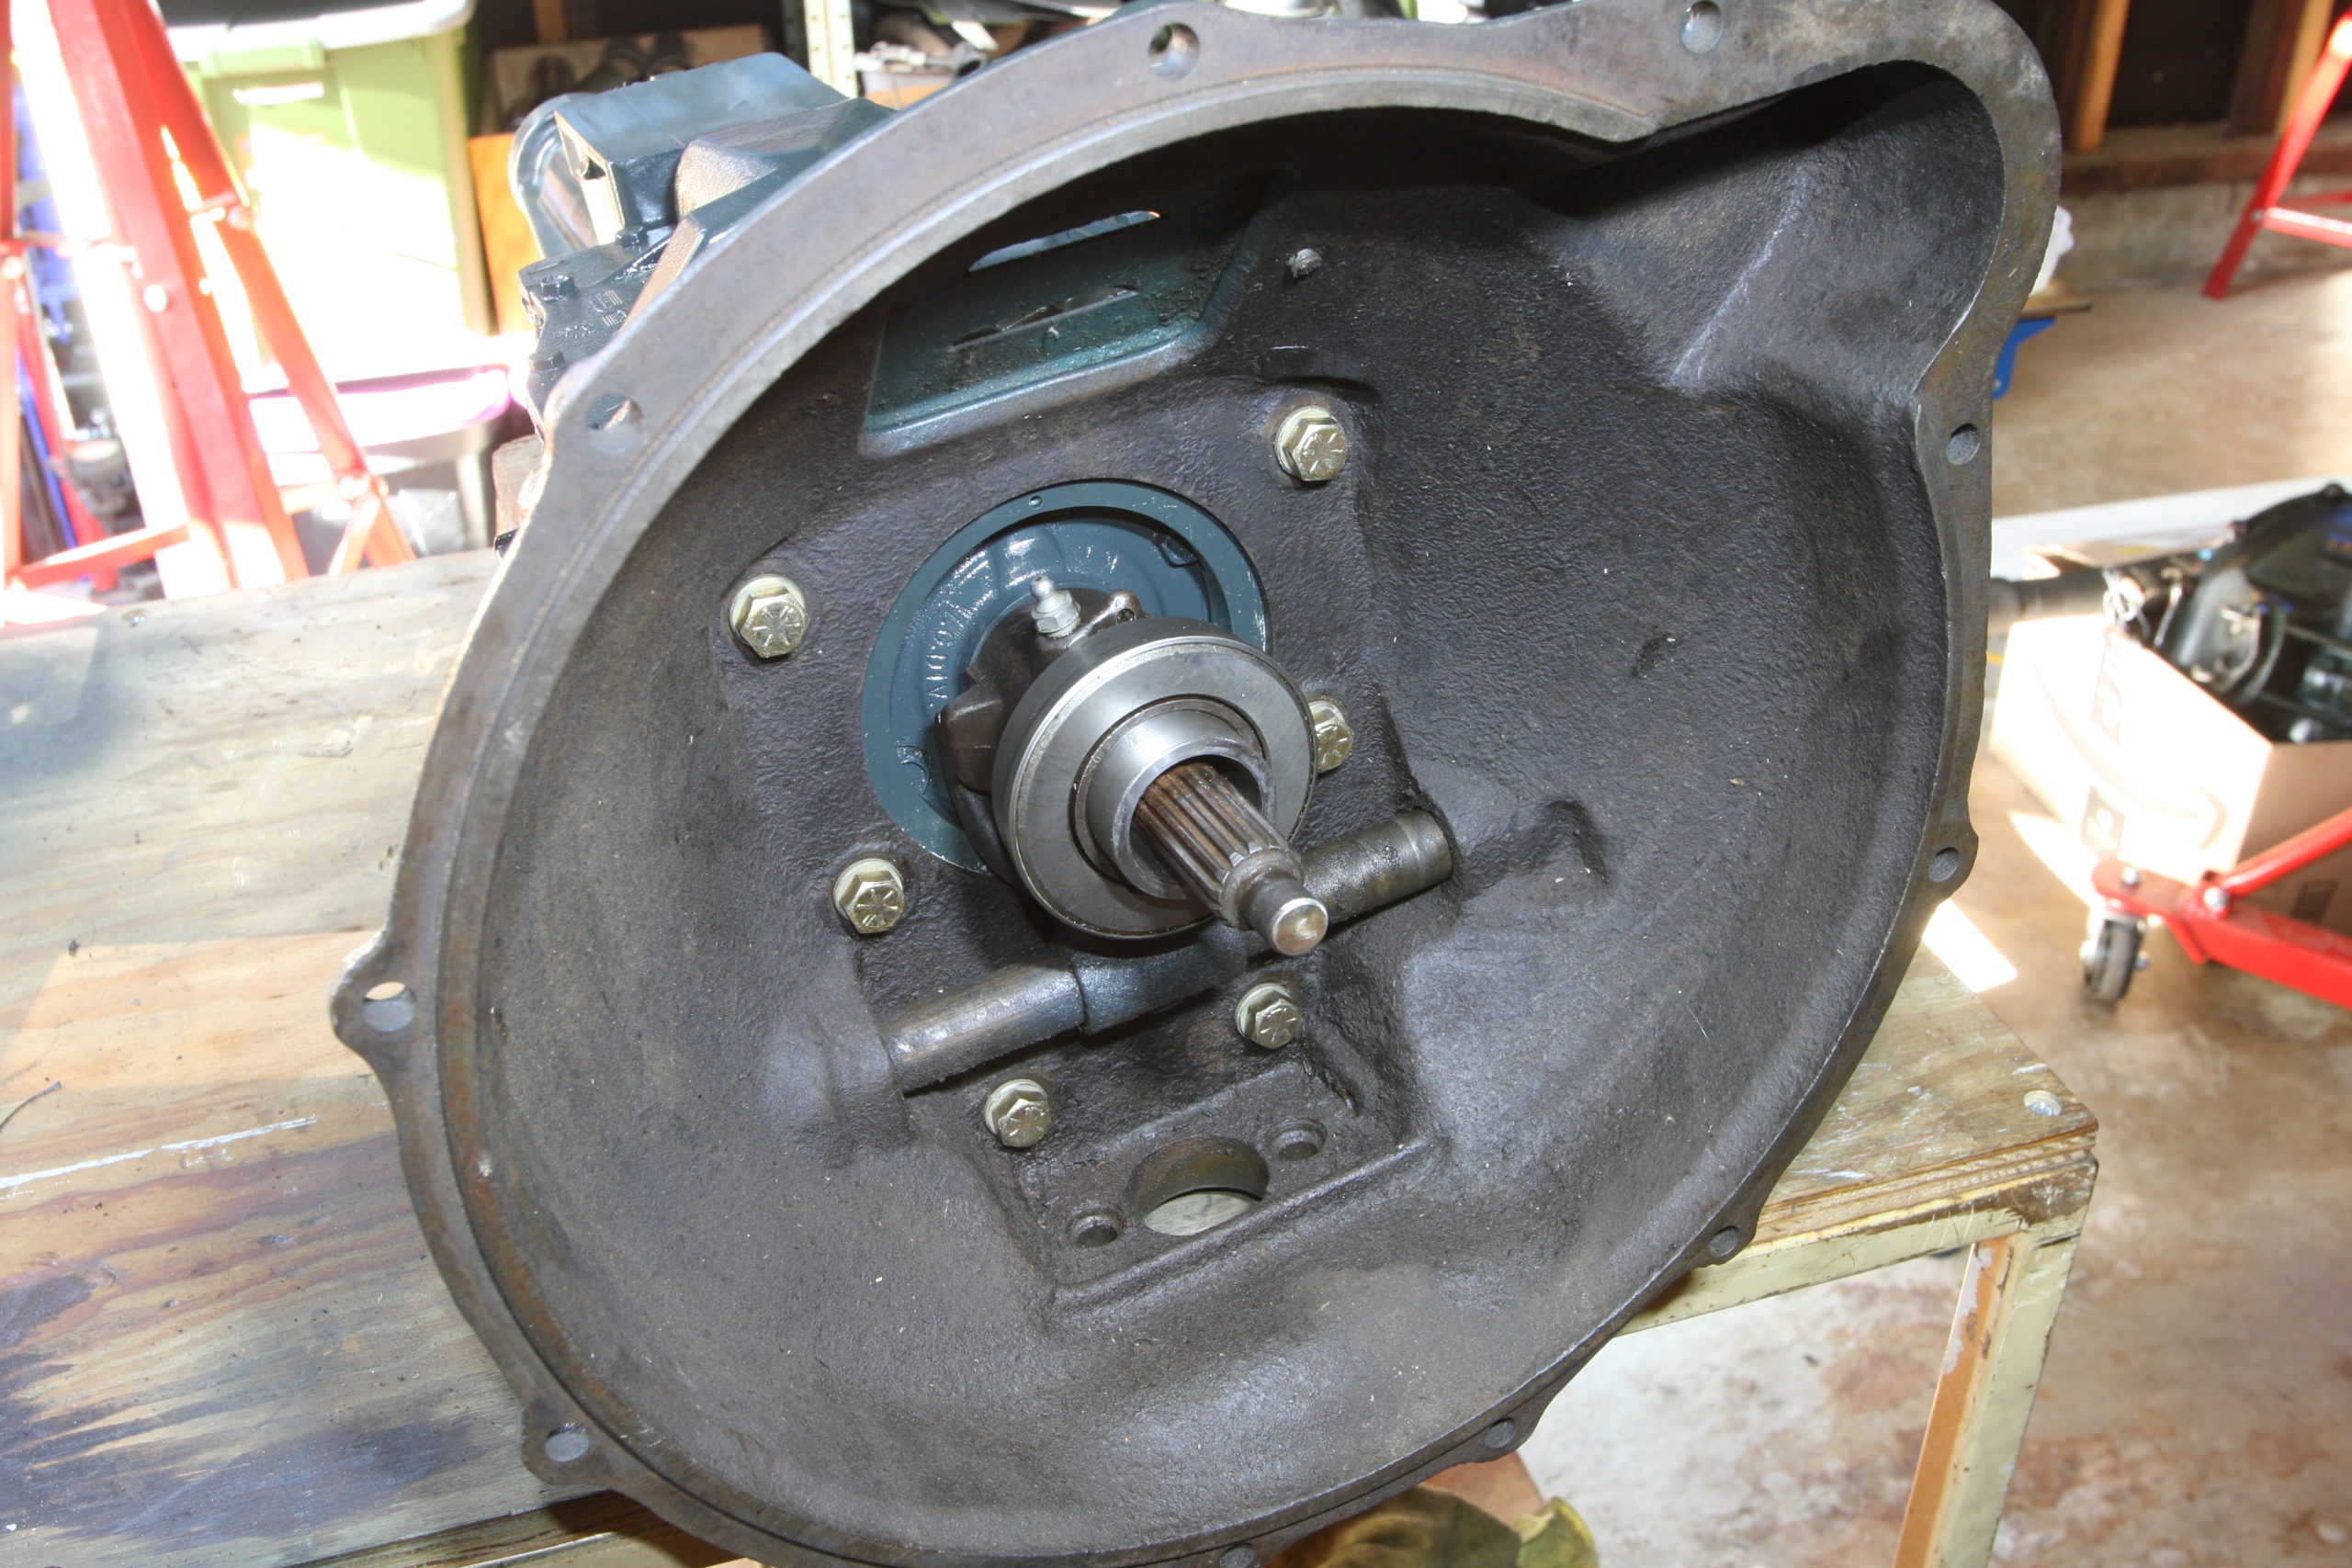
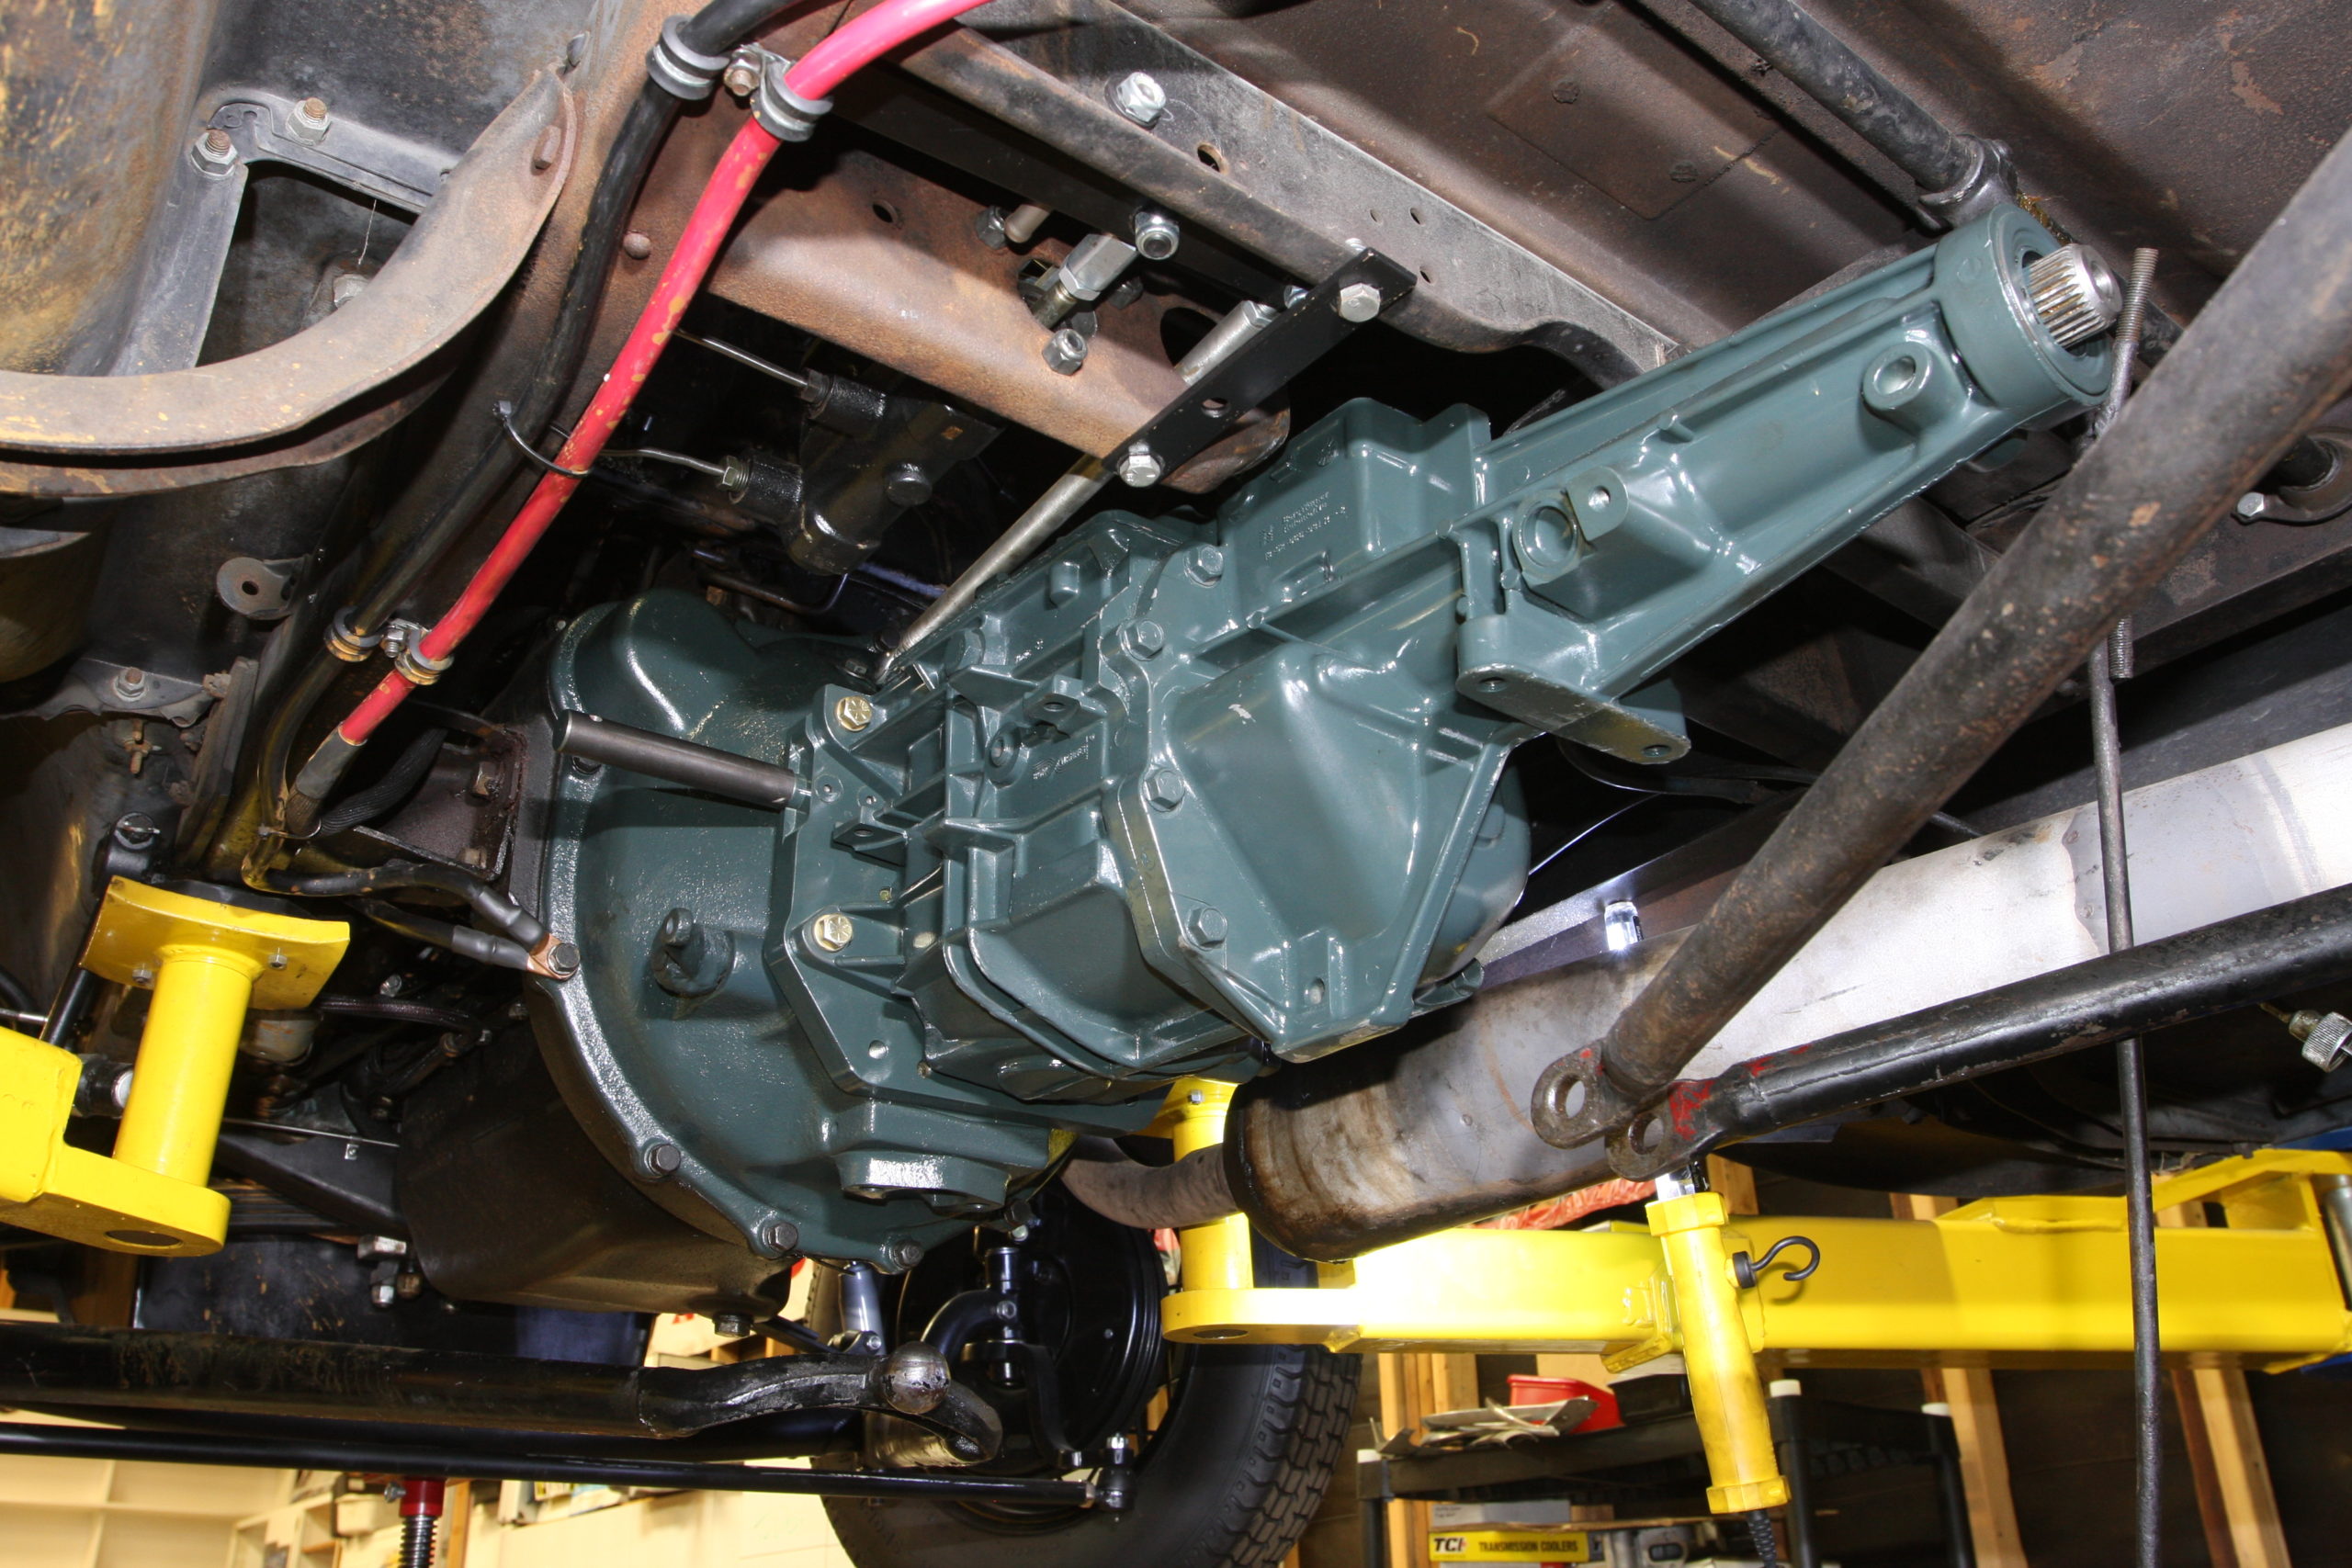
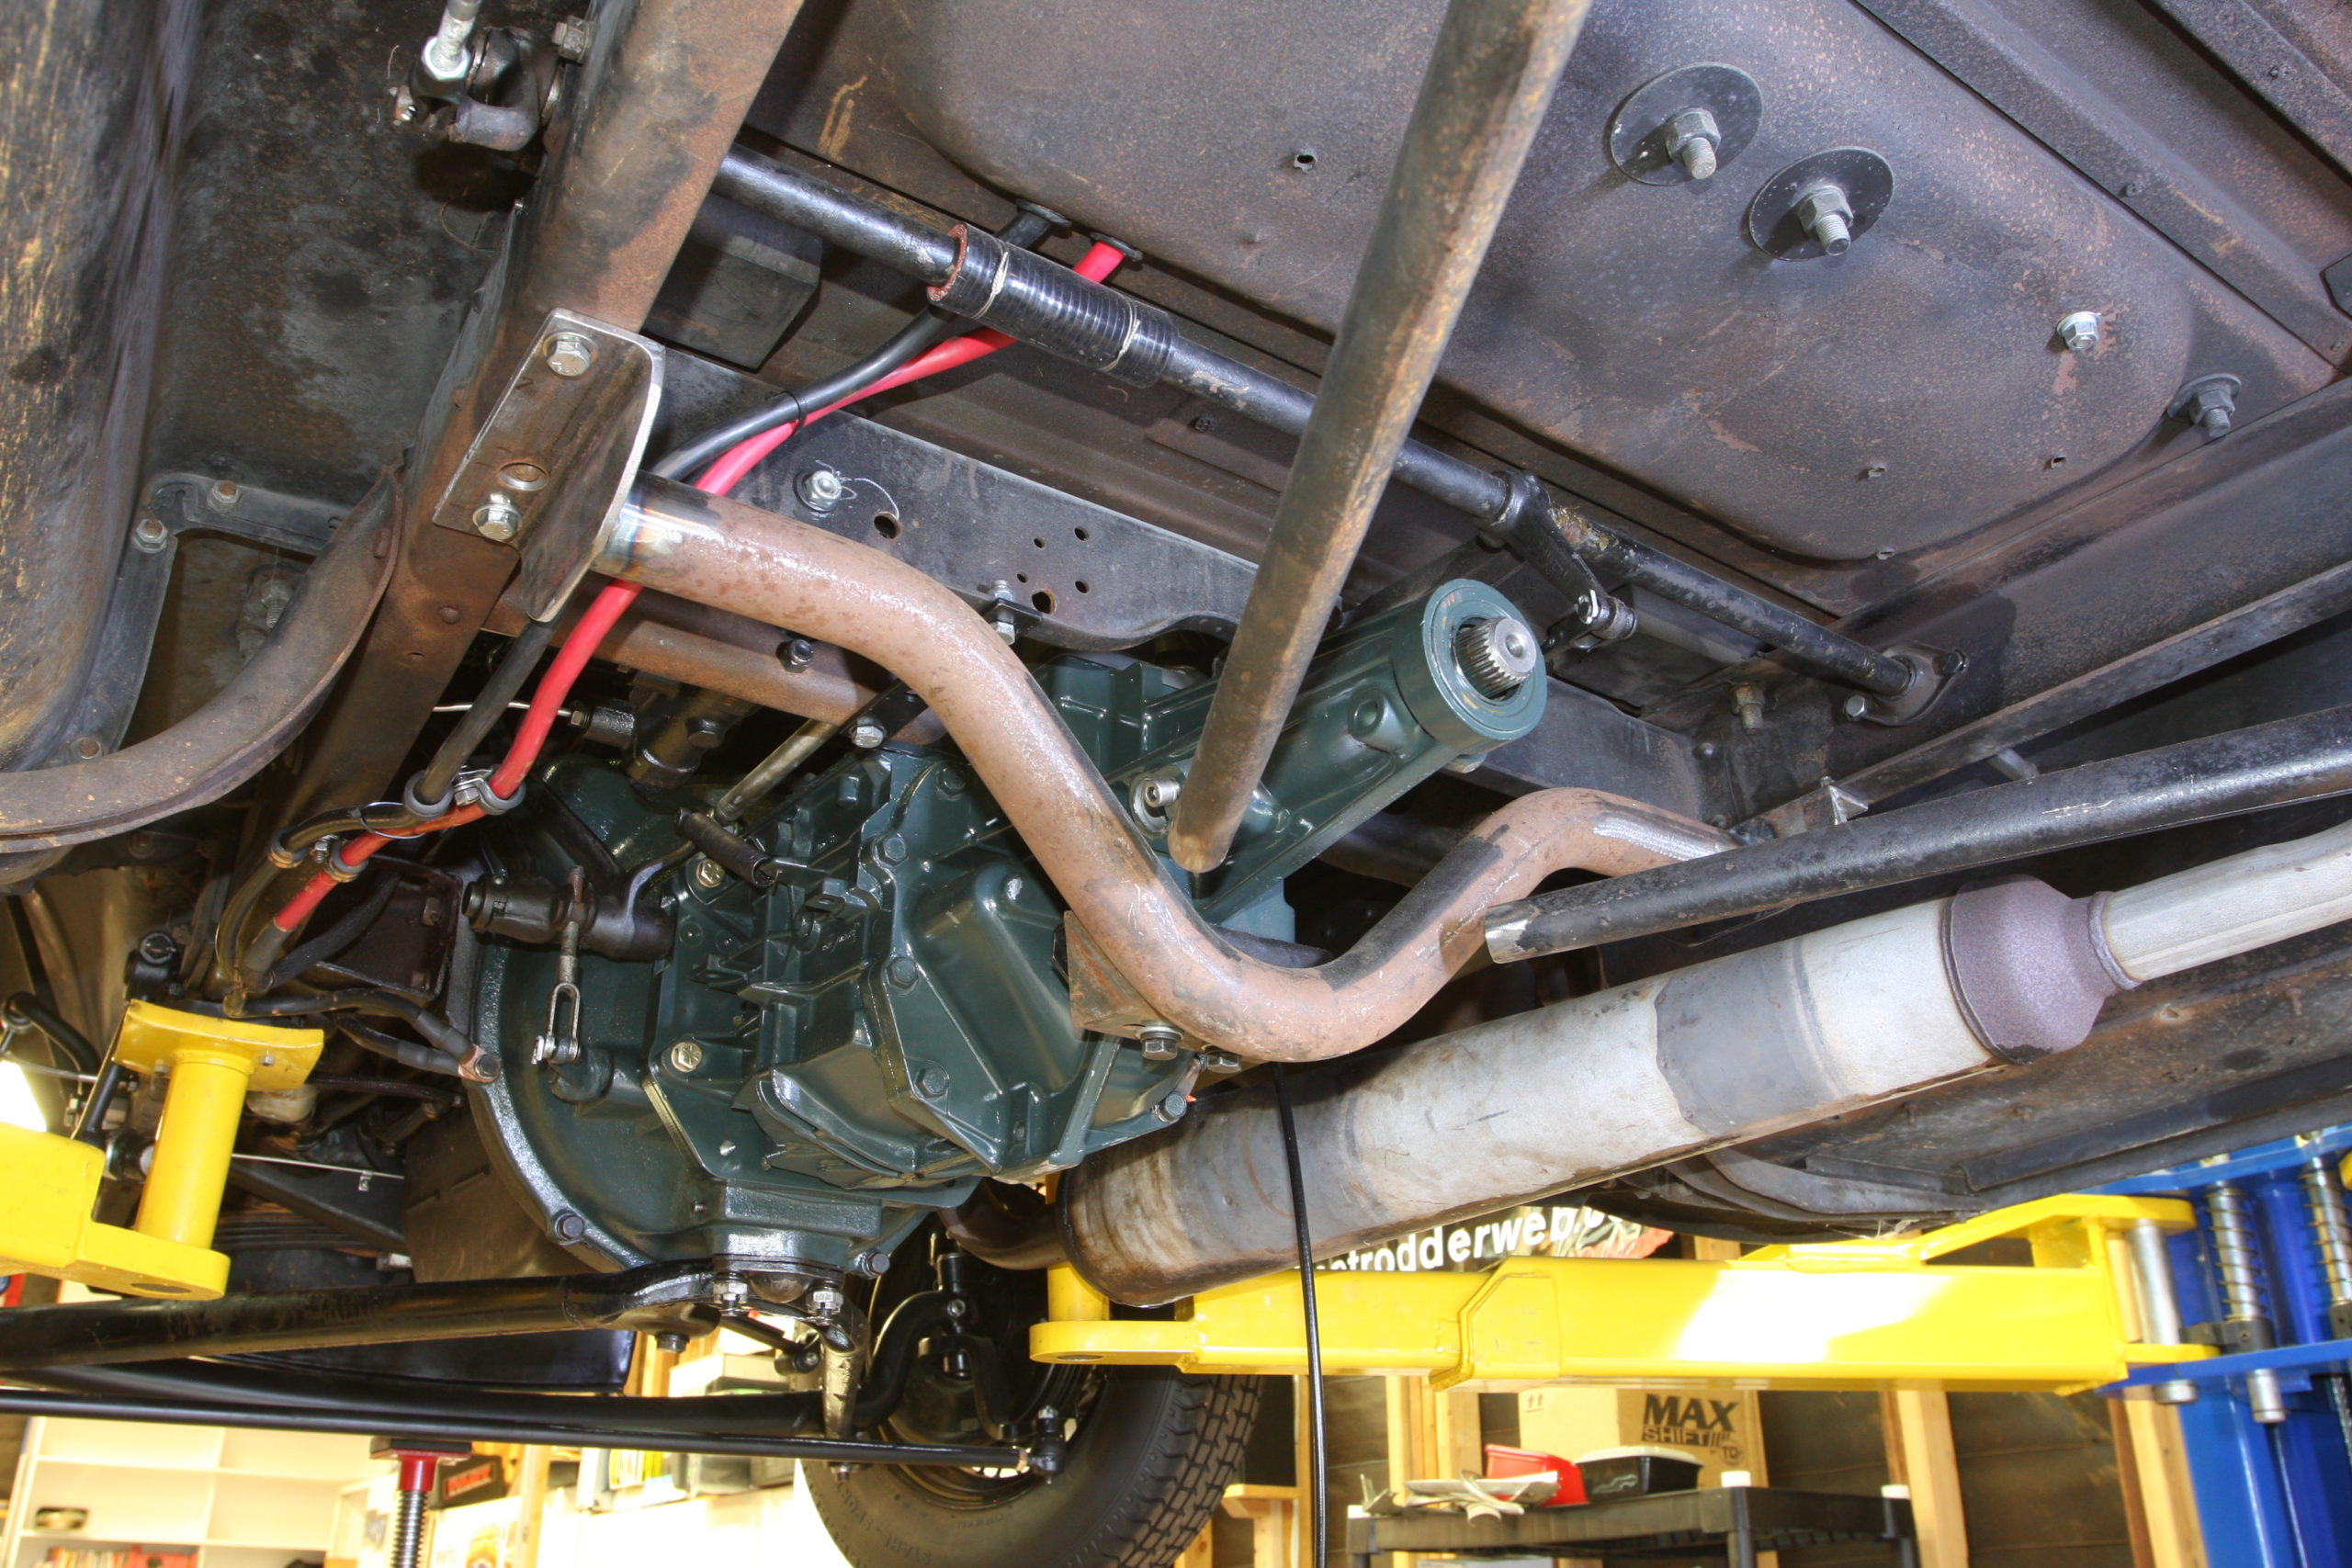
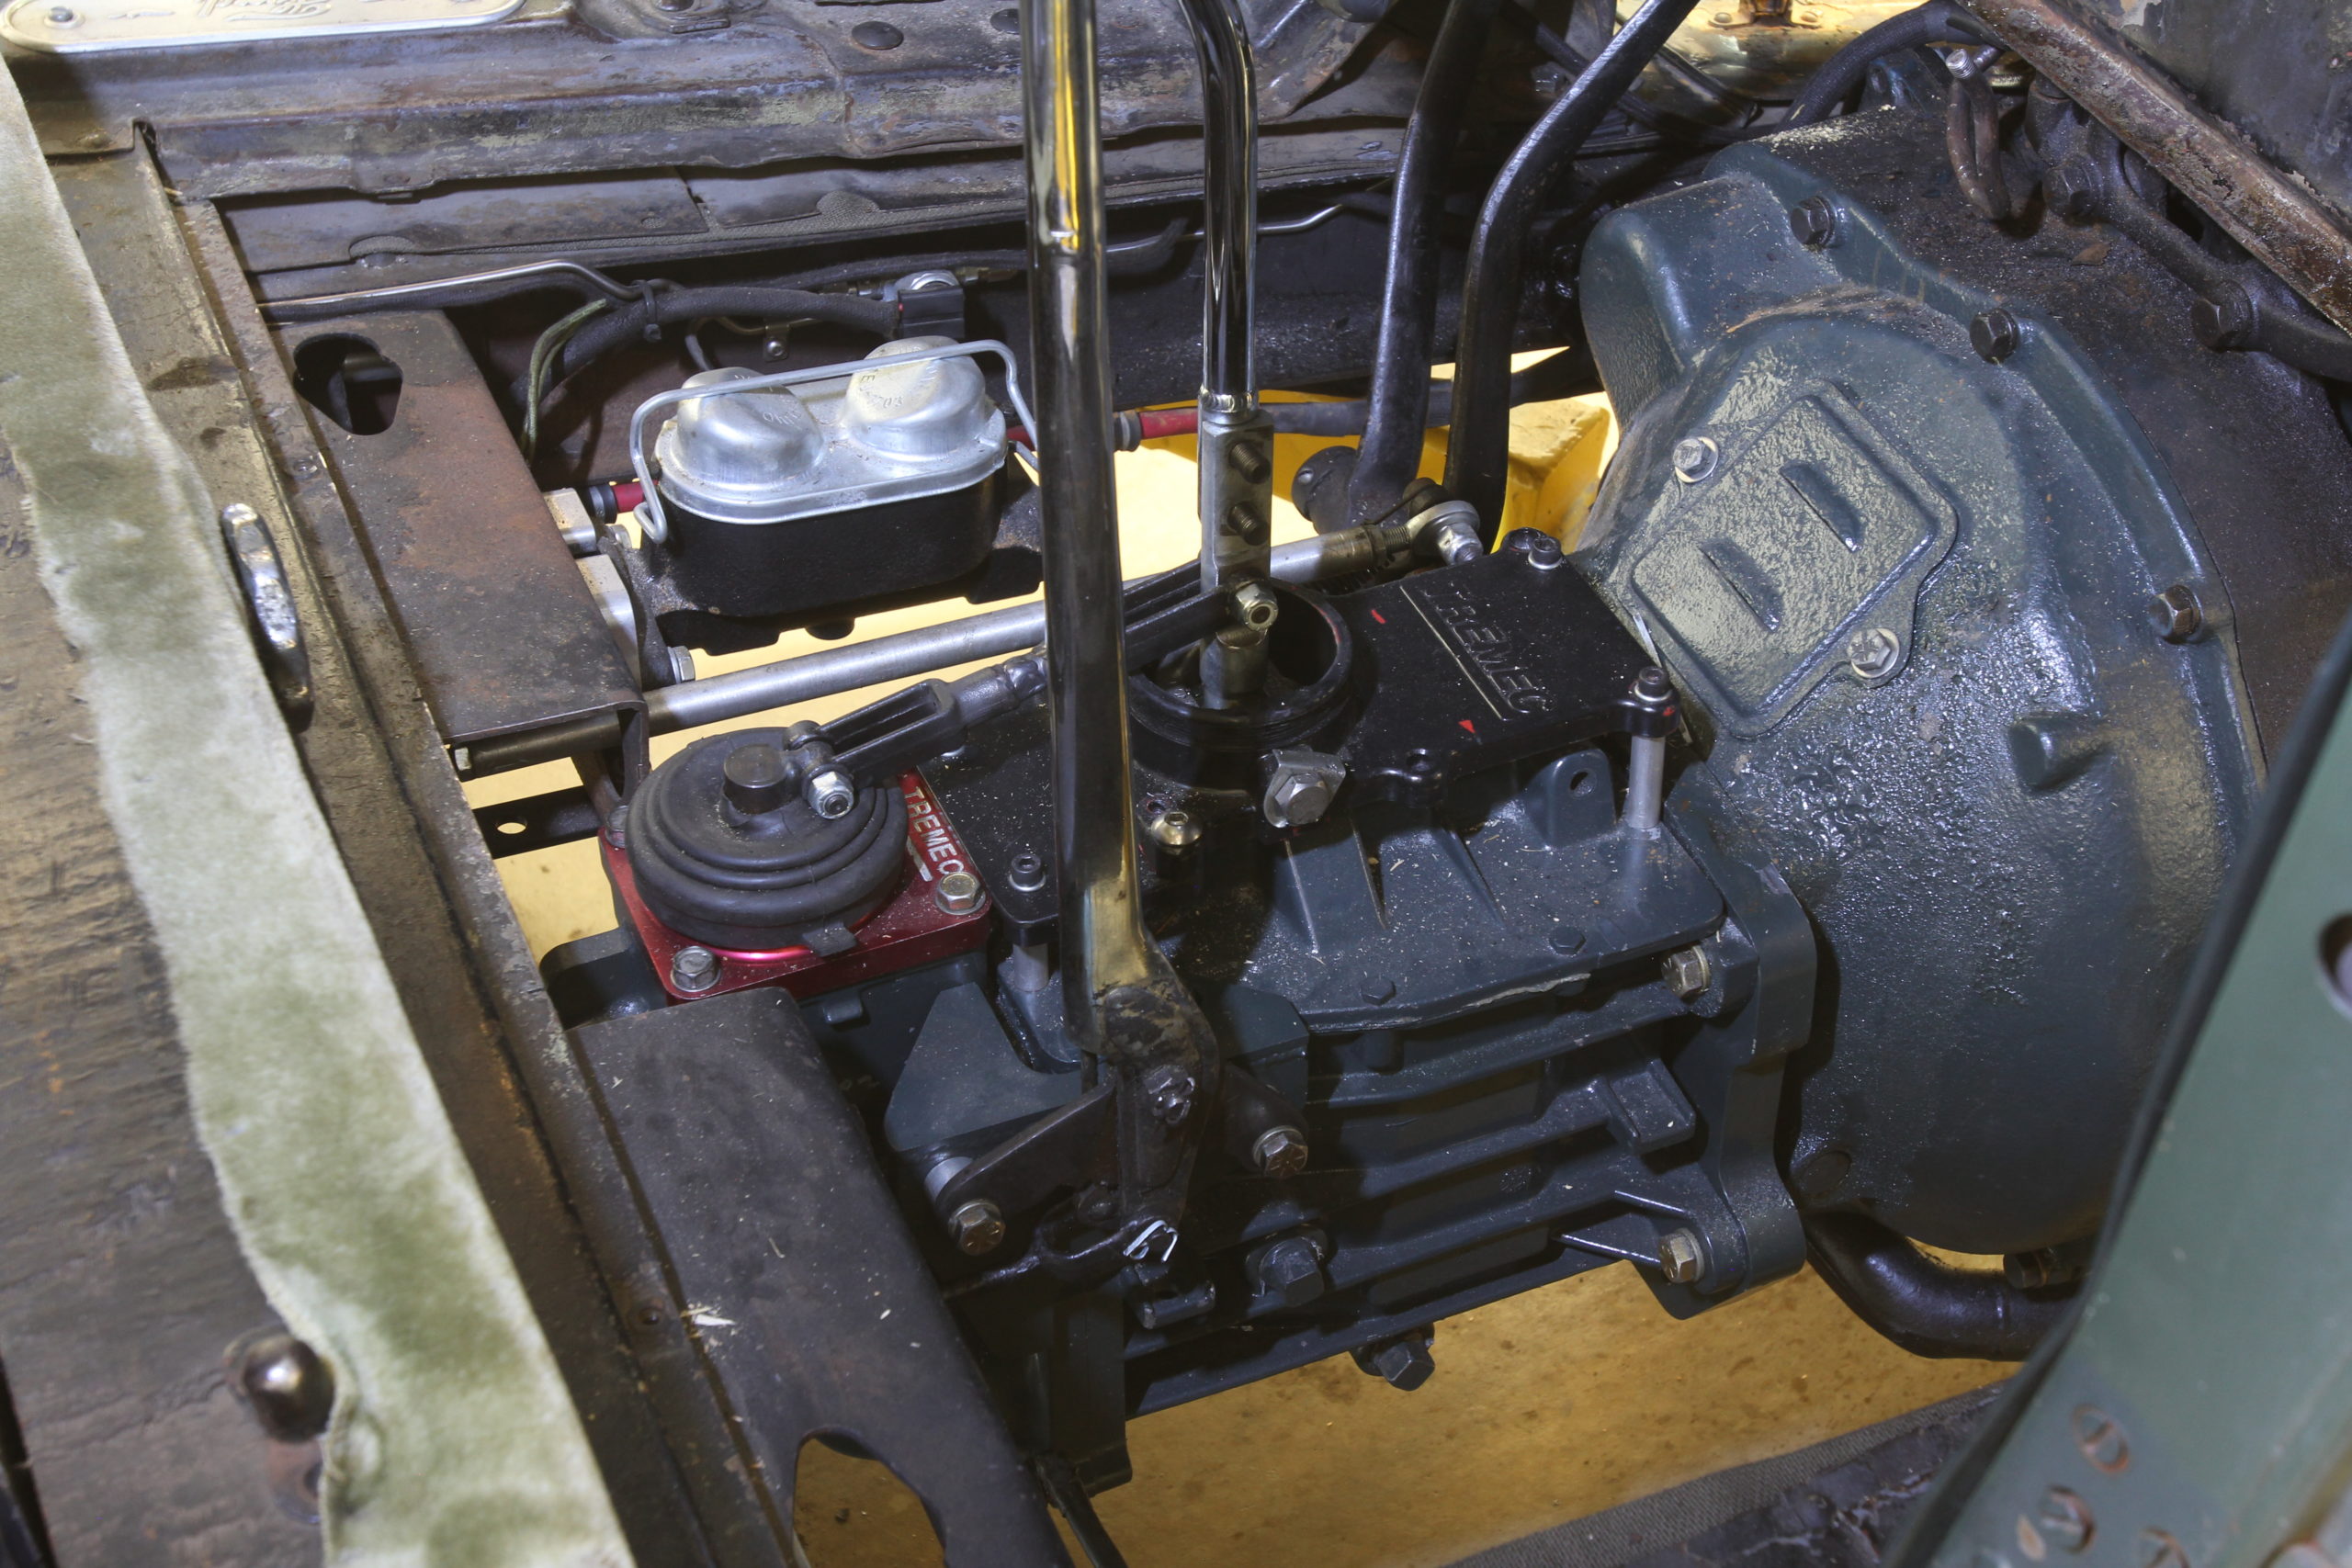
Vintage Metalworks’ kit is designed to be used with a Ford AA bellhousing, found on the larger trucks of the same era (’28-32). The AA bellhousing is 2 1/2-inches shorter than the stock Model A bellhousing, which means three things; the input shaft on the T5 doesn’t need to be extended, the shifter (with an S10 tailshaft) is in front of the bench seat, and there is less conflict with the center crossmember. The AA bellhousing retains the same location for the front wishbone mount as the Model A, so that remains uneffected. The only problem with using the AA bellhousing is that the original unit had an integrated pedal shaft and the AA does not. That required some careful thinking by Dave, but he came up with a clever design by mounting the pedal shaft on the same adapter plate that mates the T5 to the AA bellhousing; problem solved! As it turns out, this locates the pedals in the stock location, so further modifications are unnecessary. This takes care of mounting the transmission, but there are a few other components required to make everything work. For those ends, Vintage Metalworks offers a clutch that’s designed to fit the diameter/spline of the T5’s output shaft and fits the stock Model A pressure plate. A collar adapter is also provided that slides over the T5 output shaft so that the original throwout bearing can also be used. A pilot bearing that supports the T5’s input shaft inside the Model A flywheel is the last item in the kit.

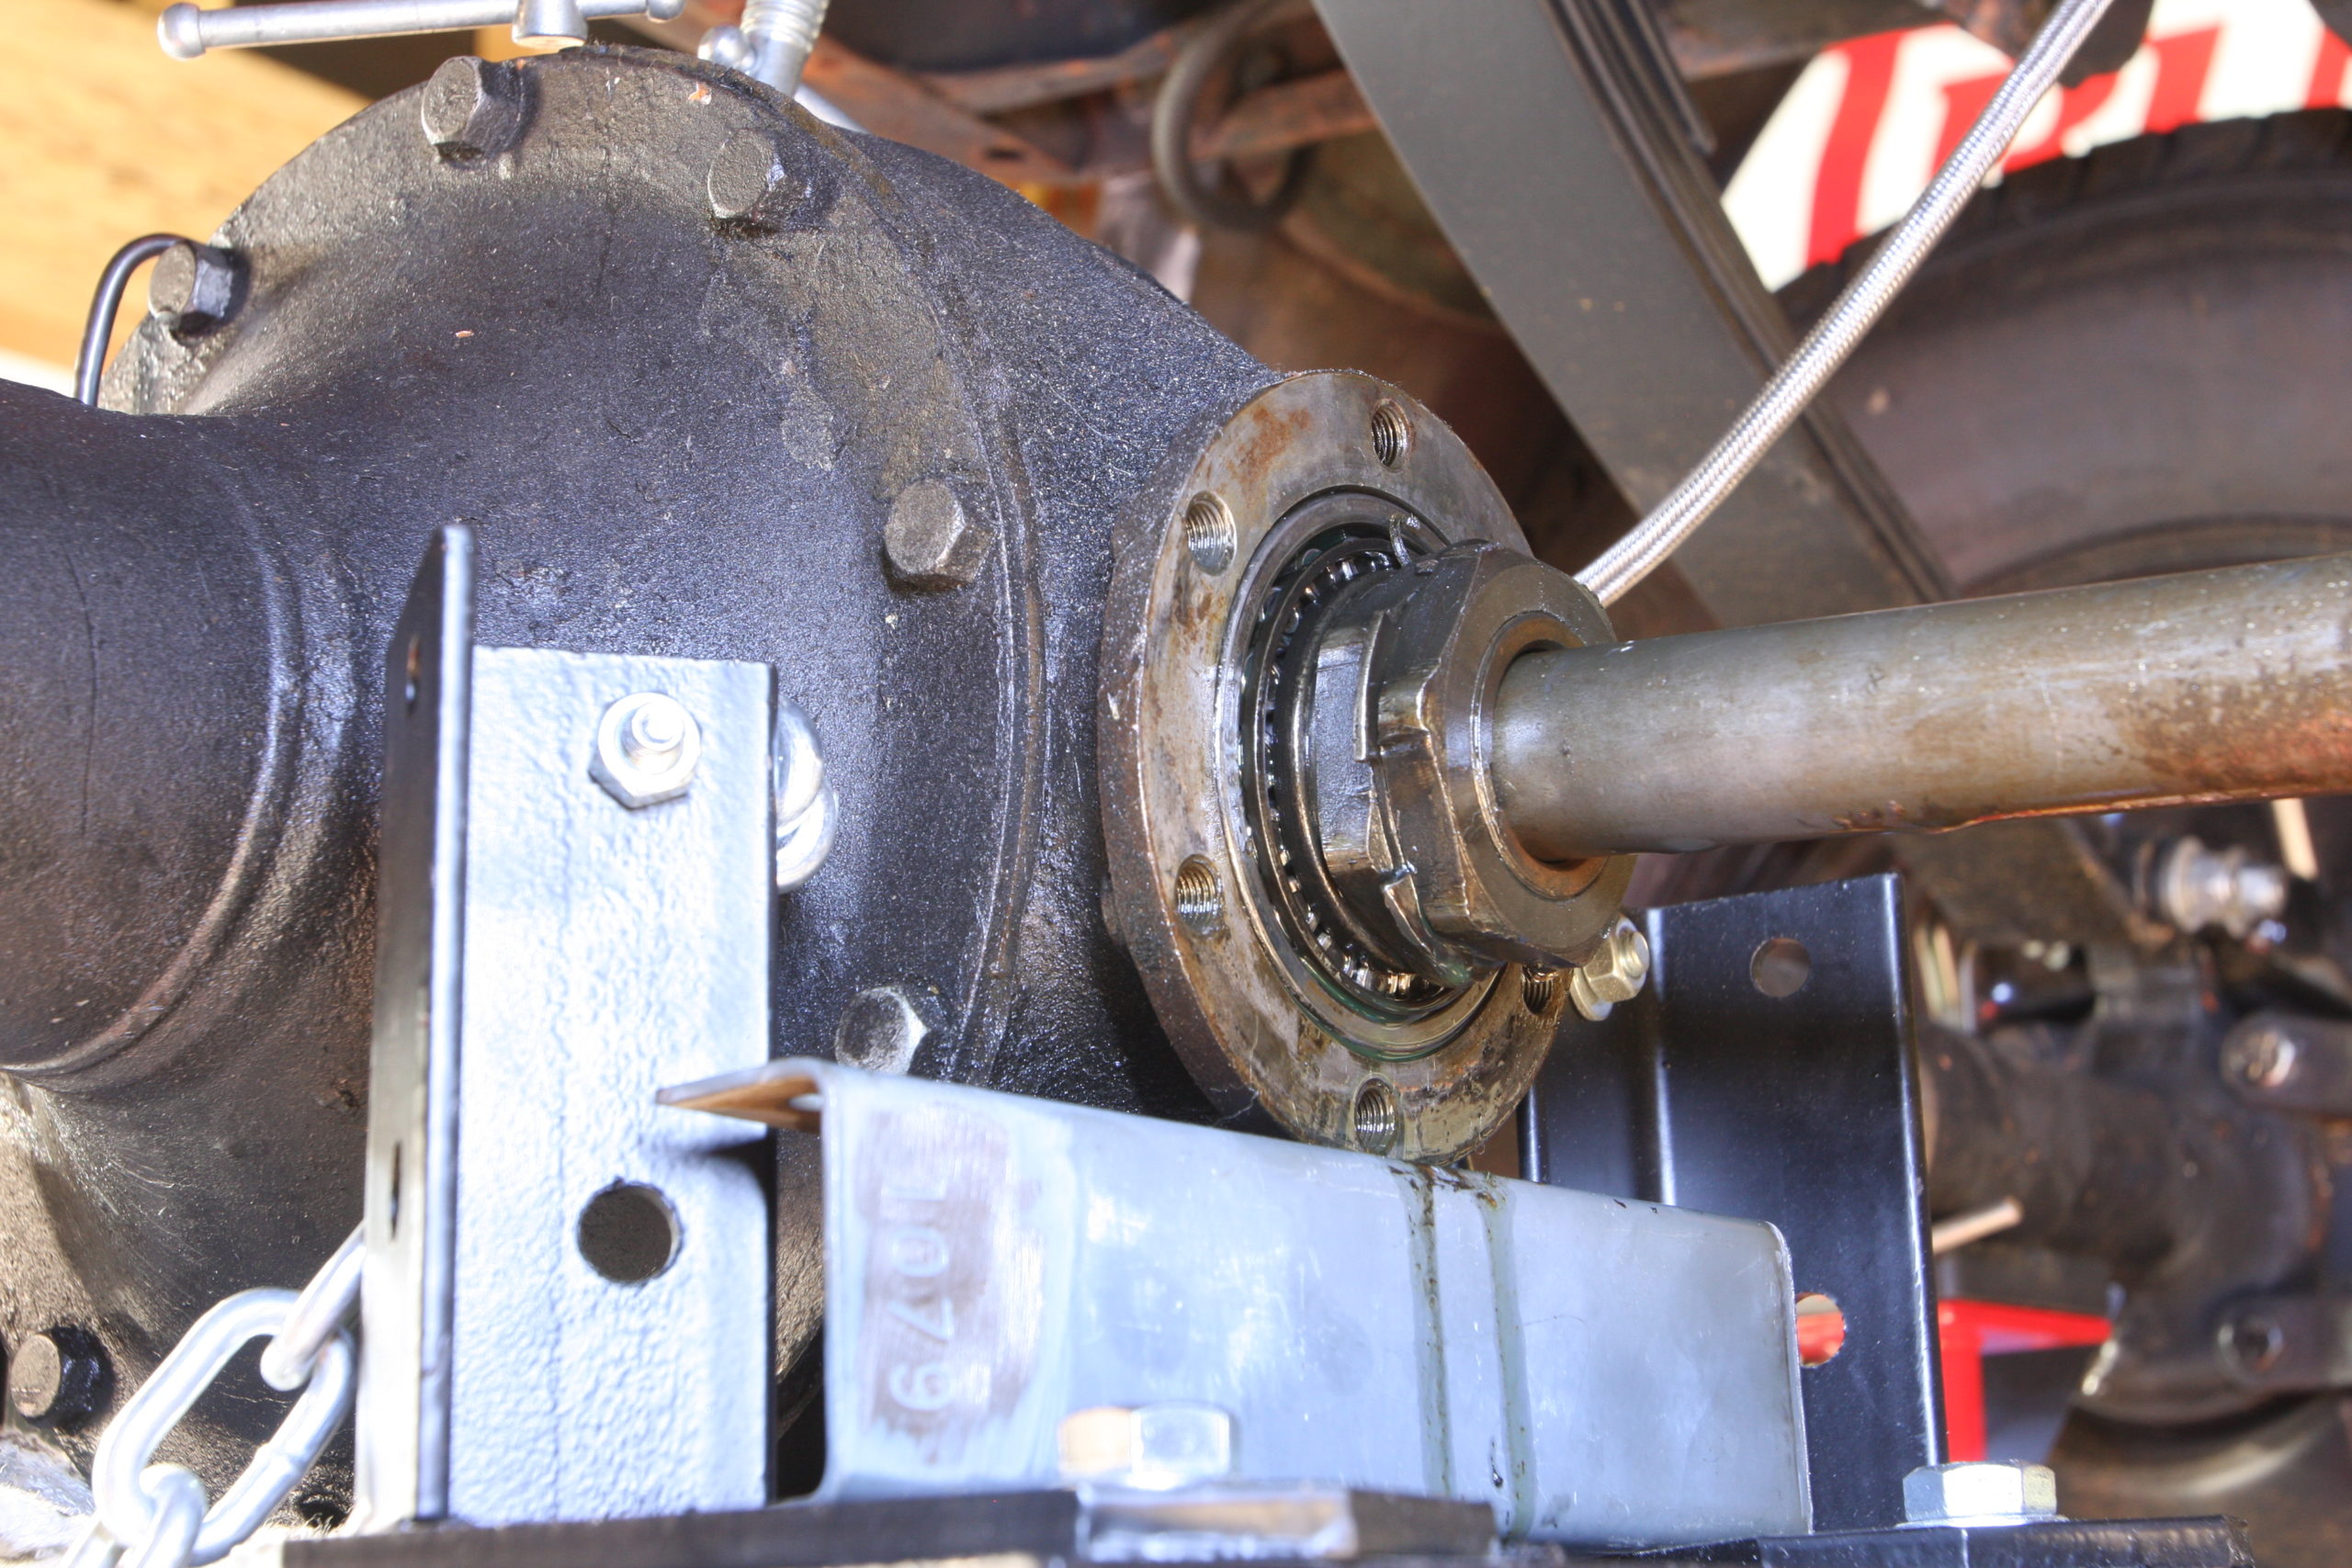
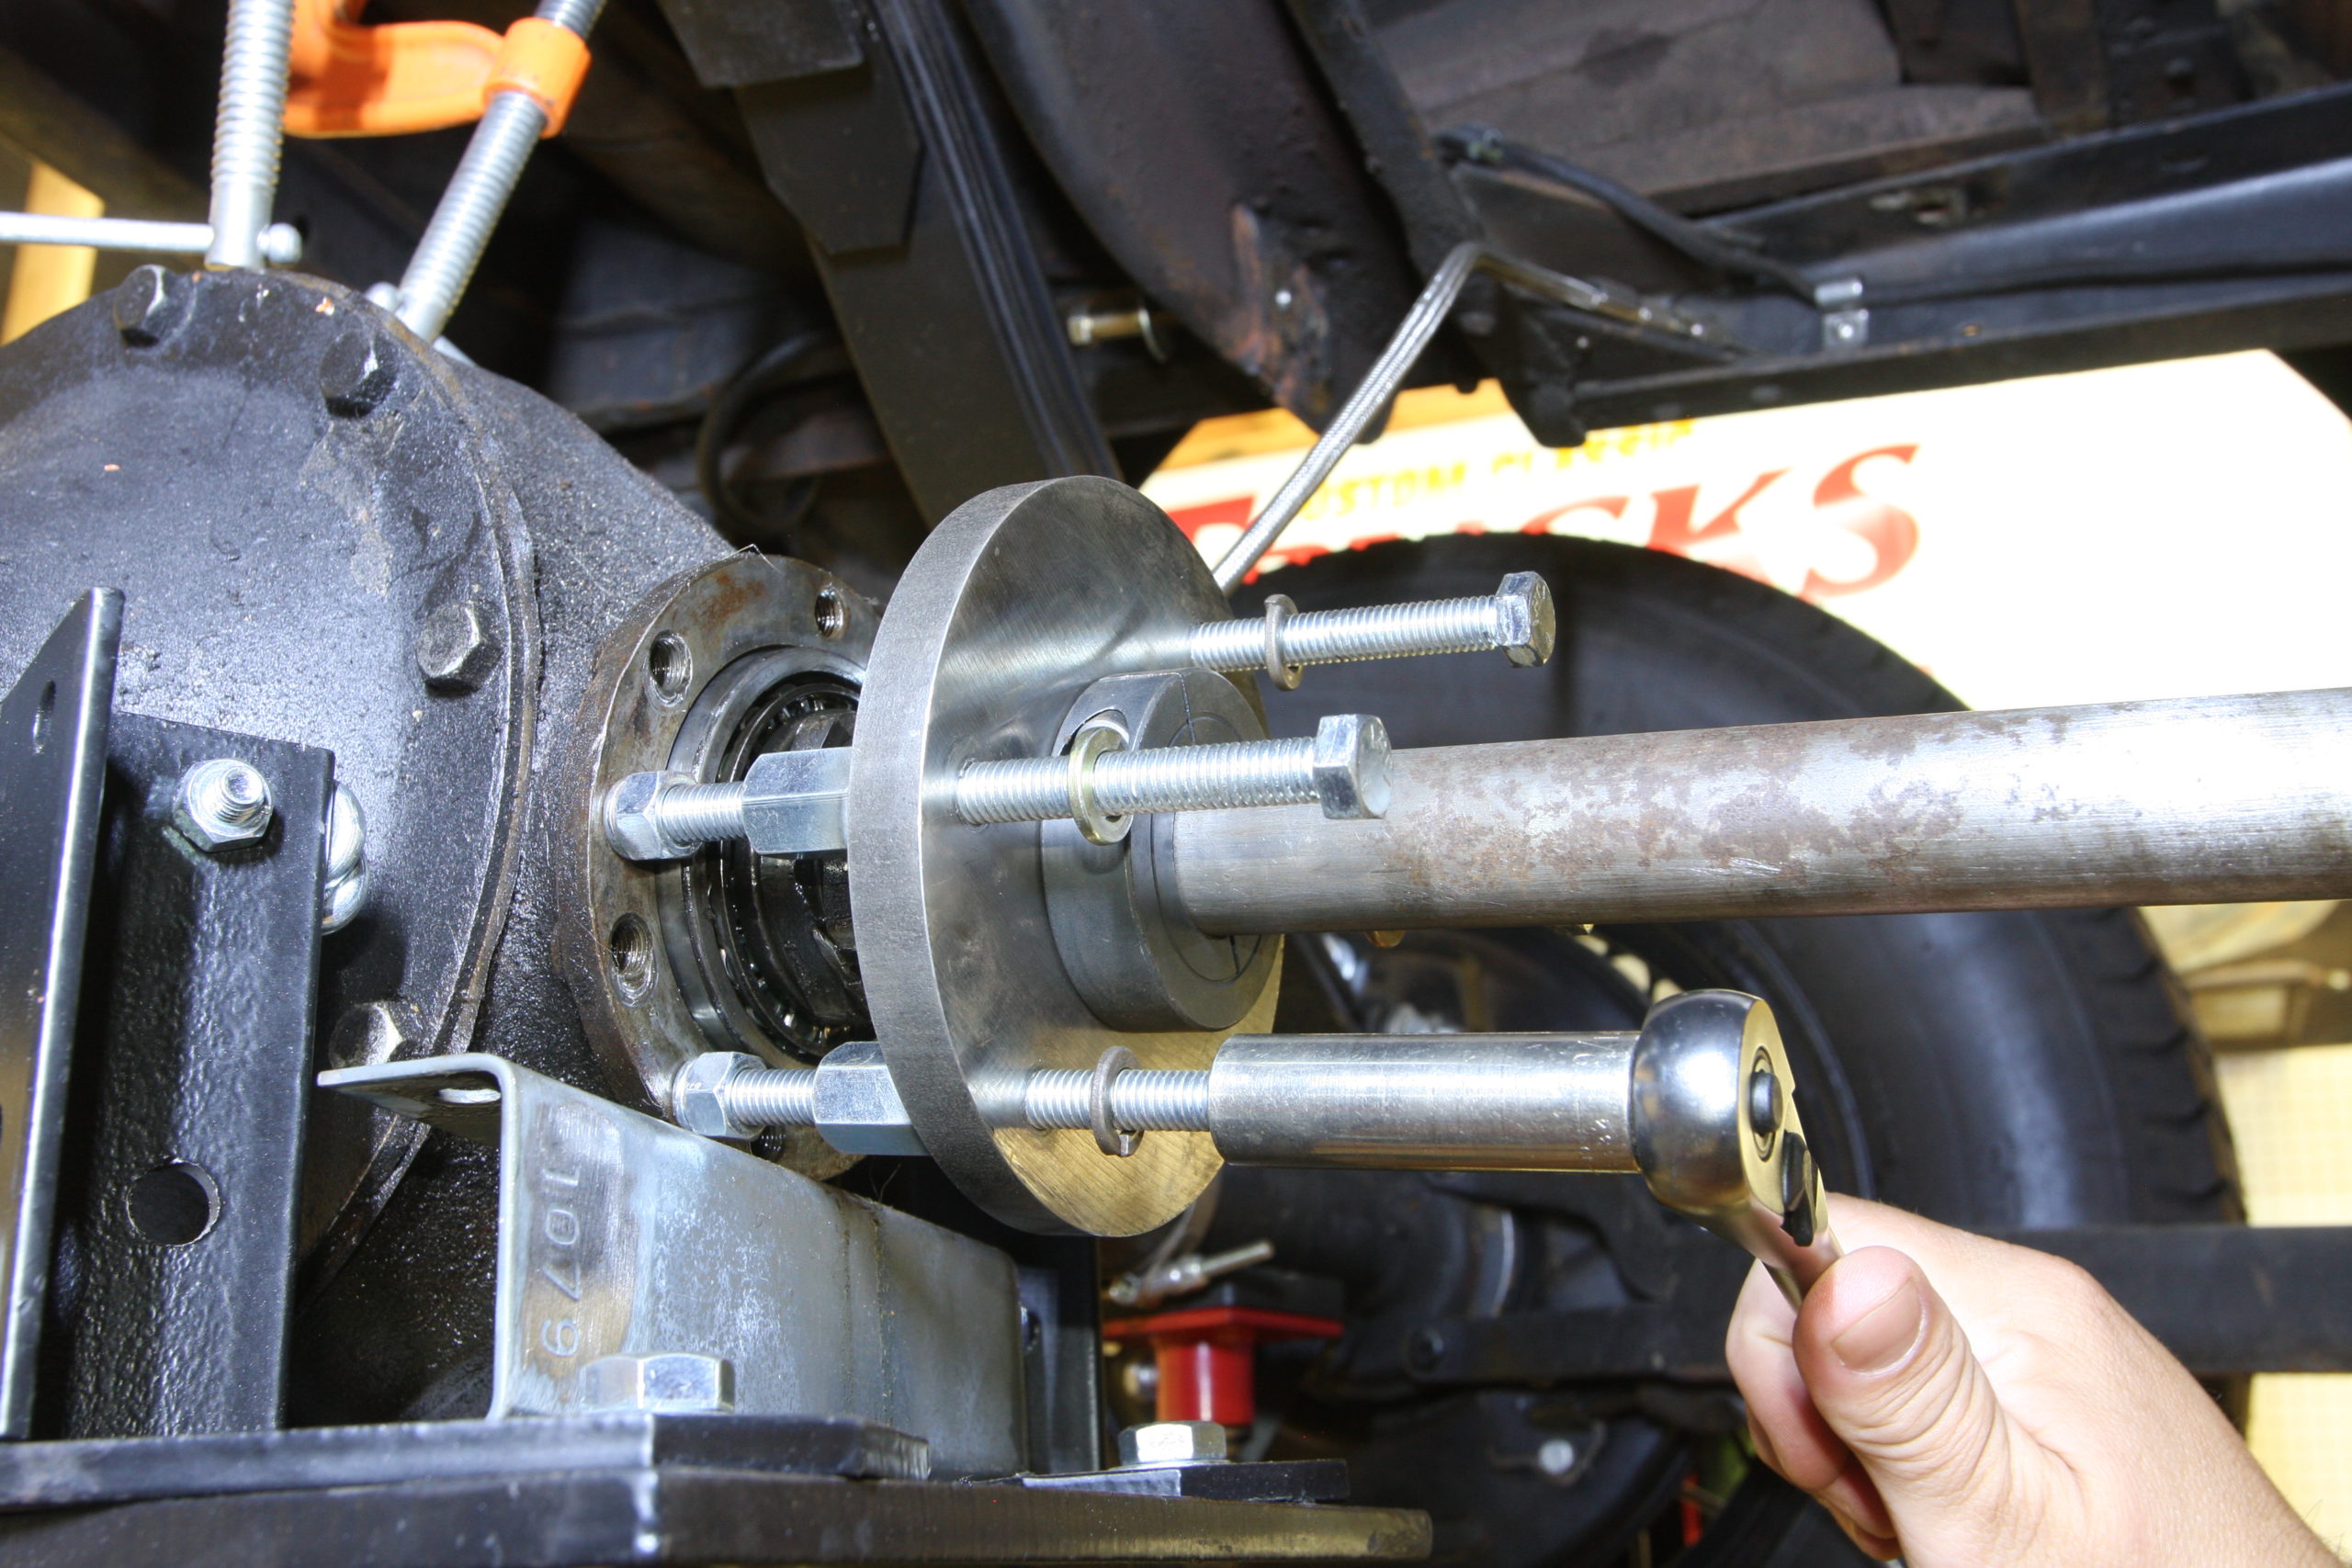
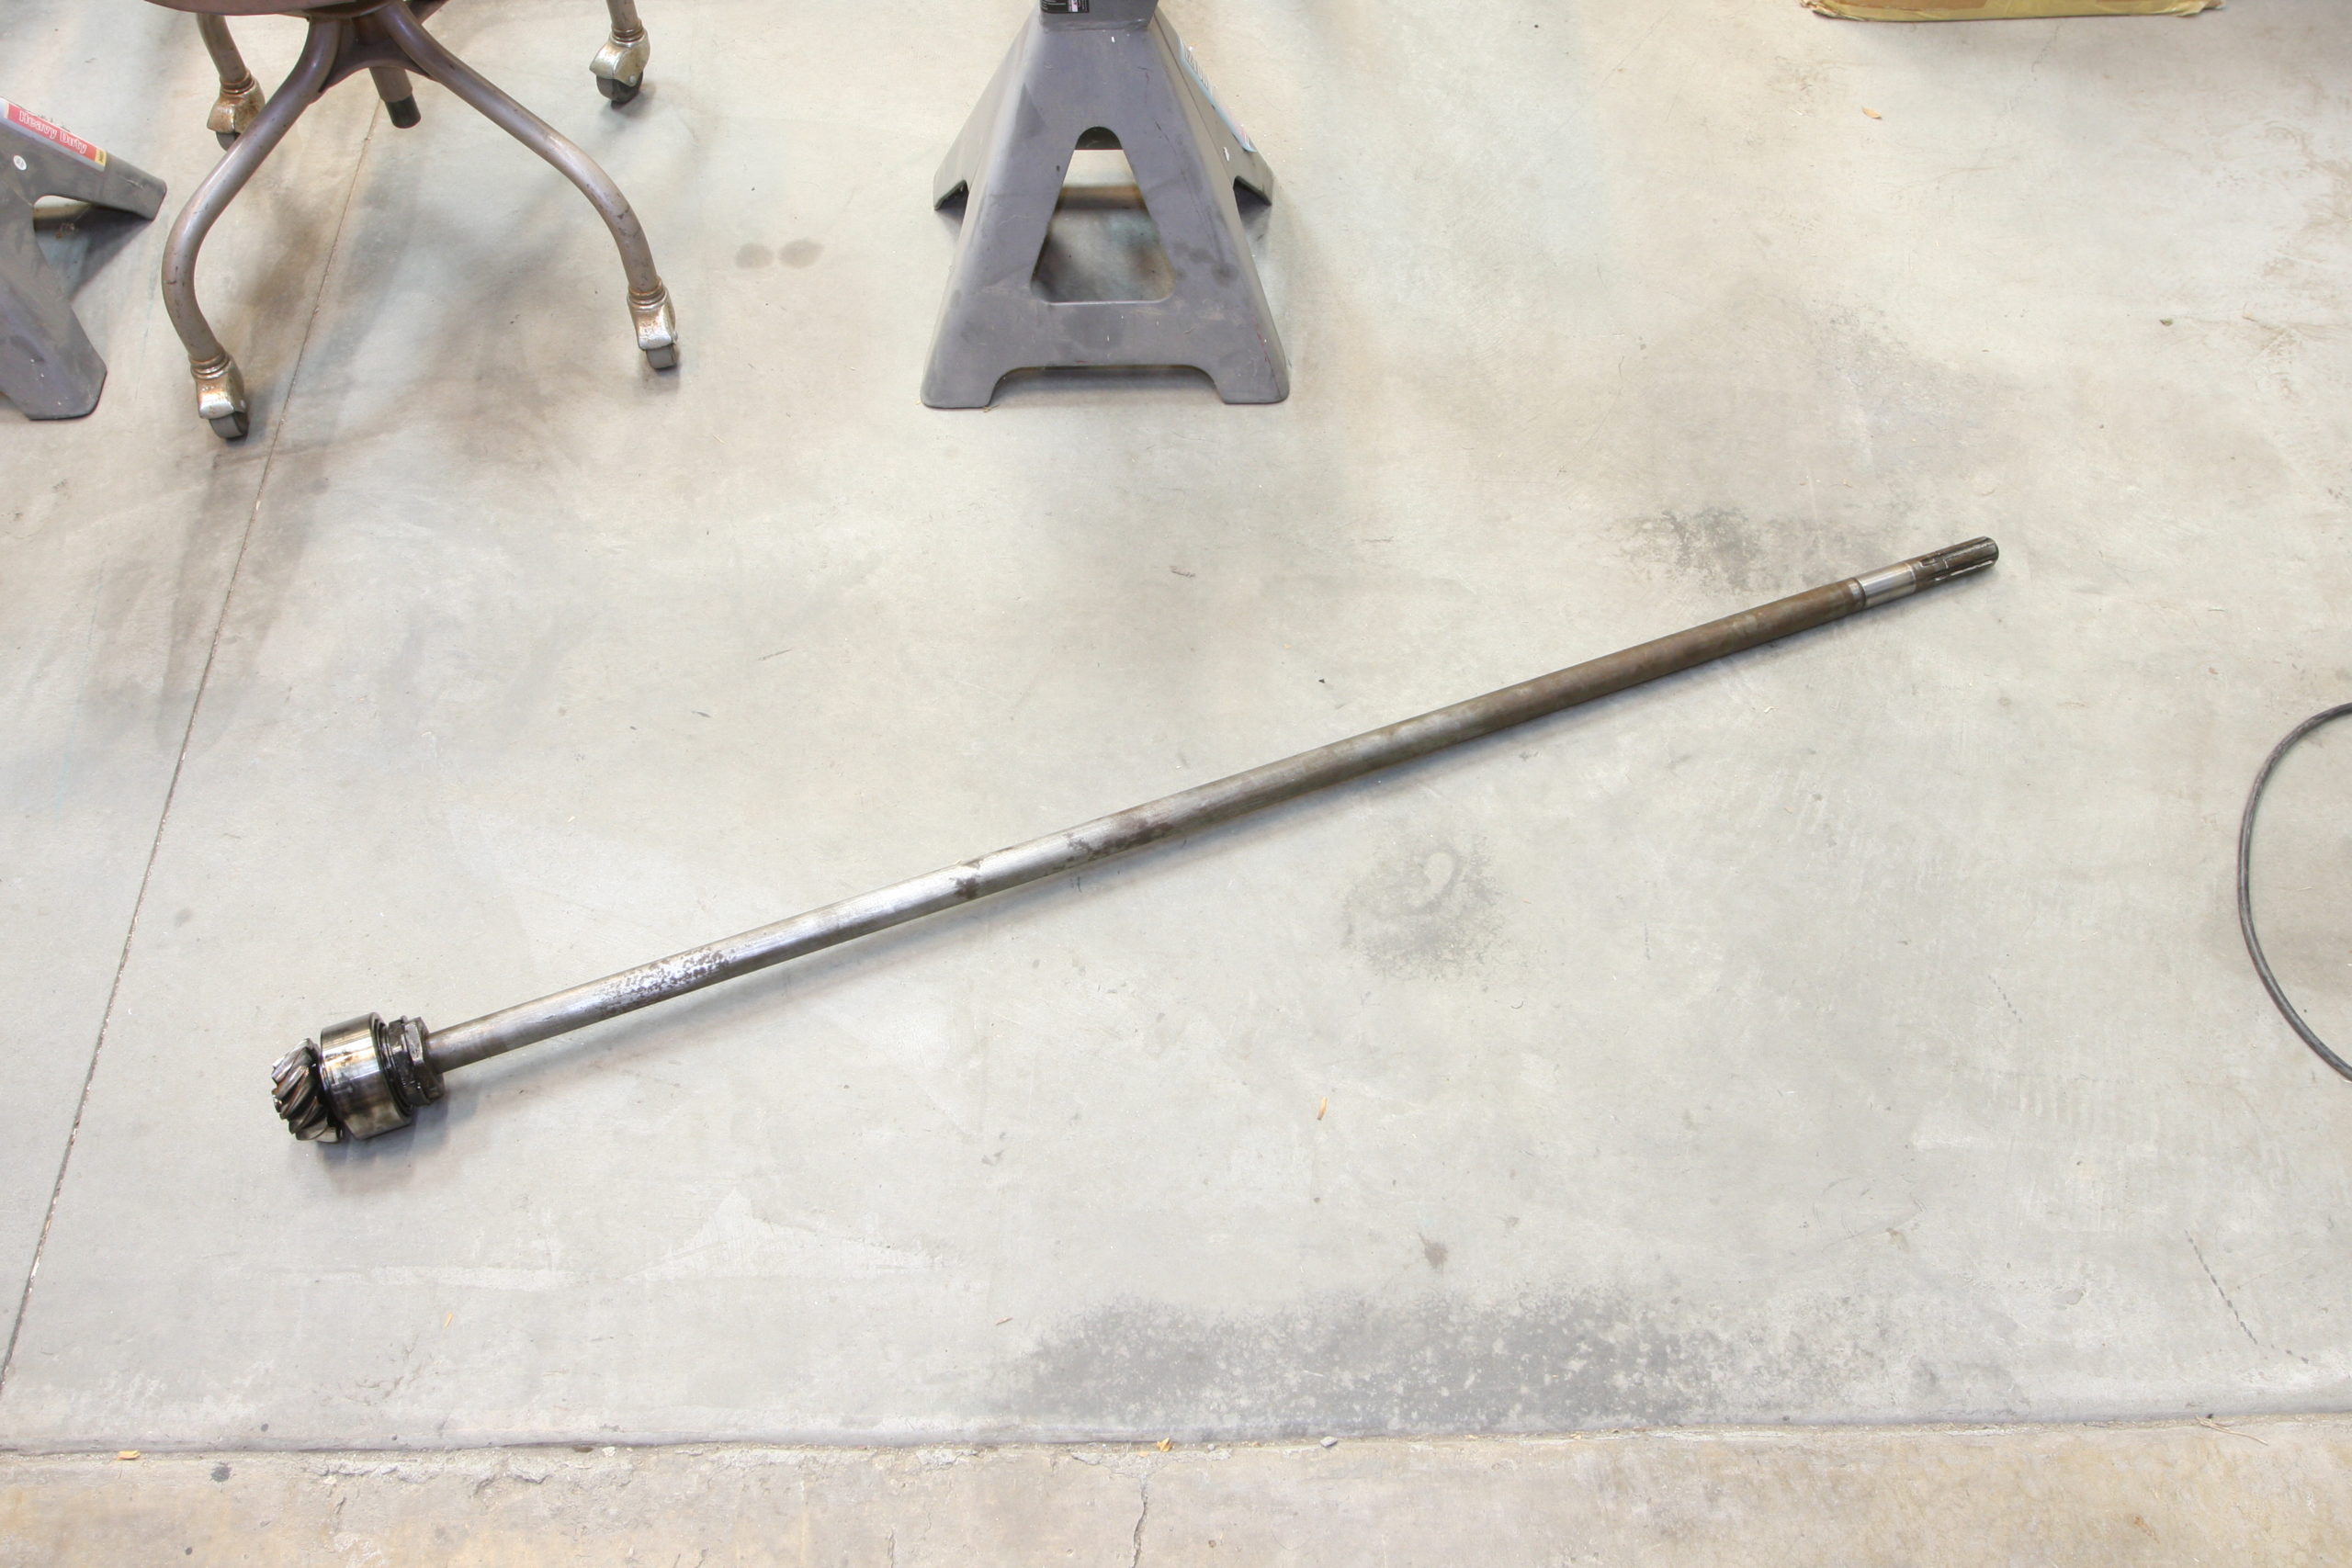
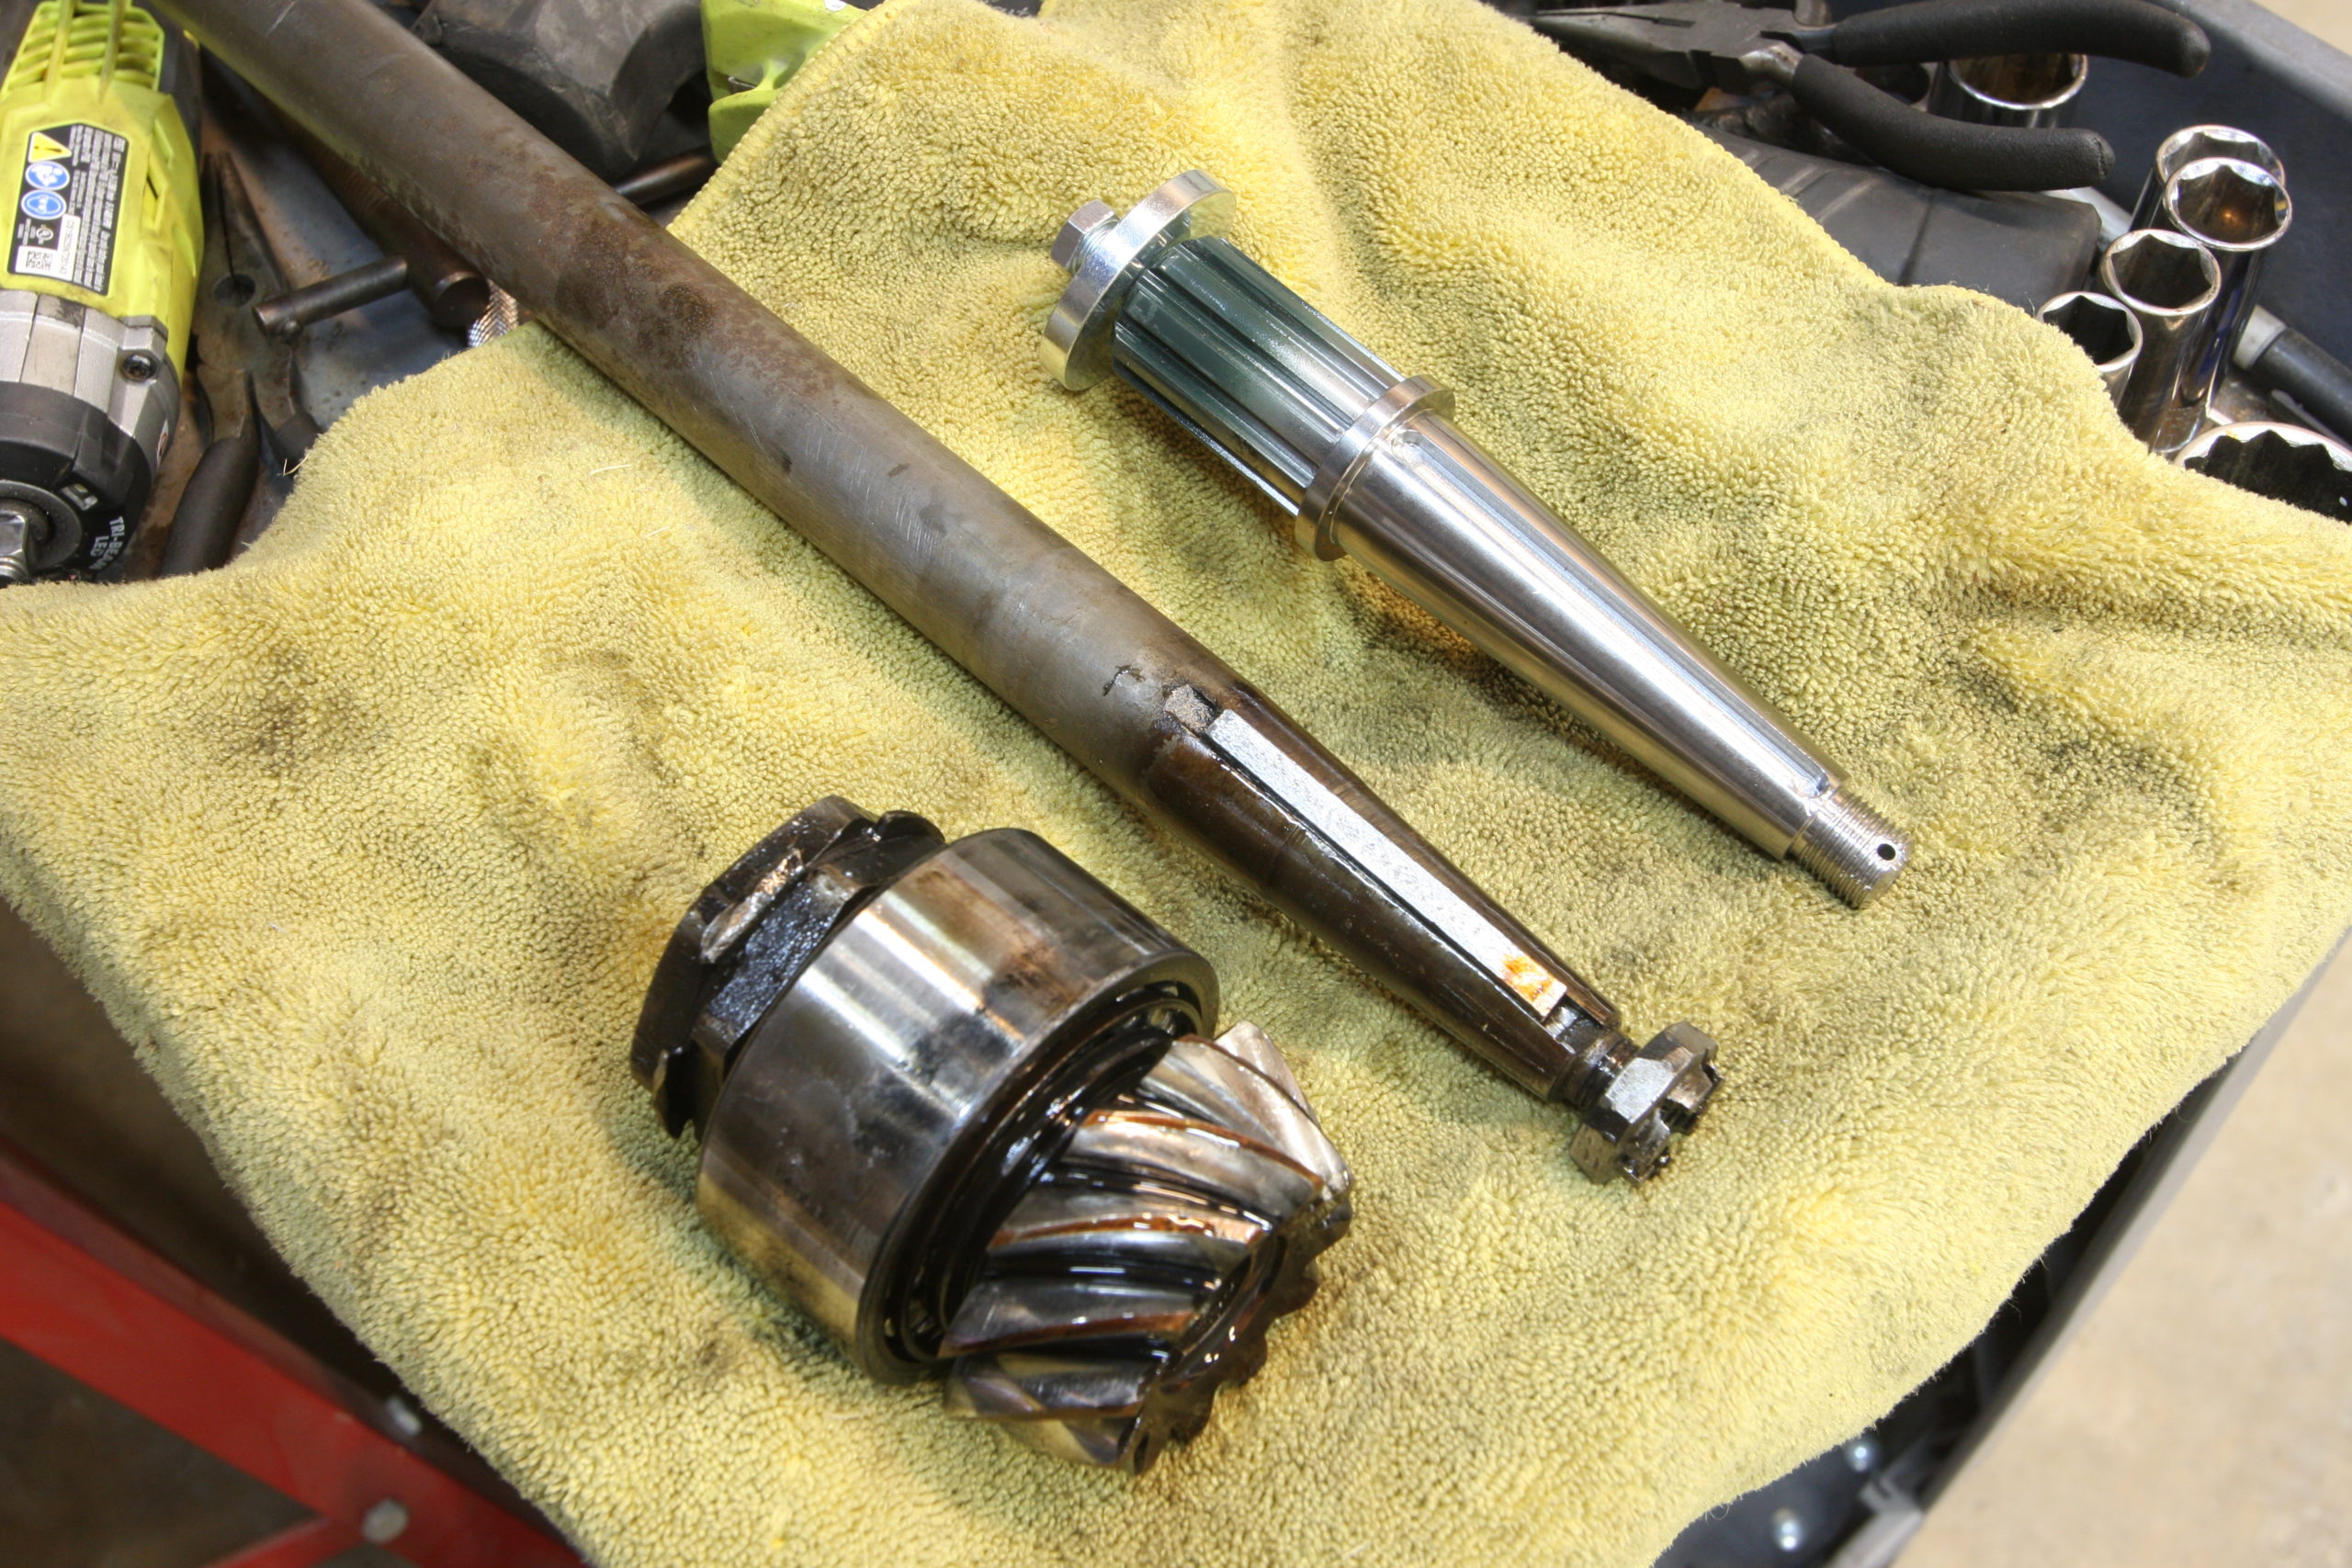
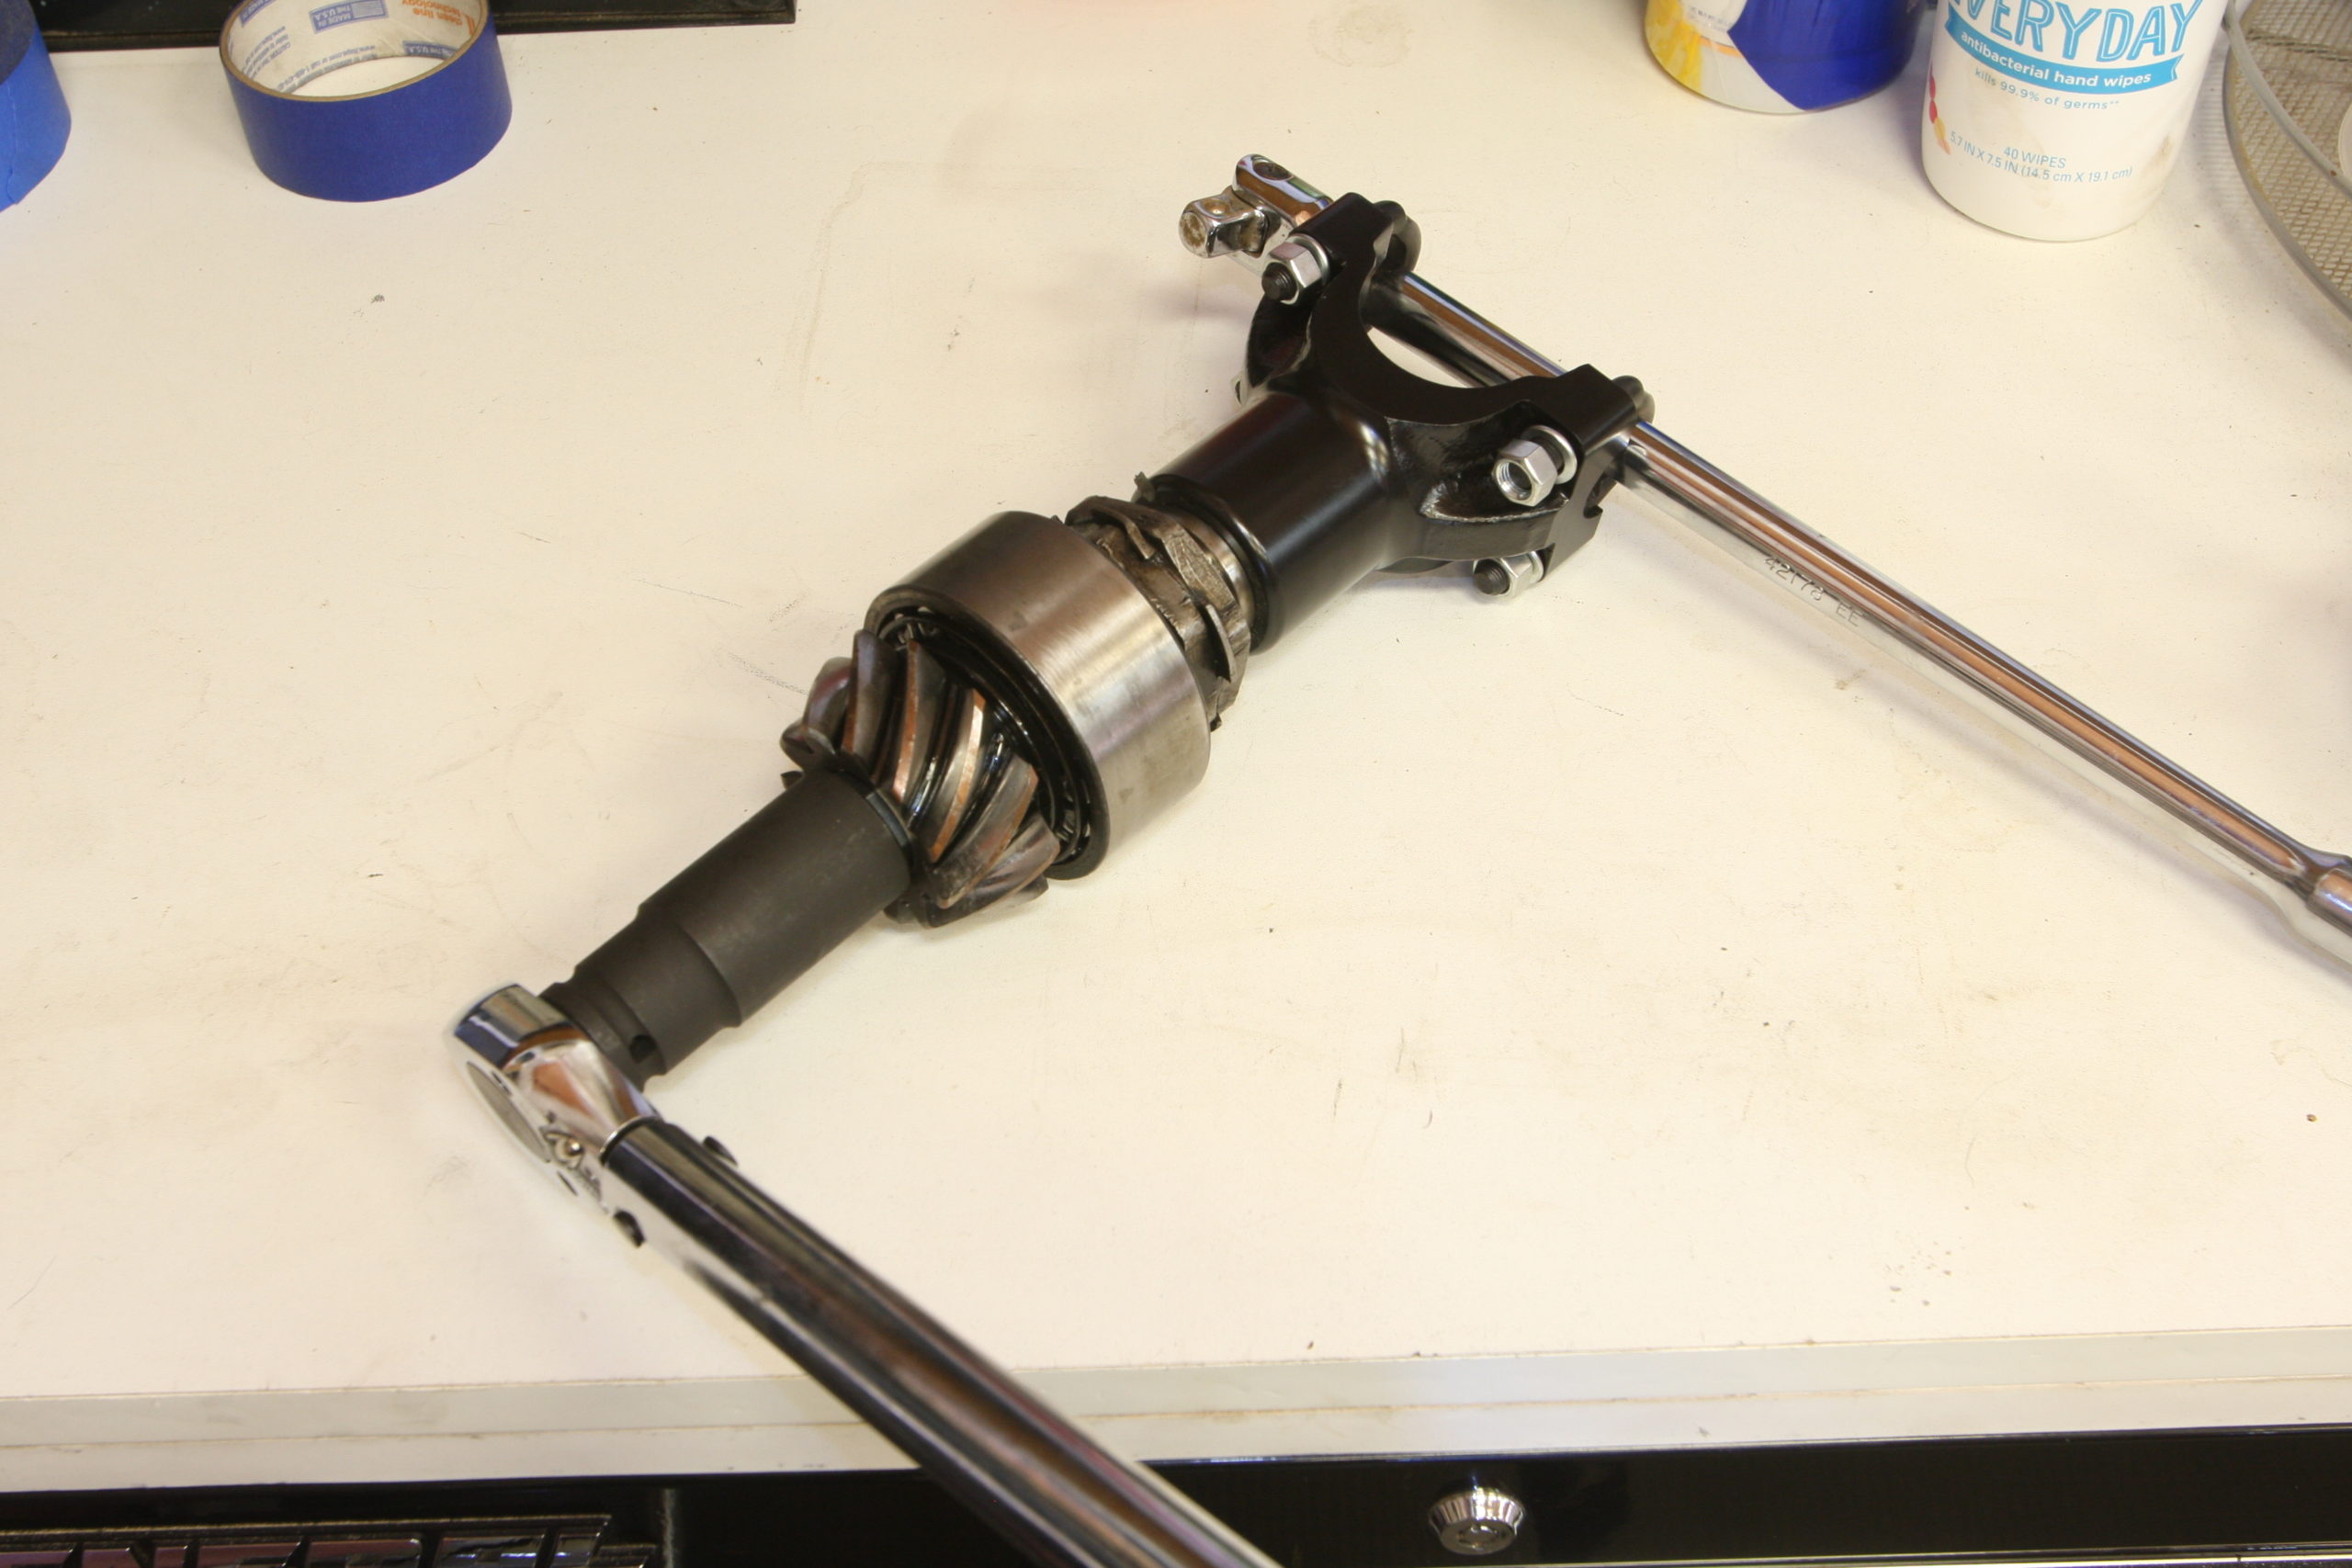
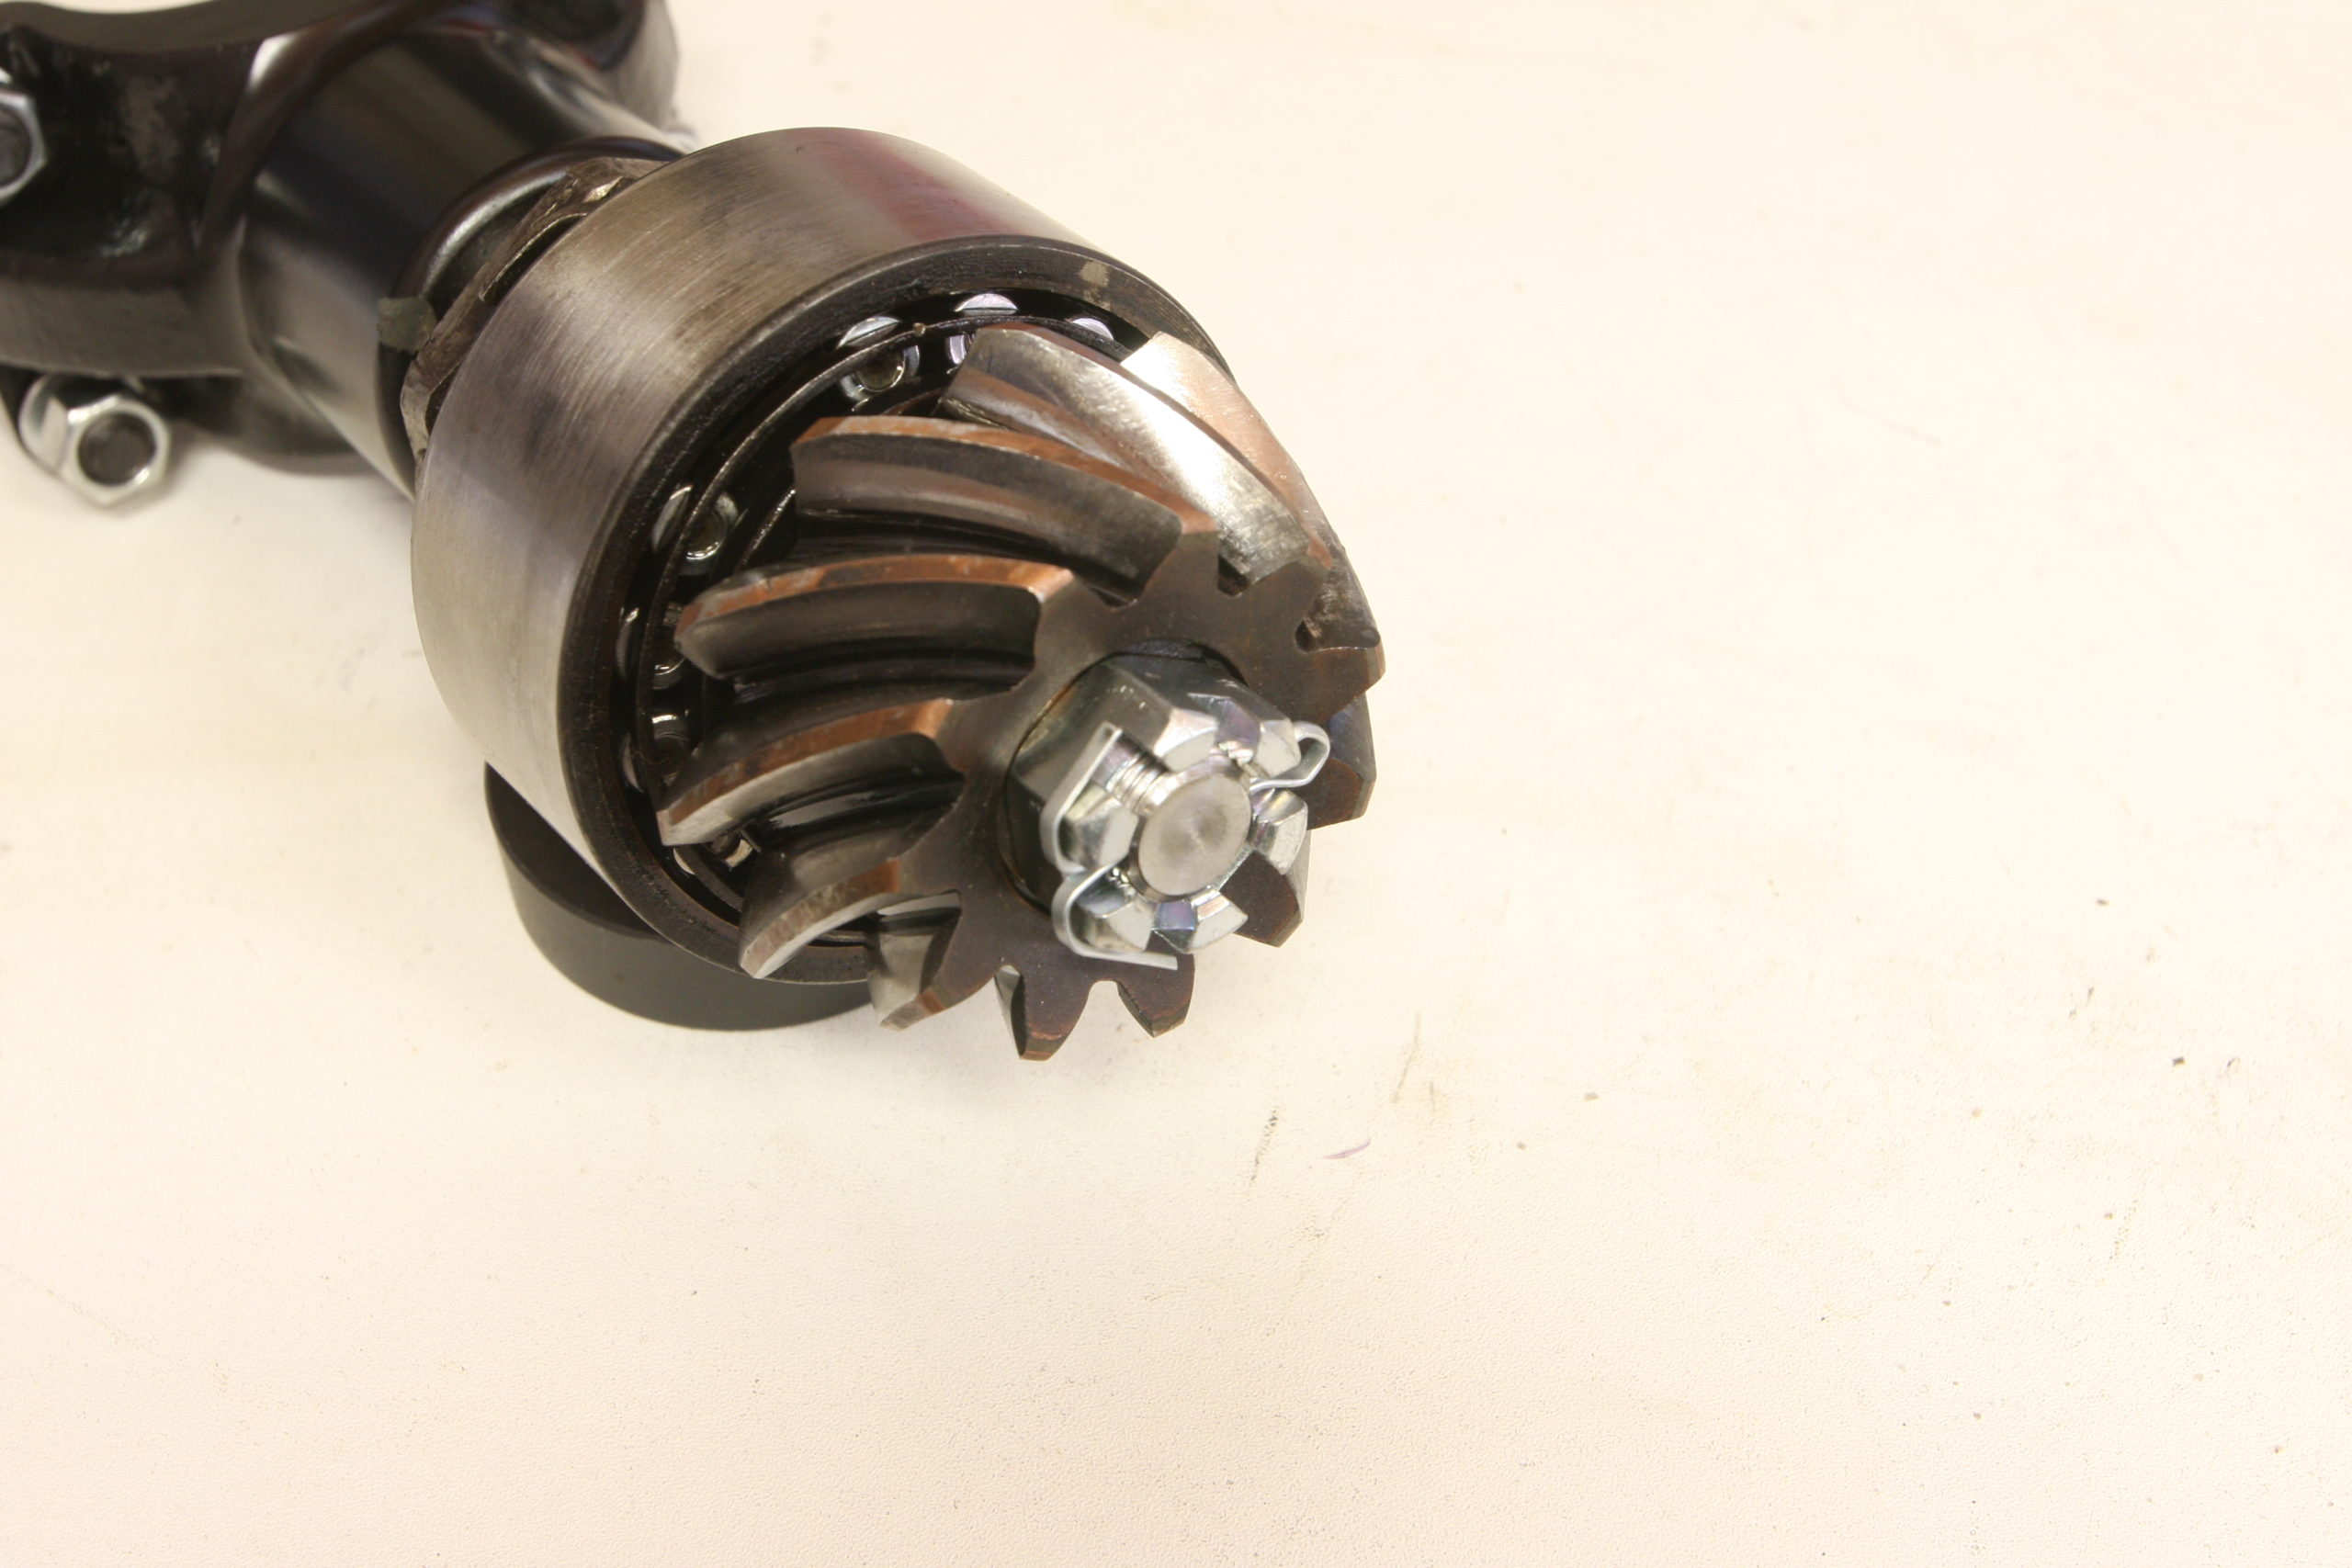
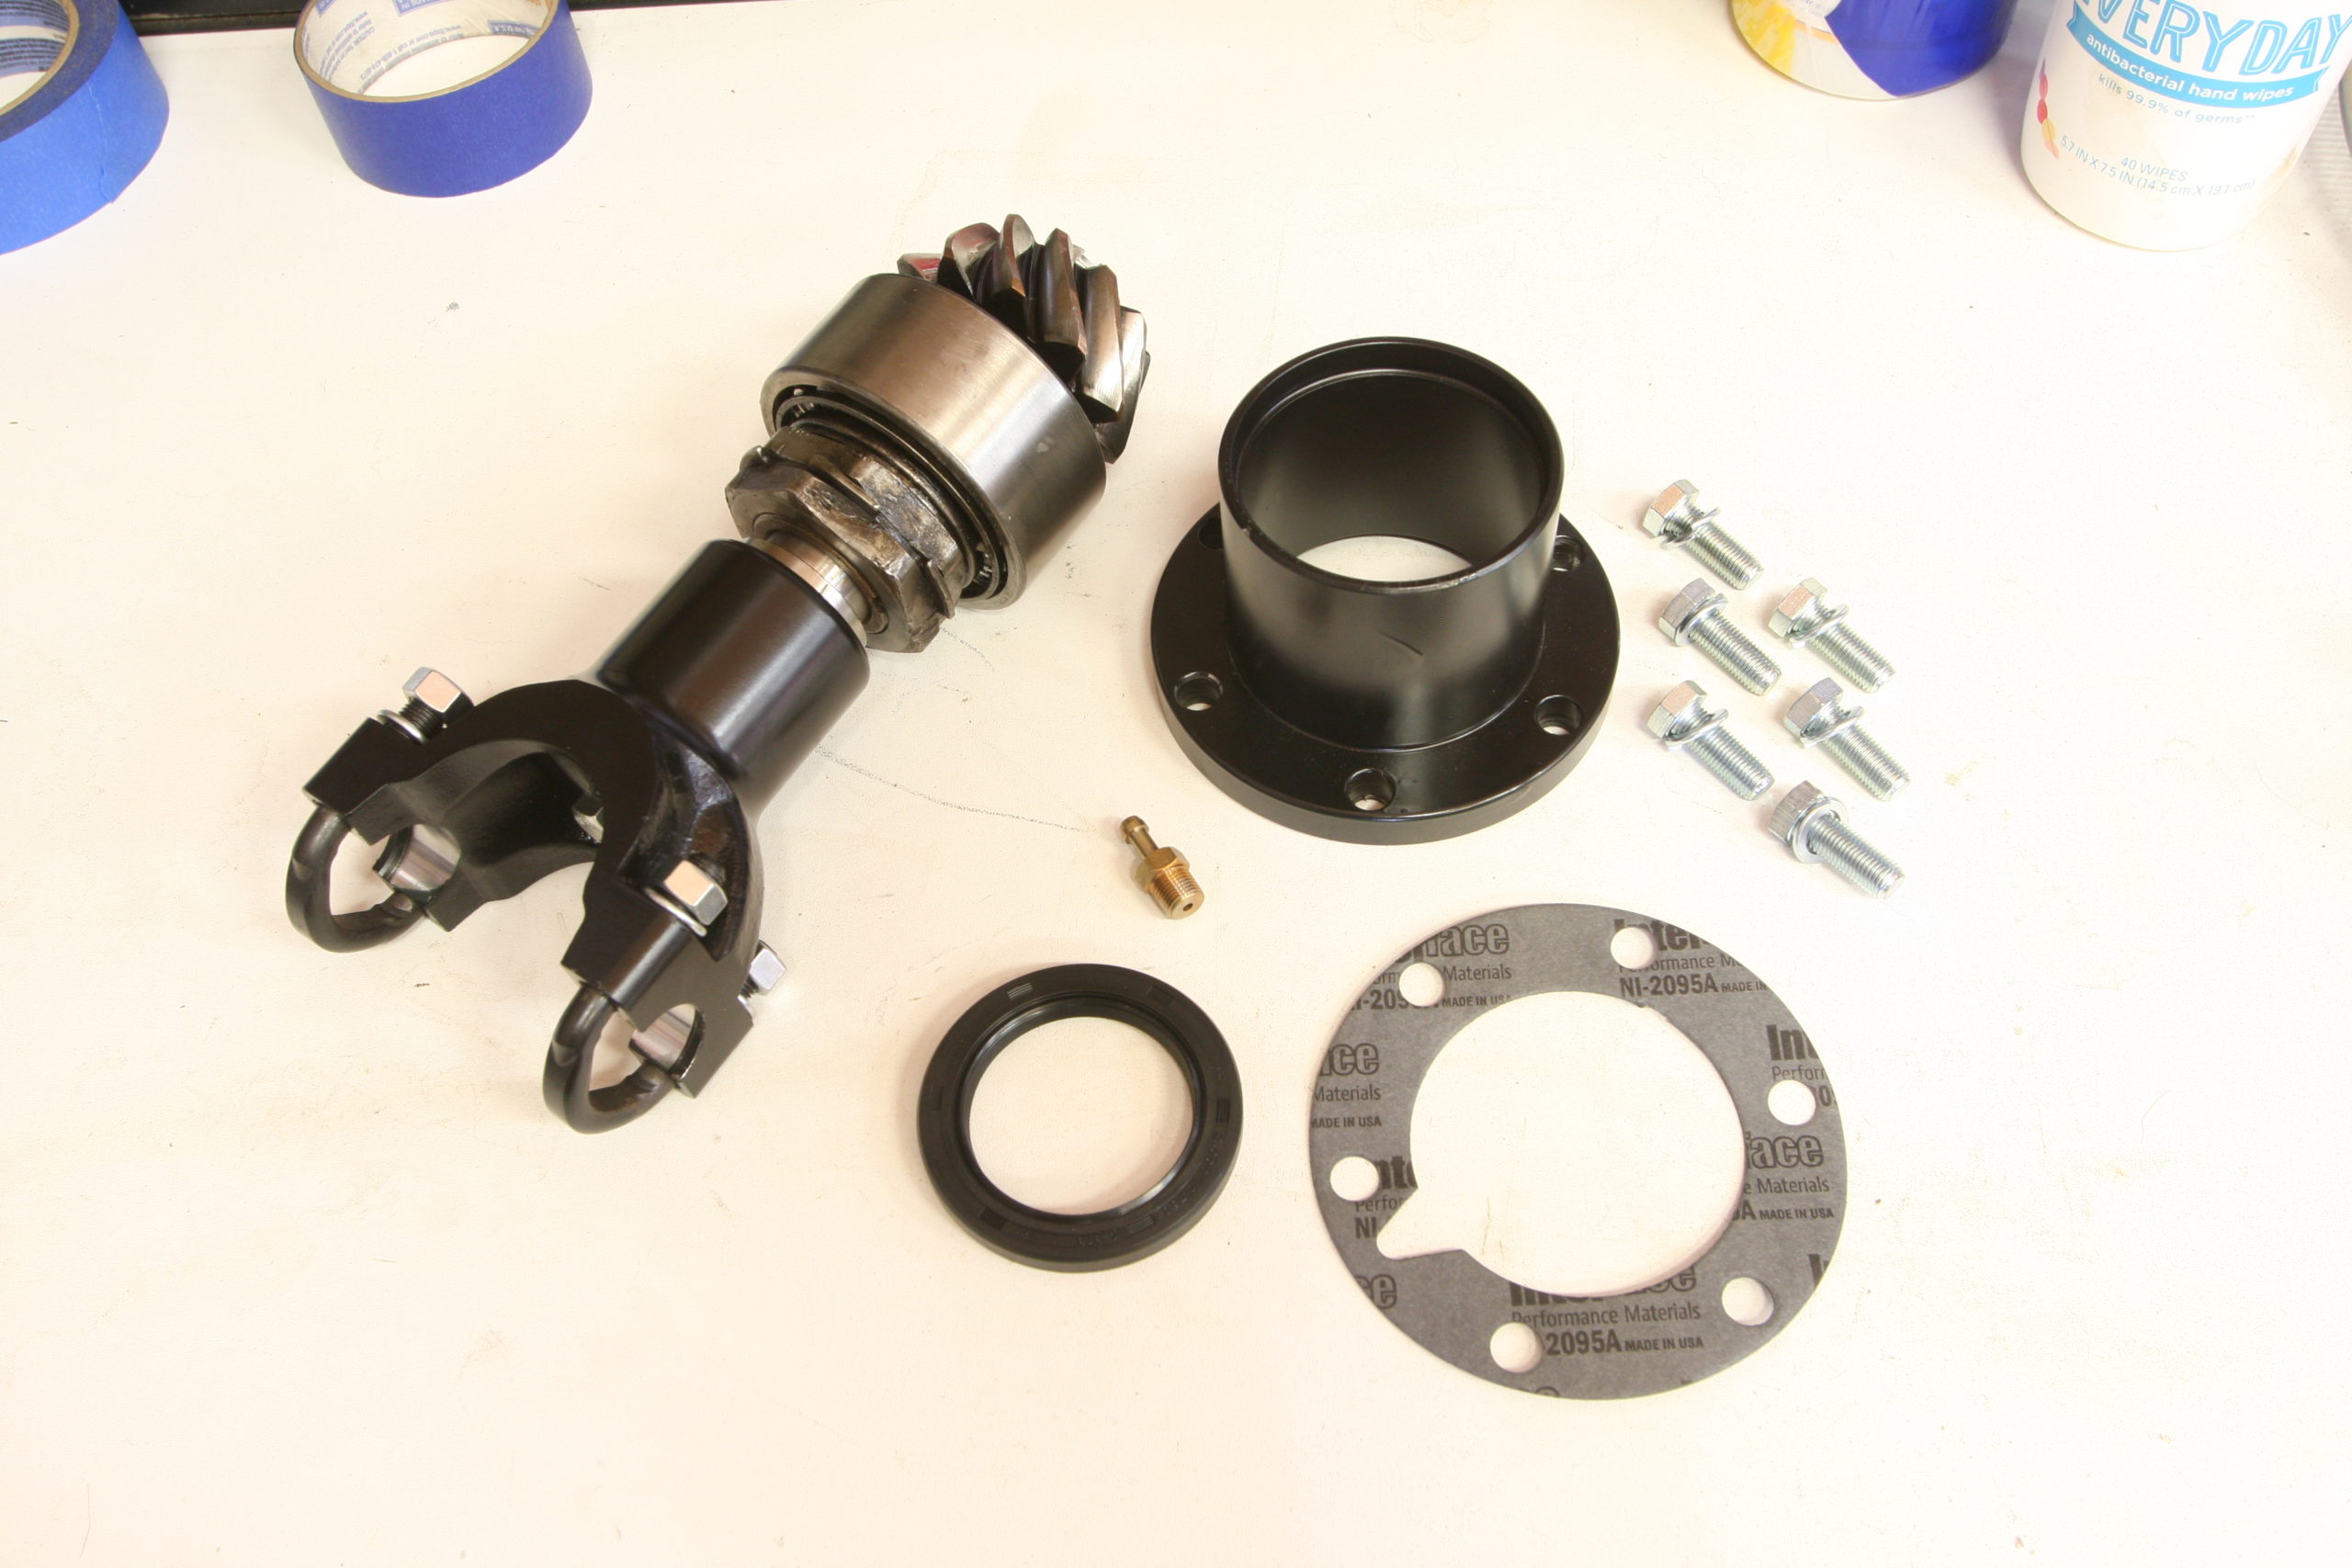
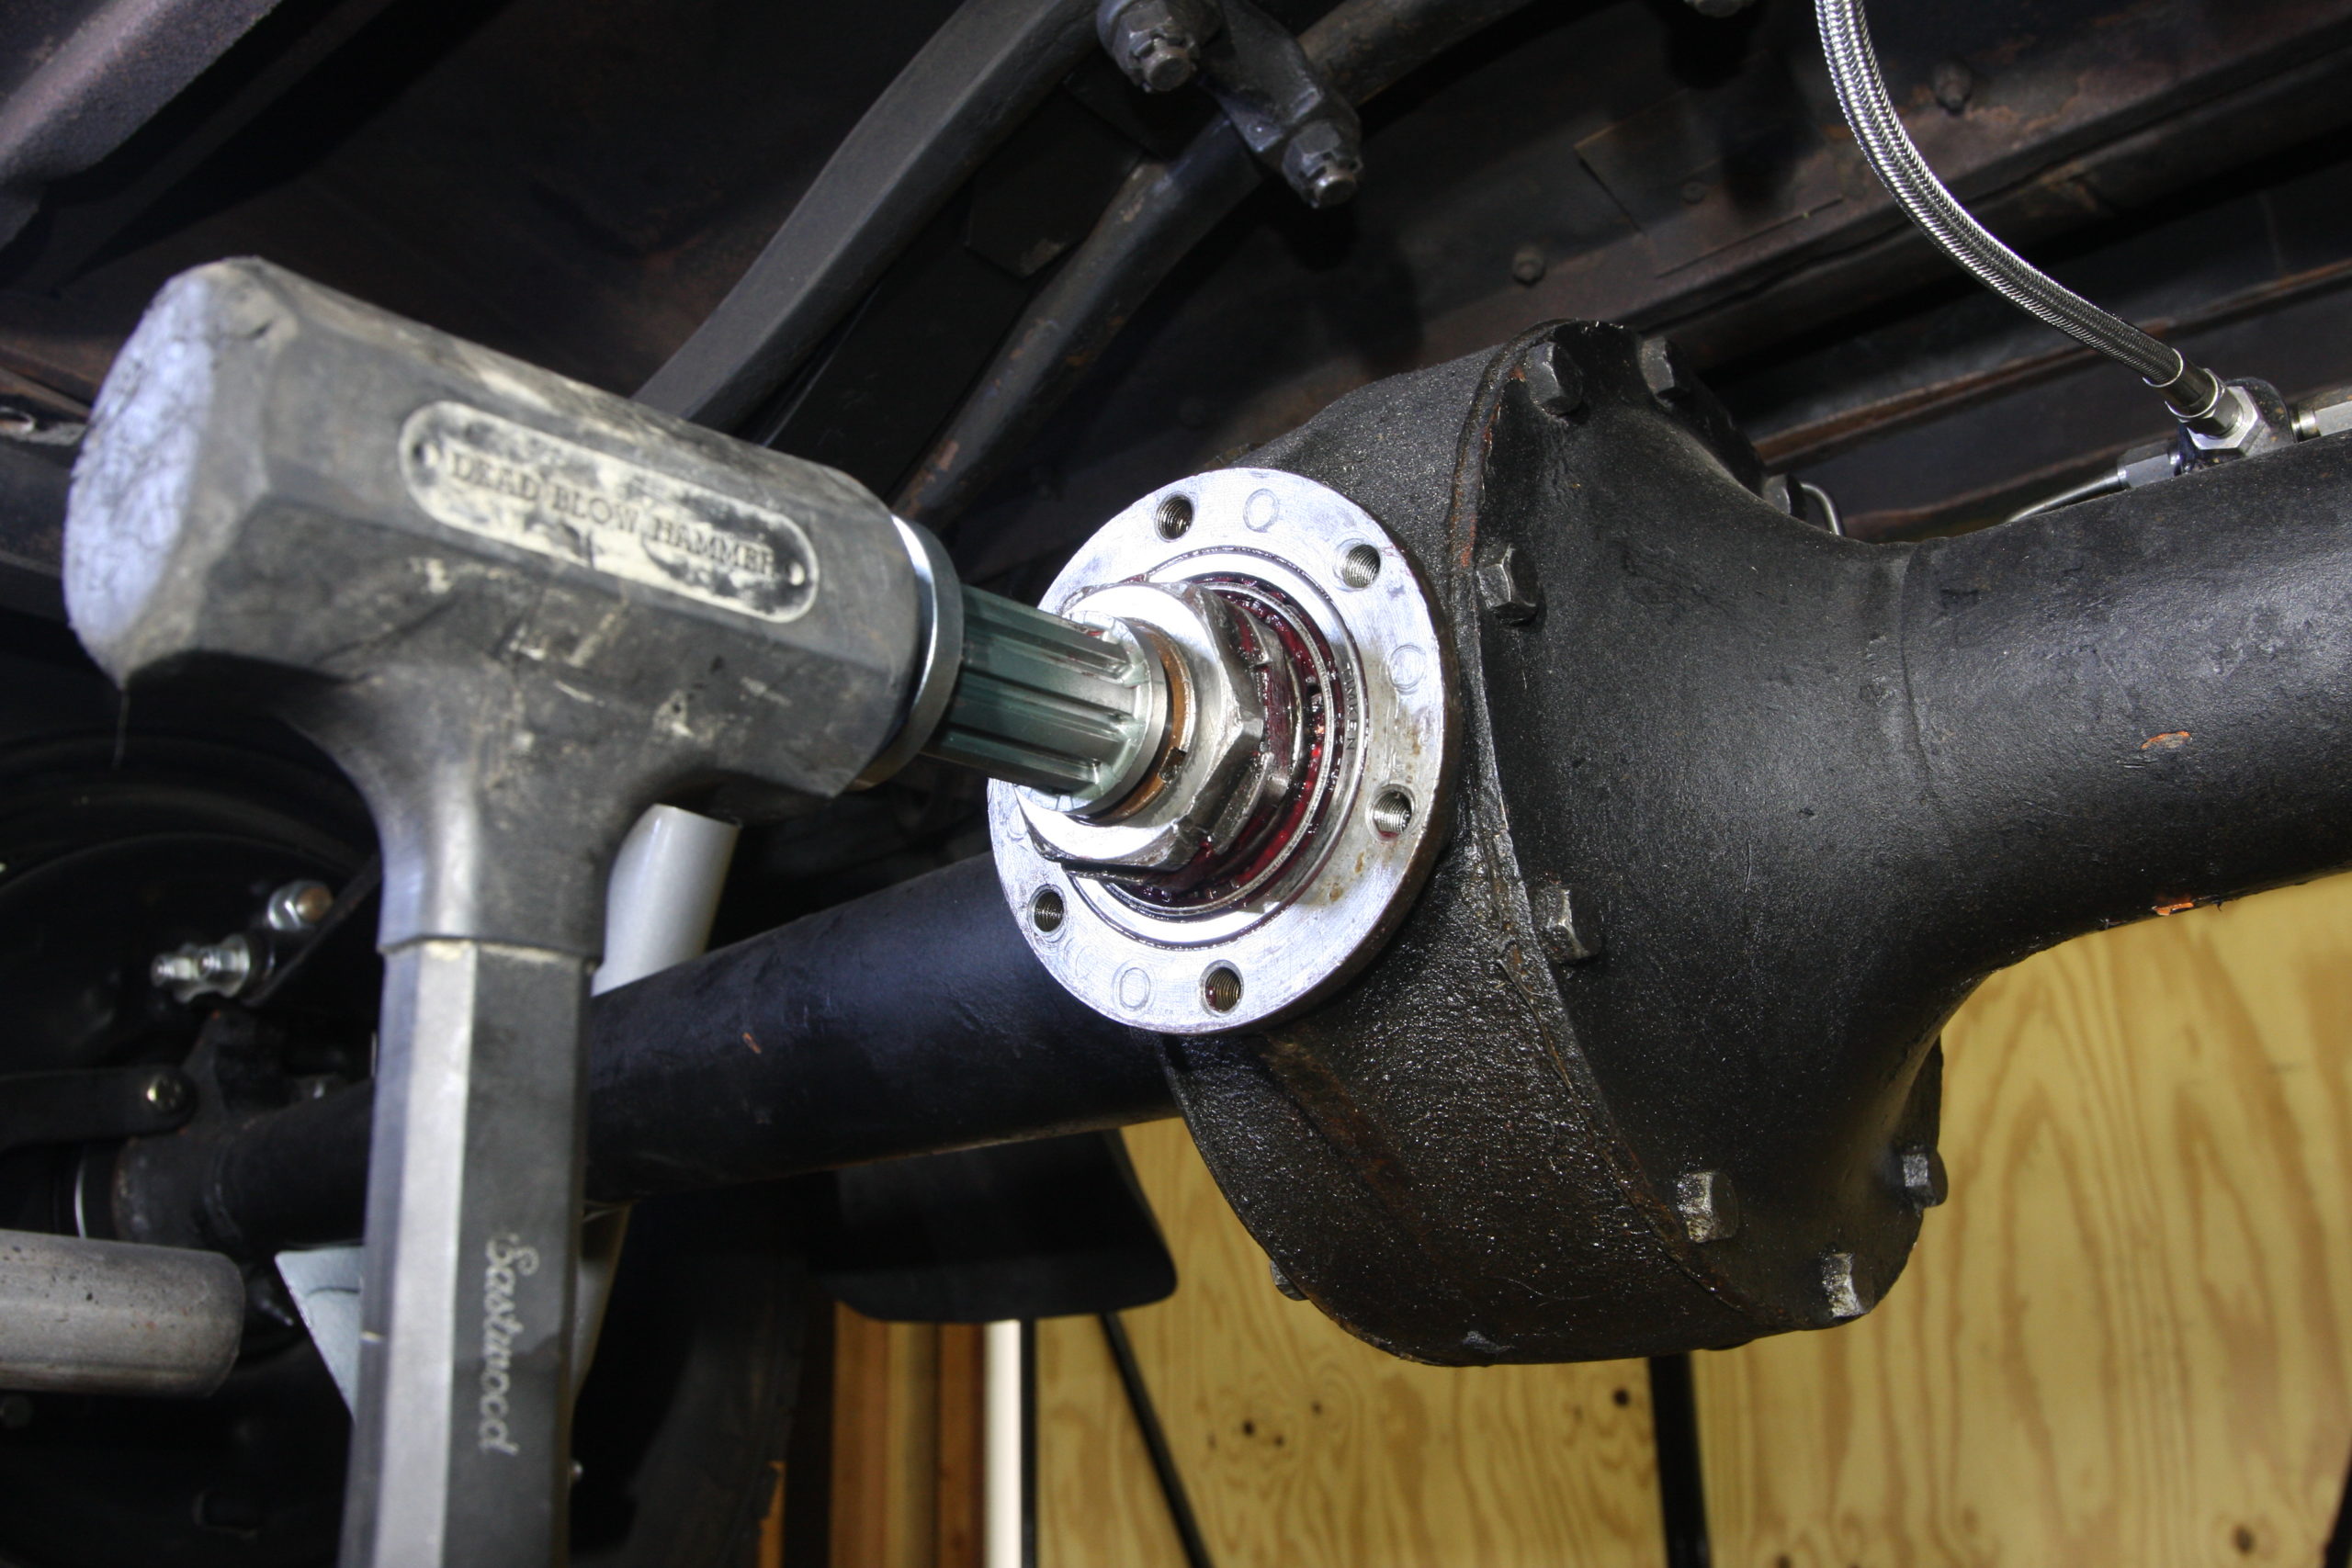
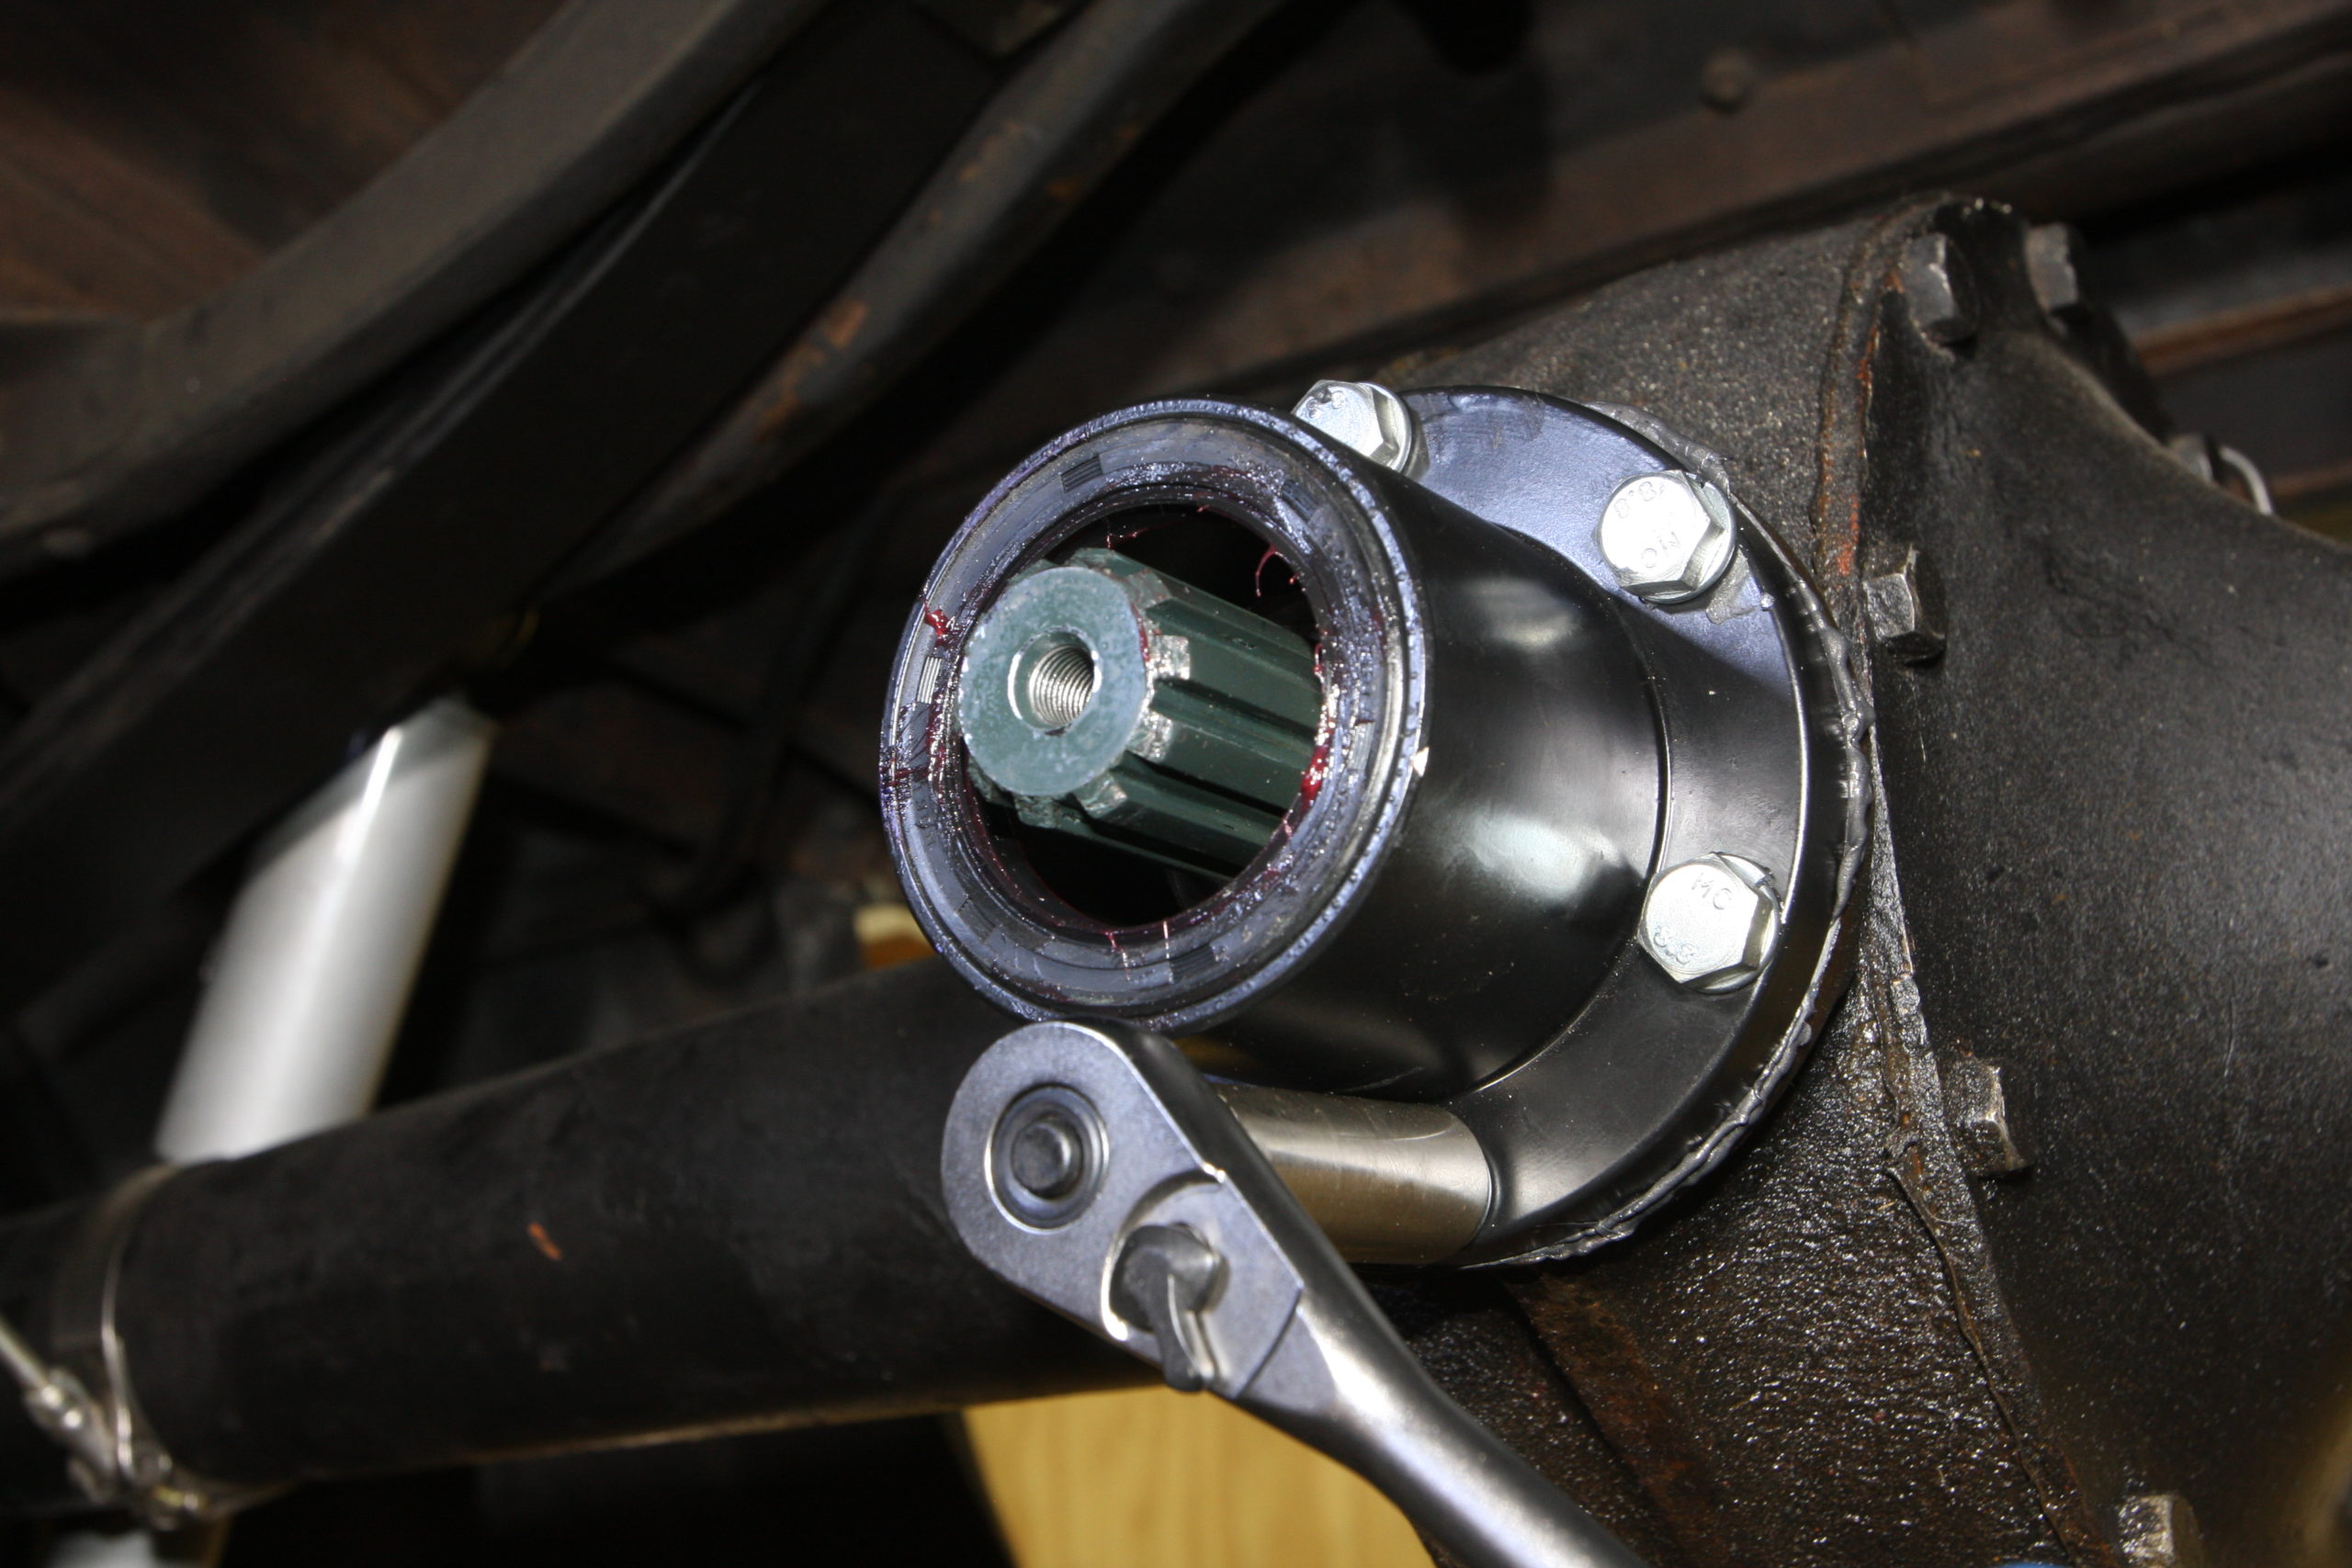
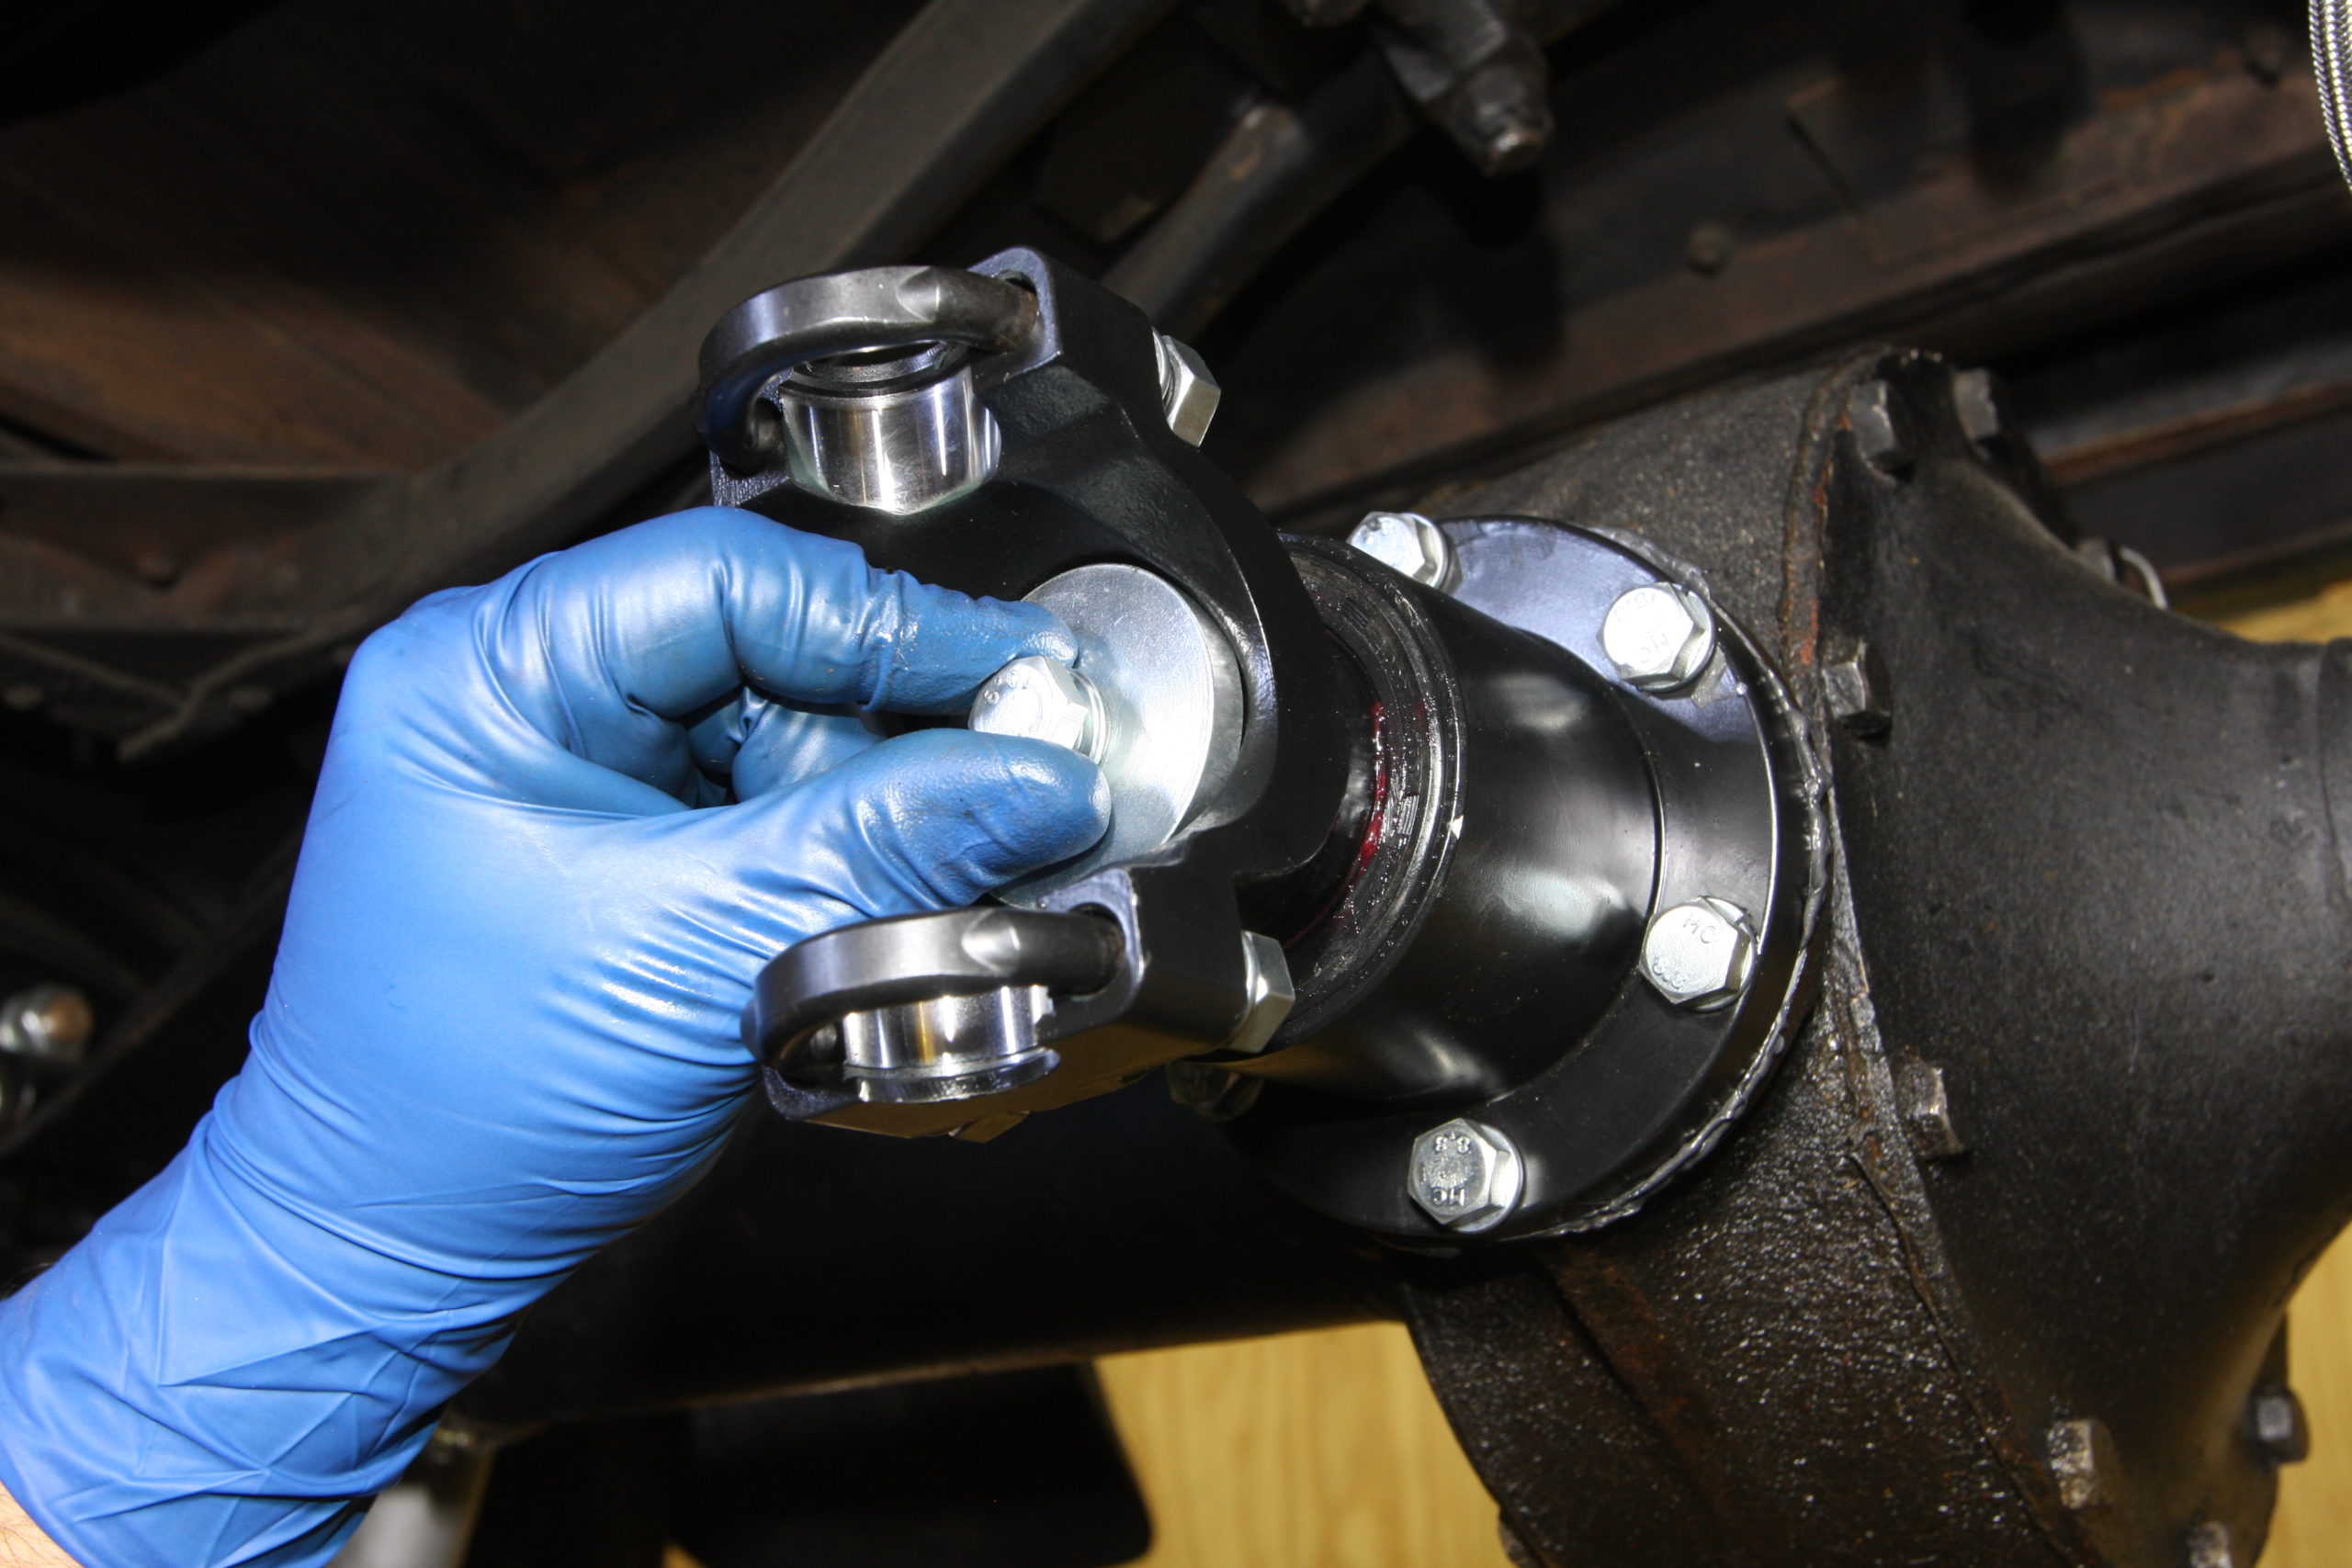
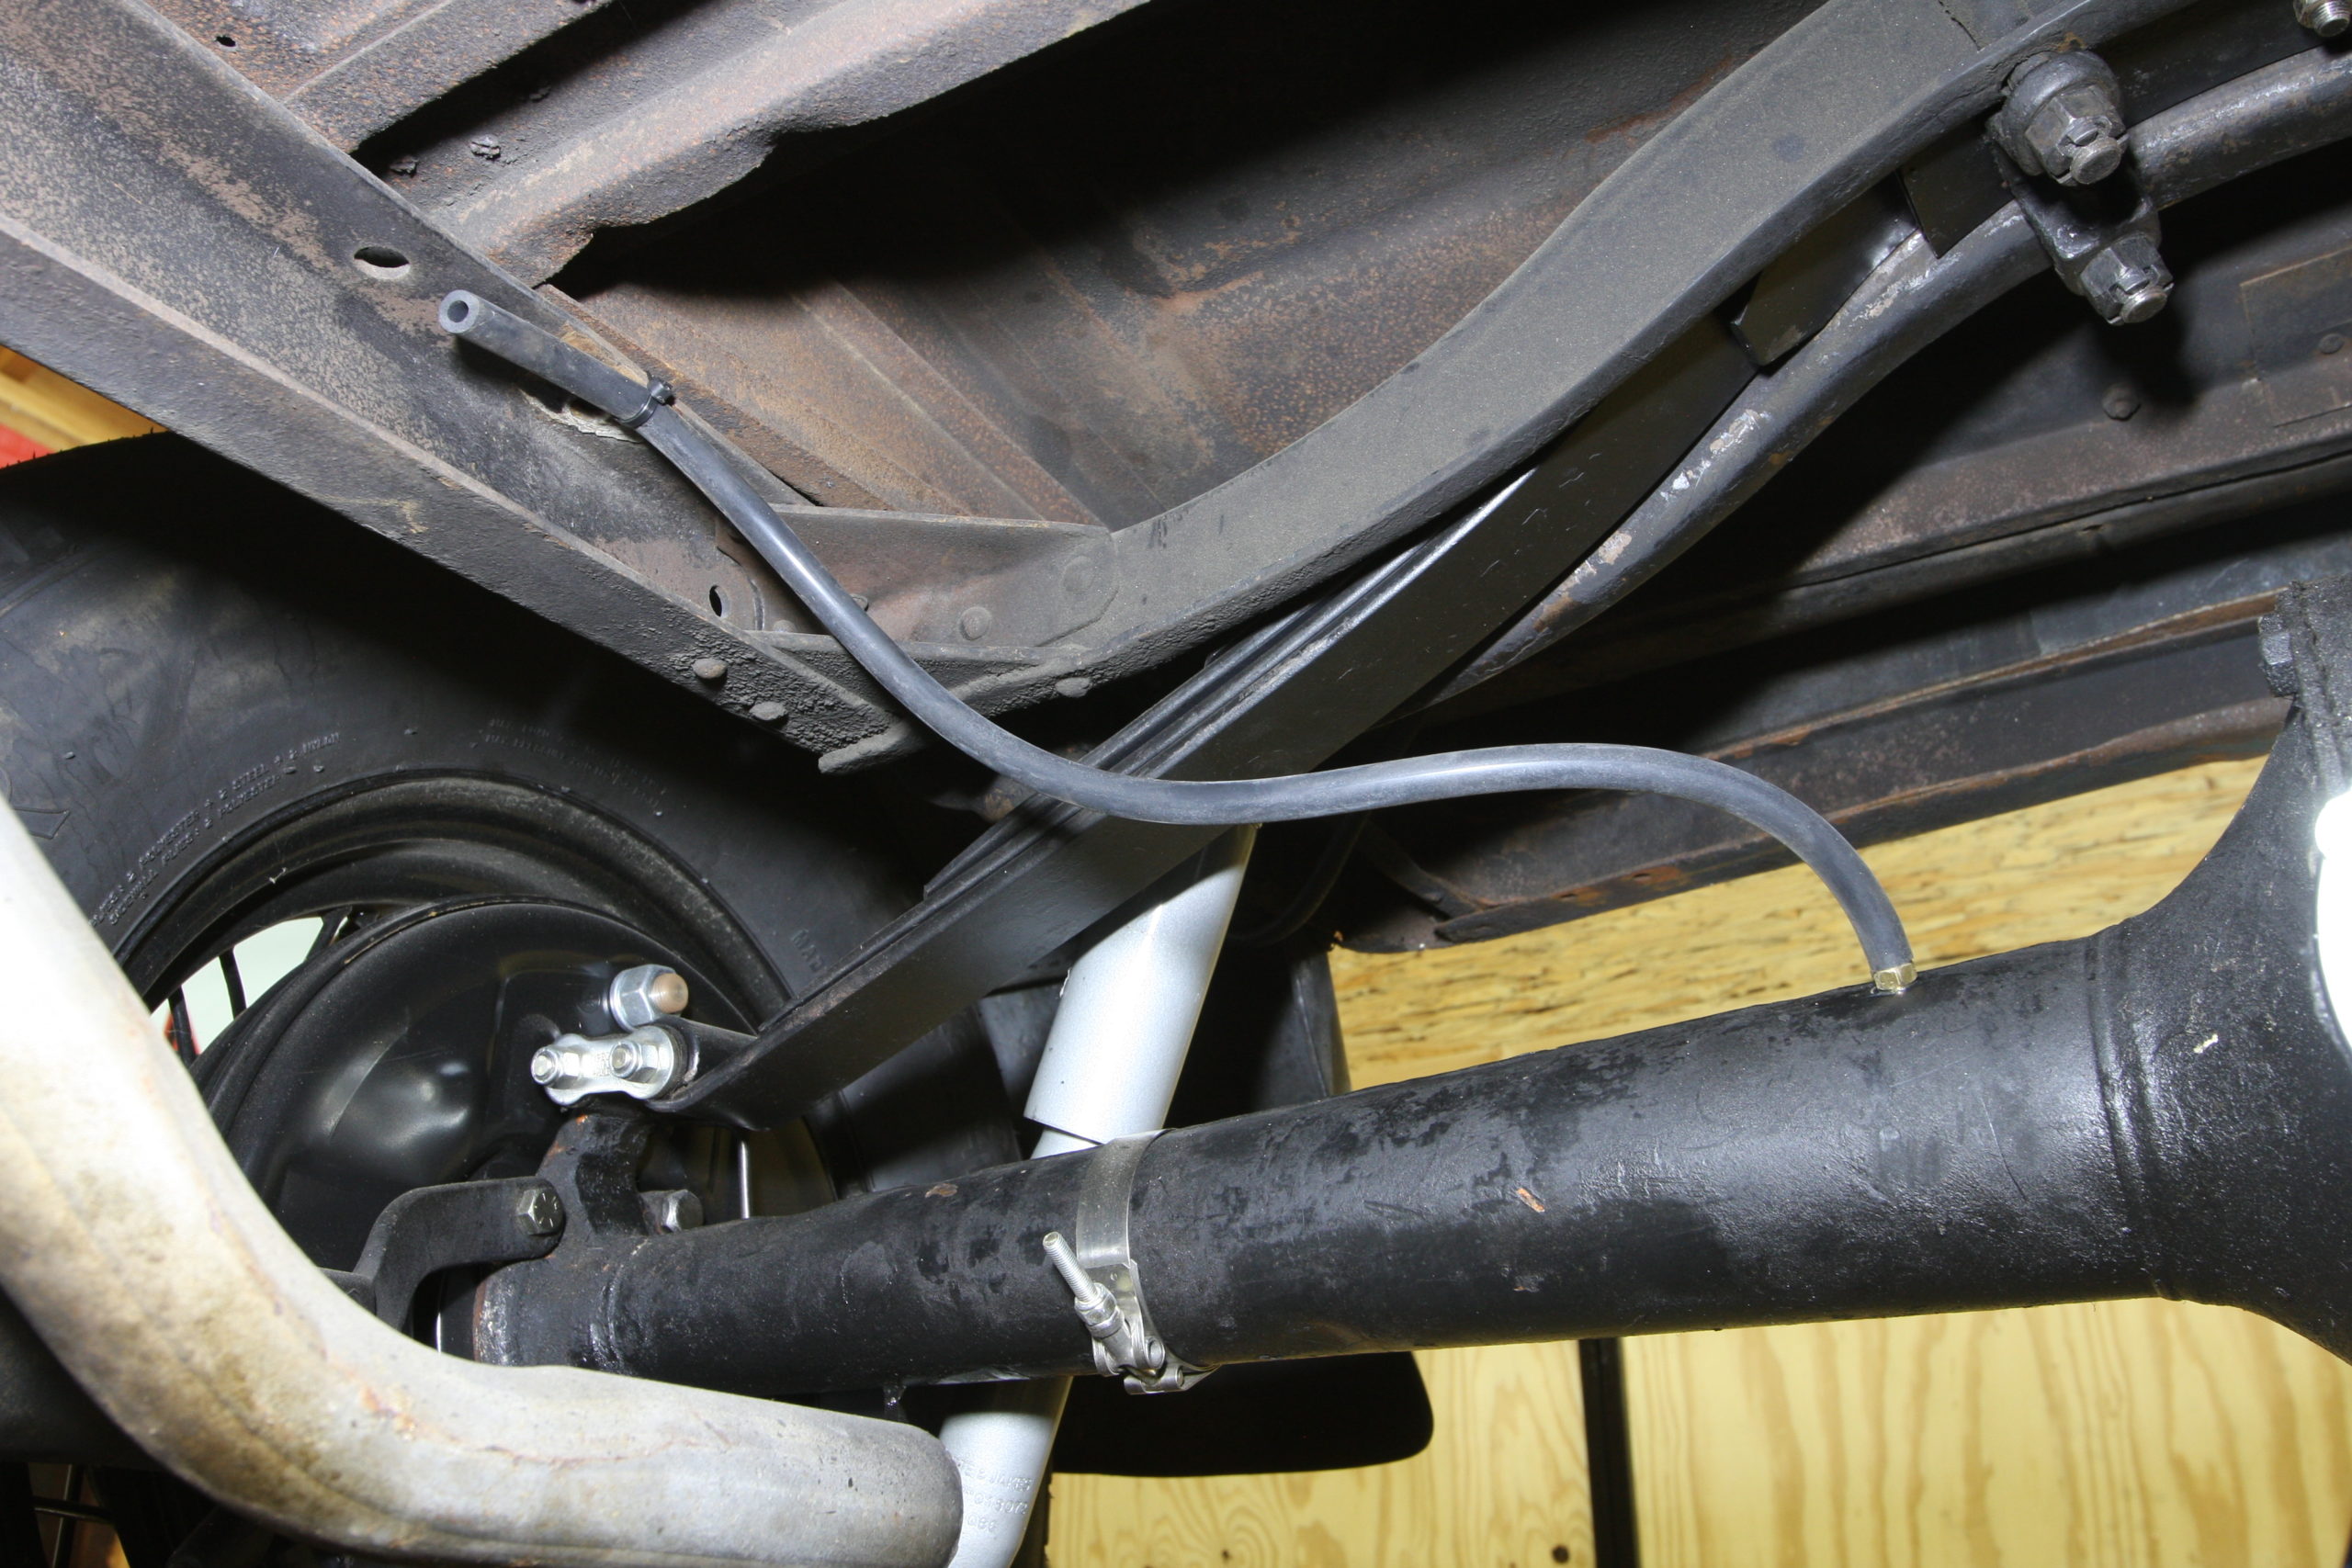
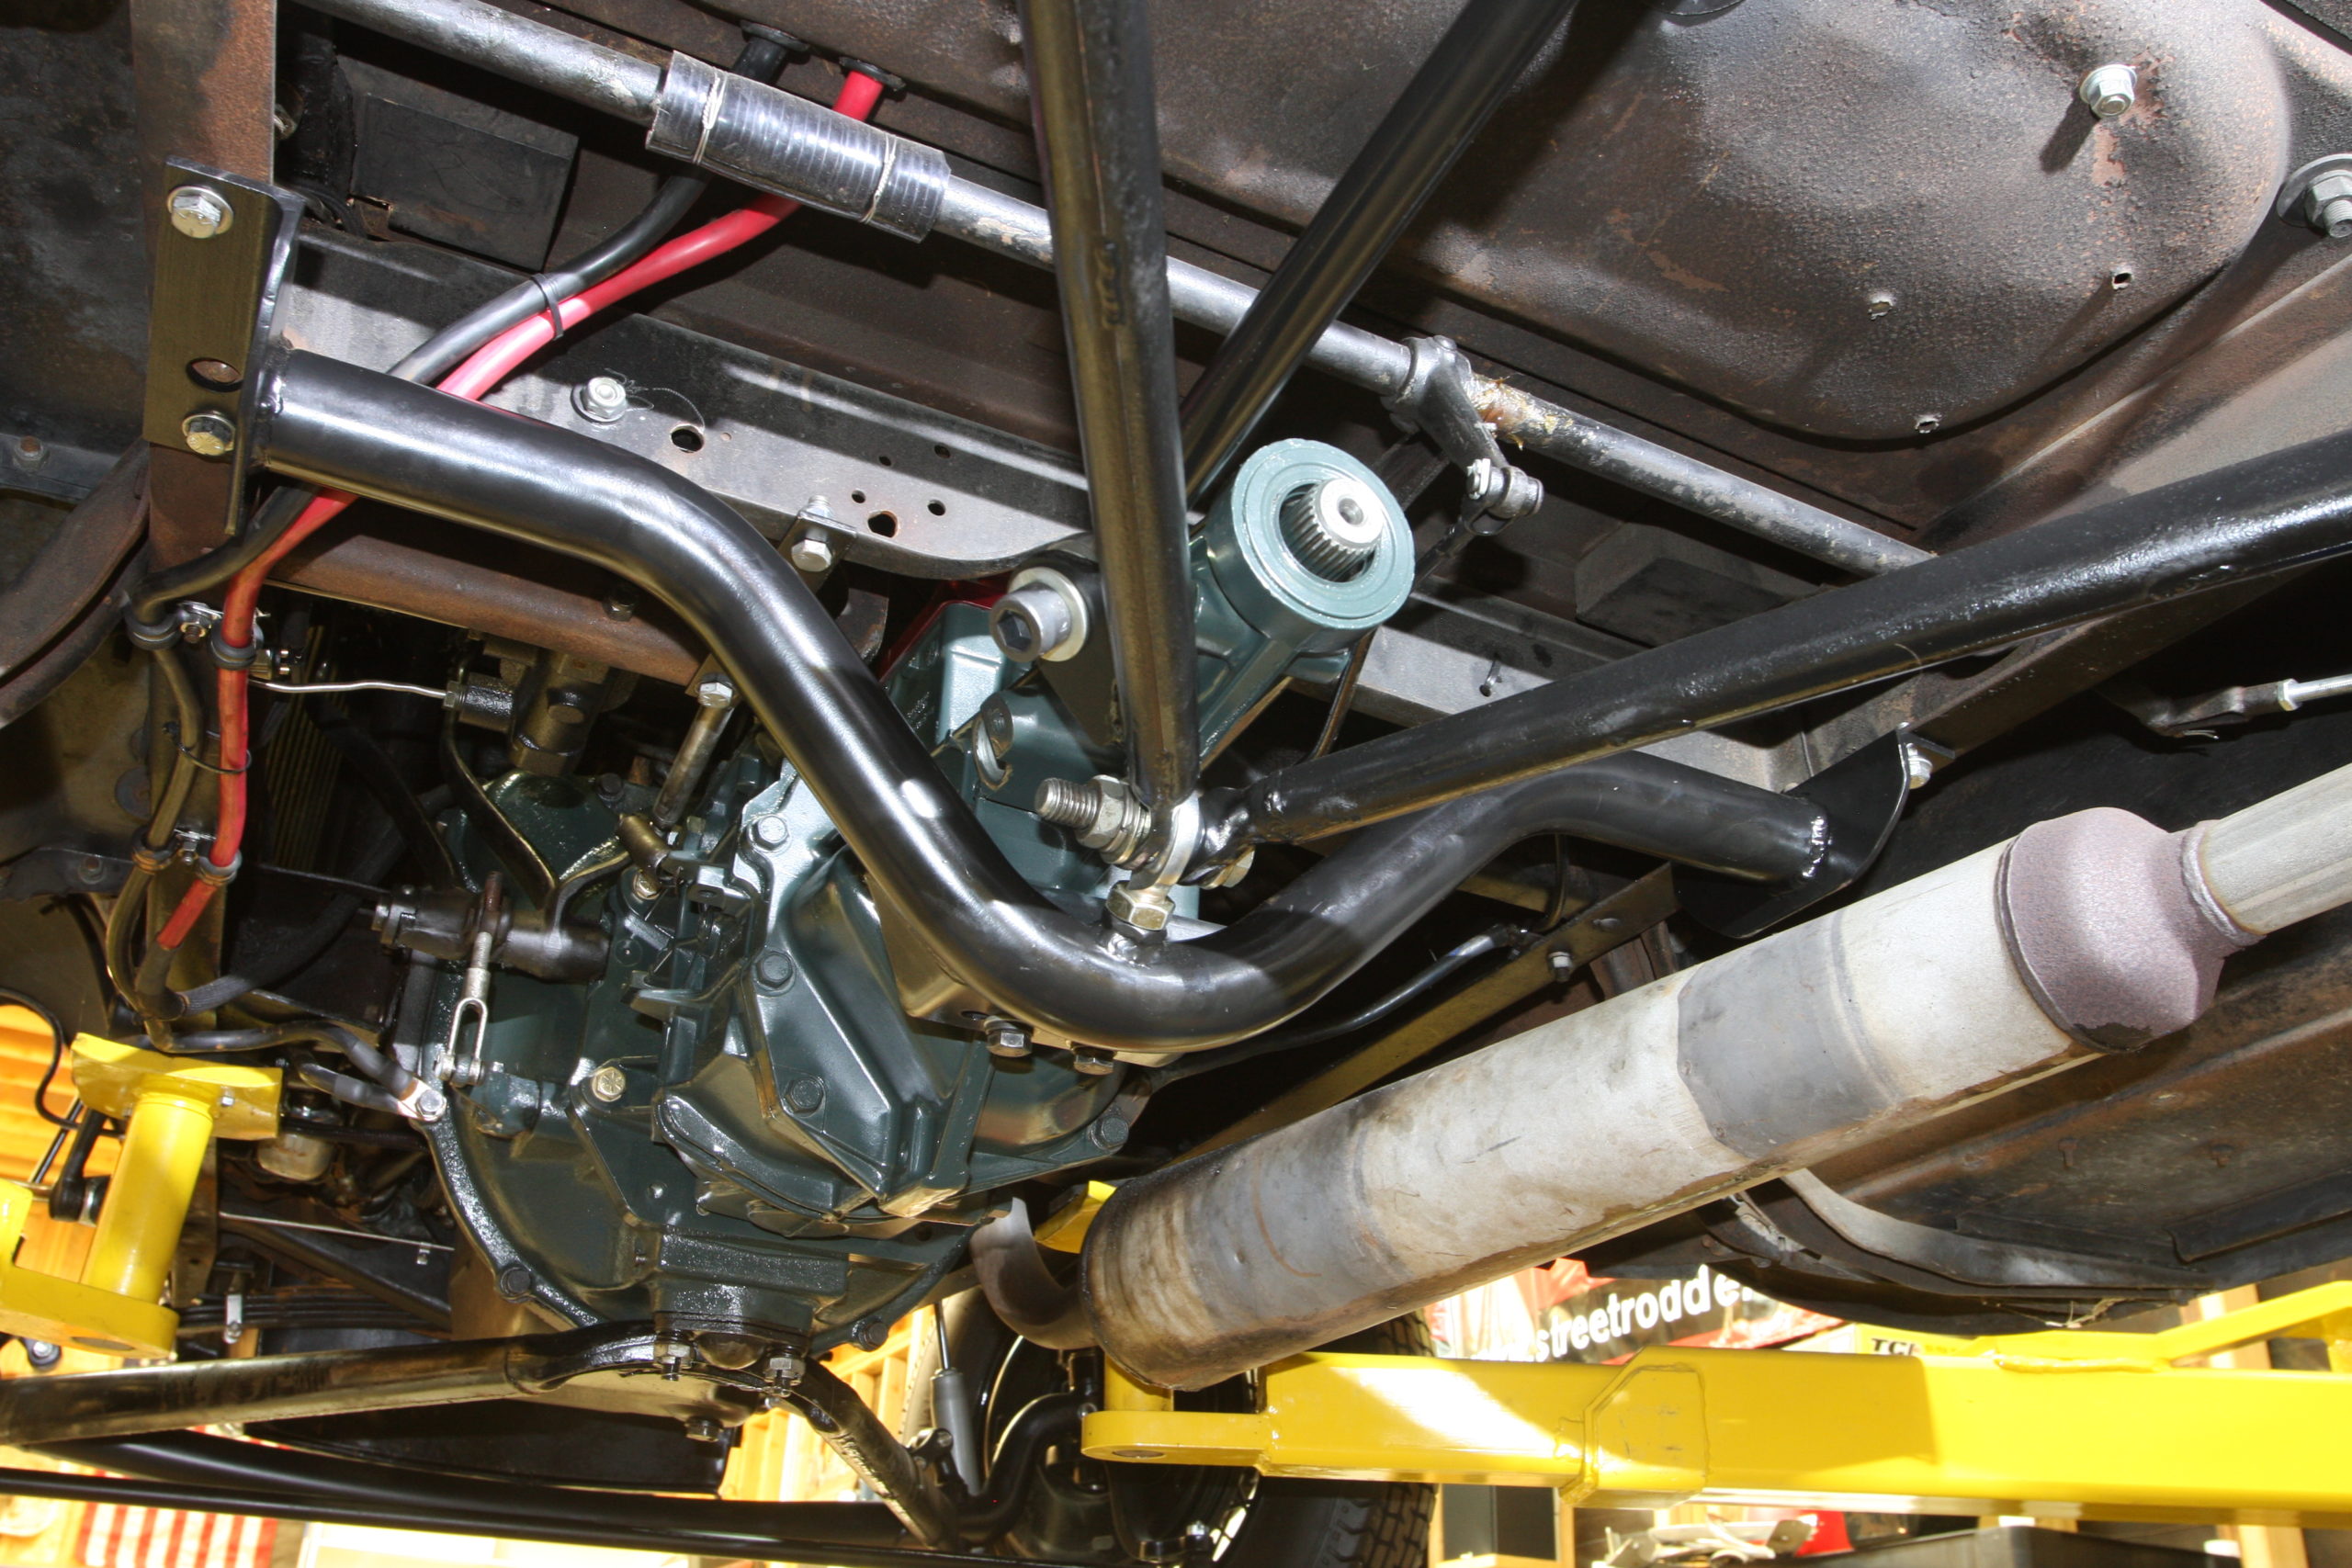
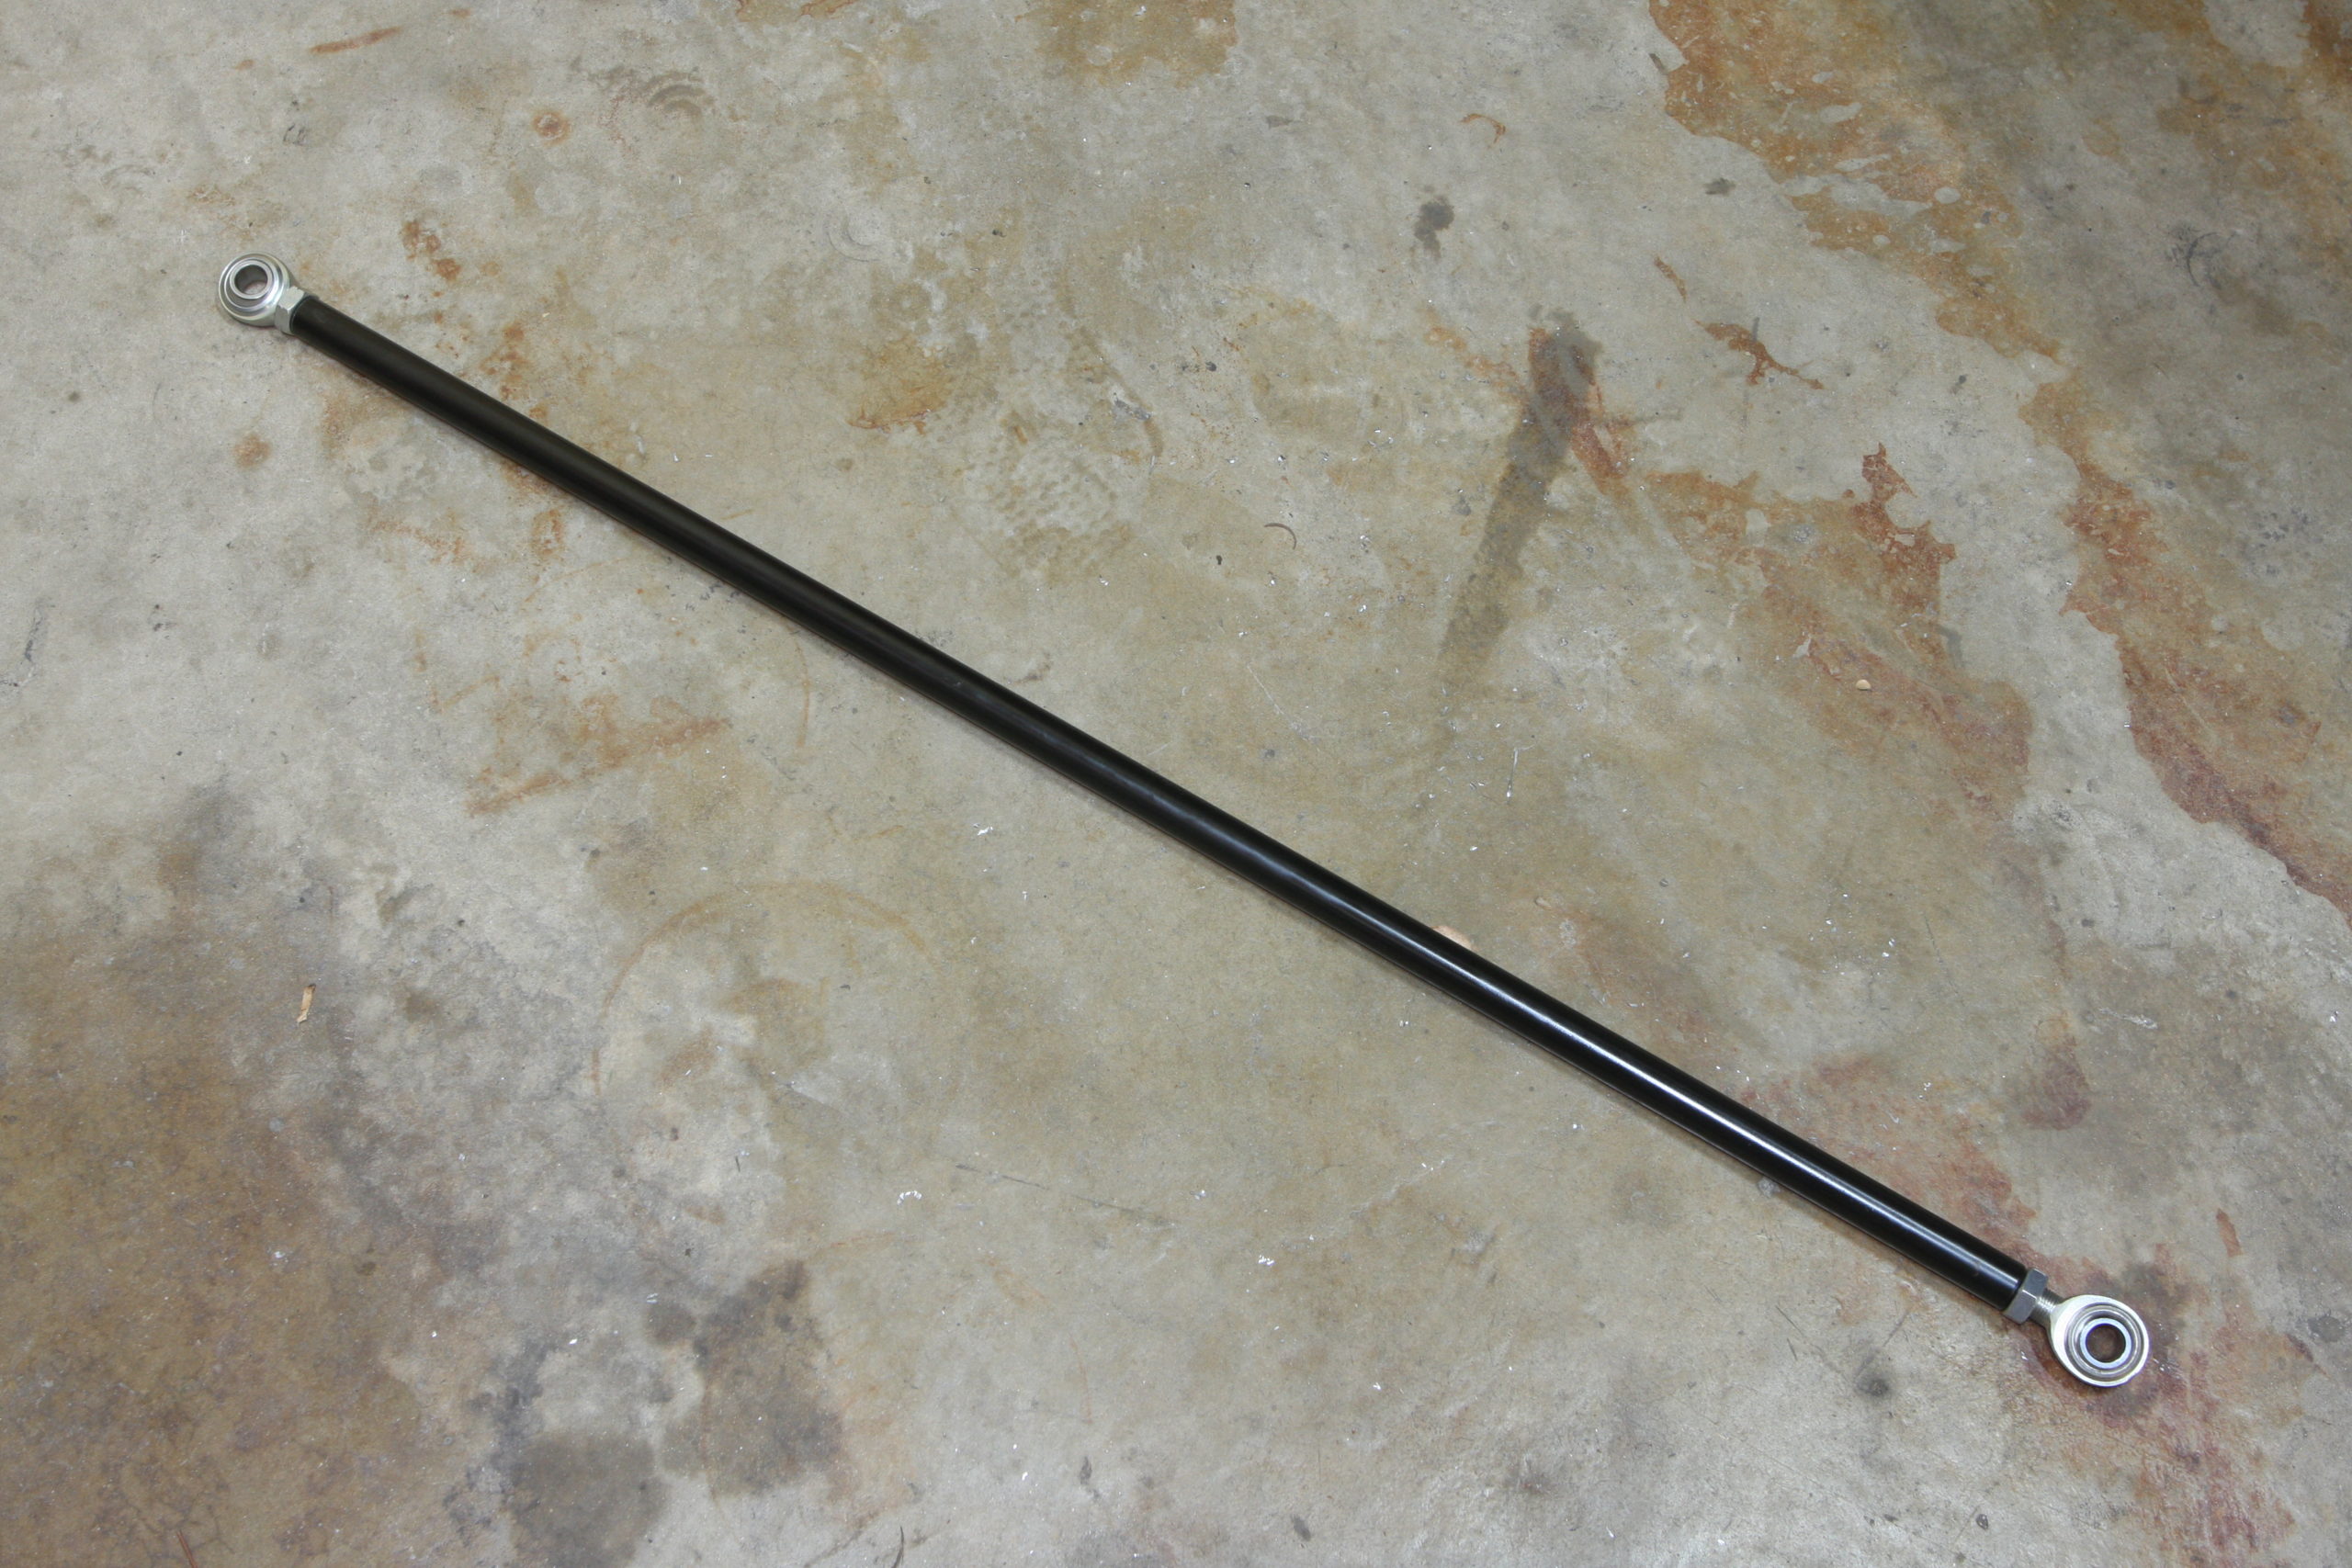
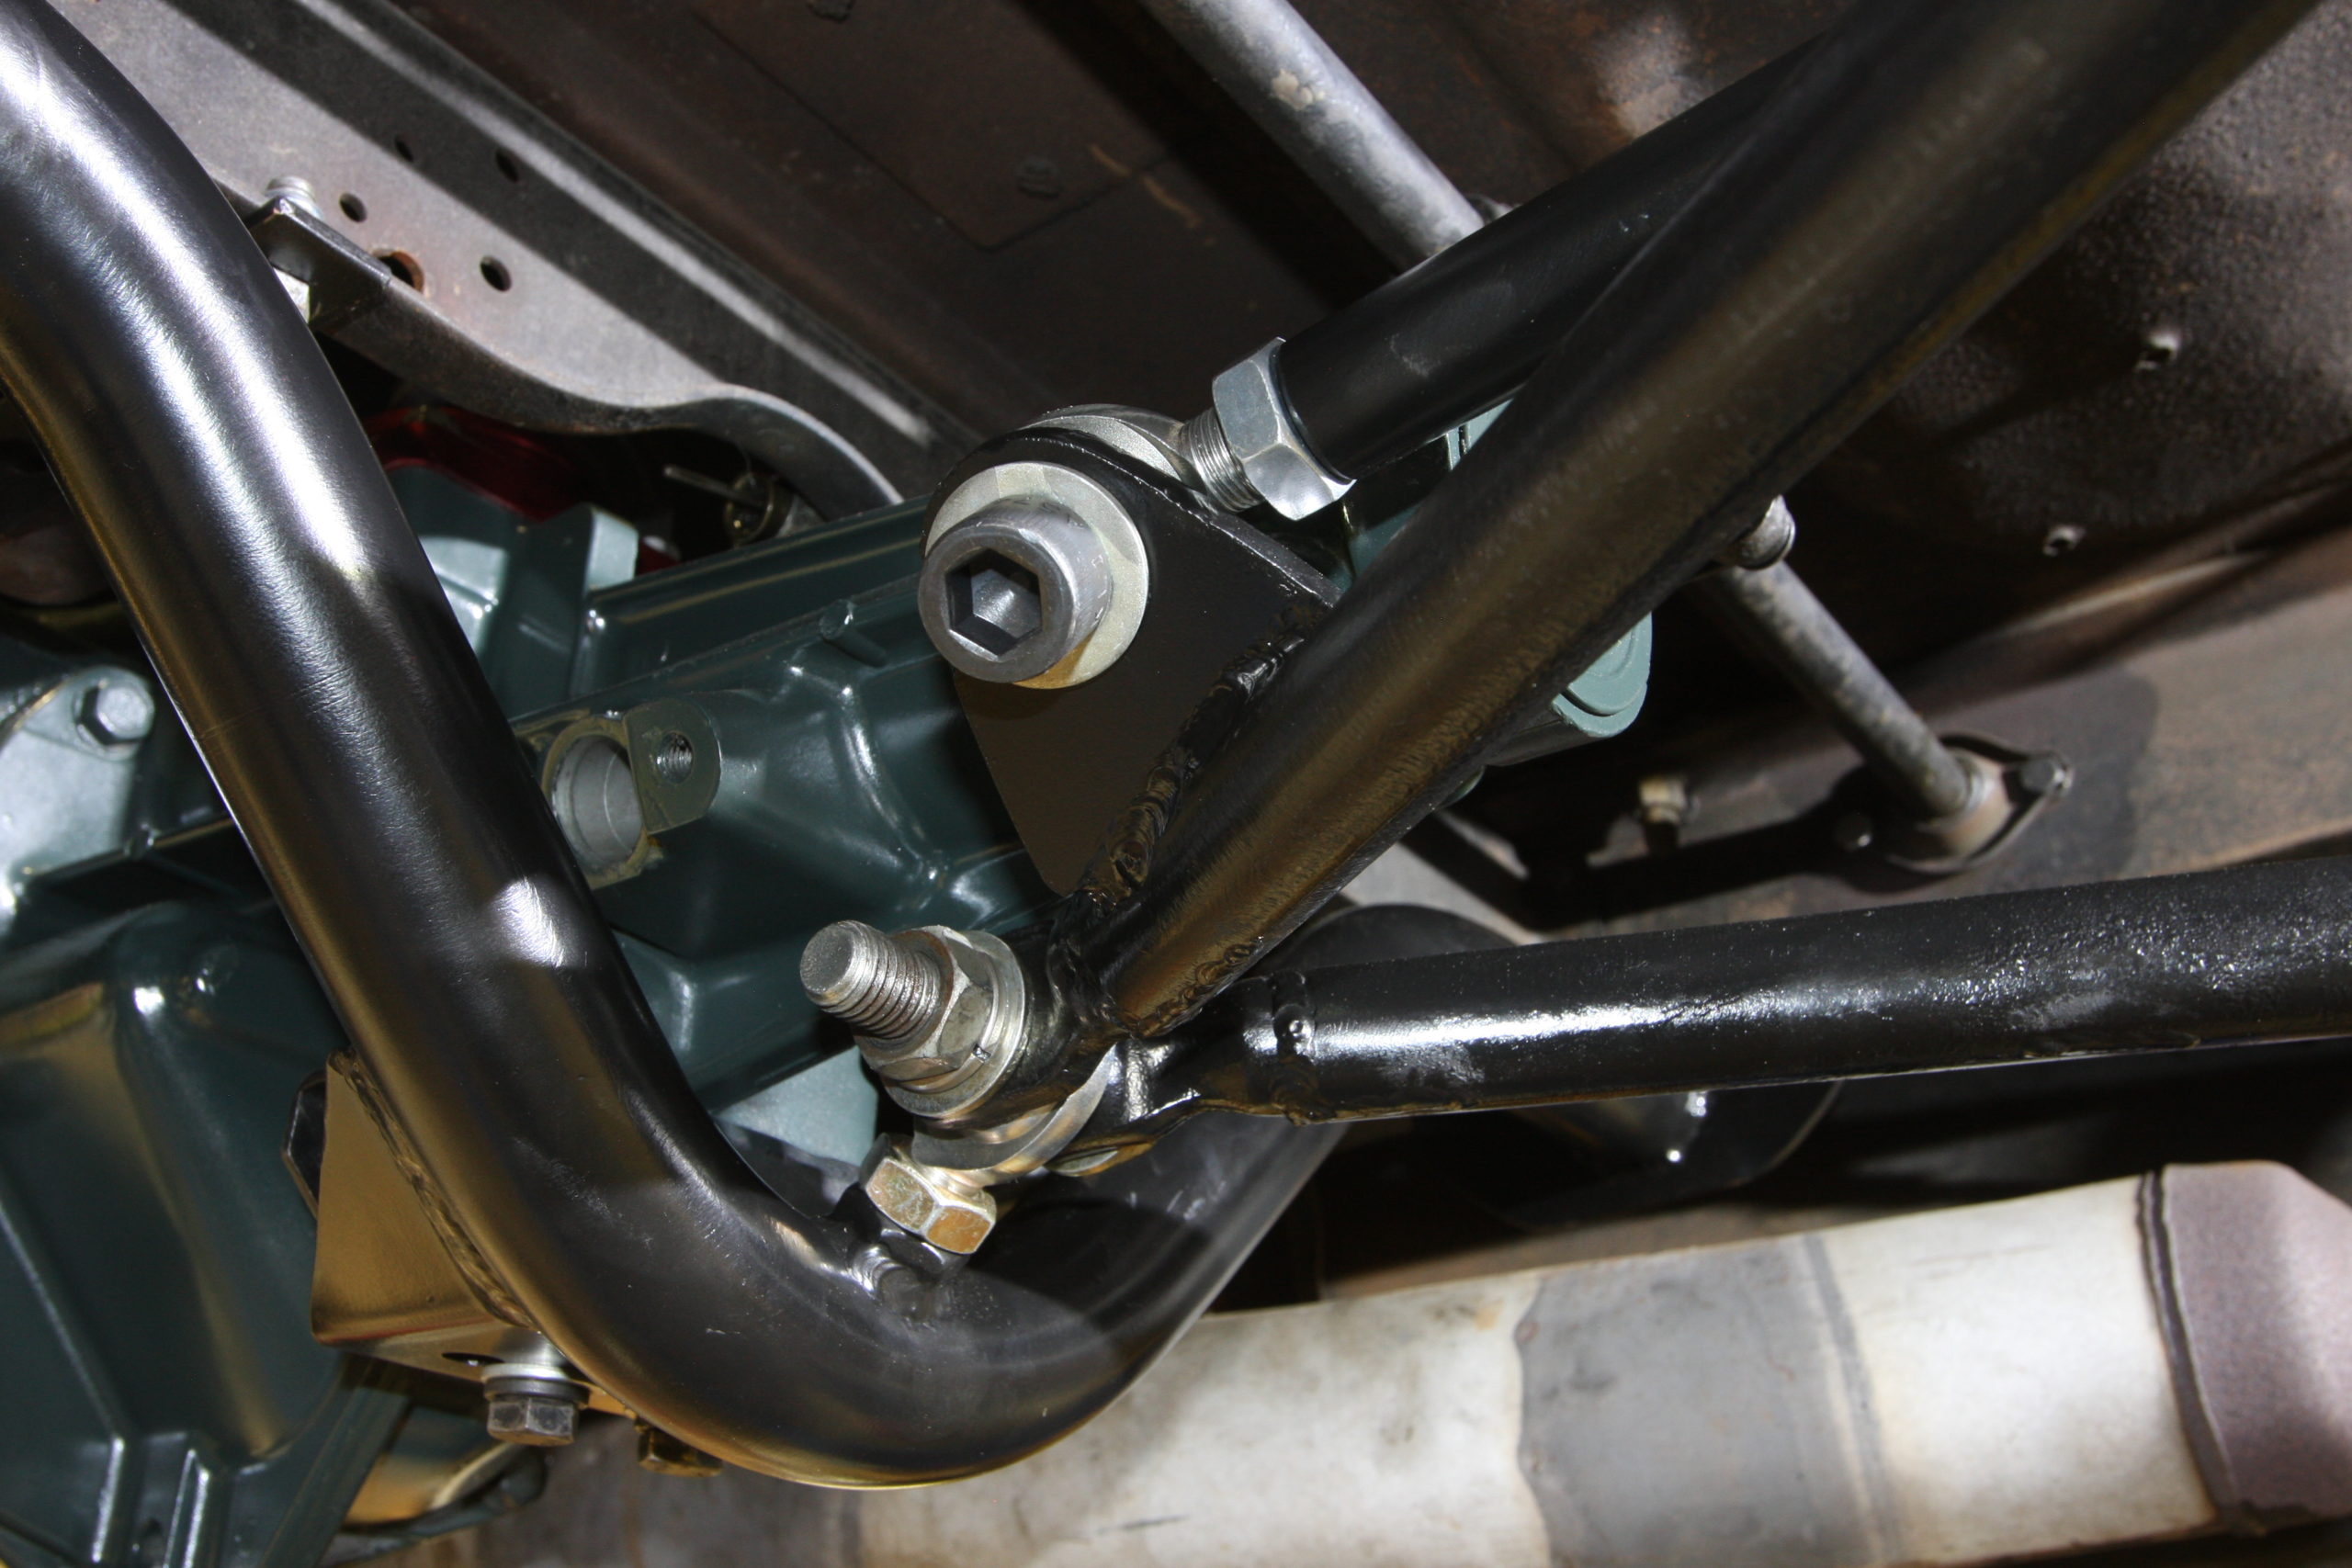
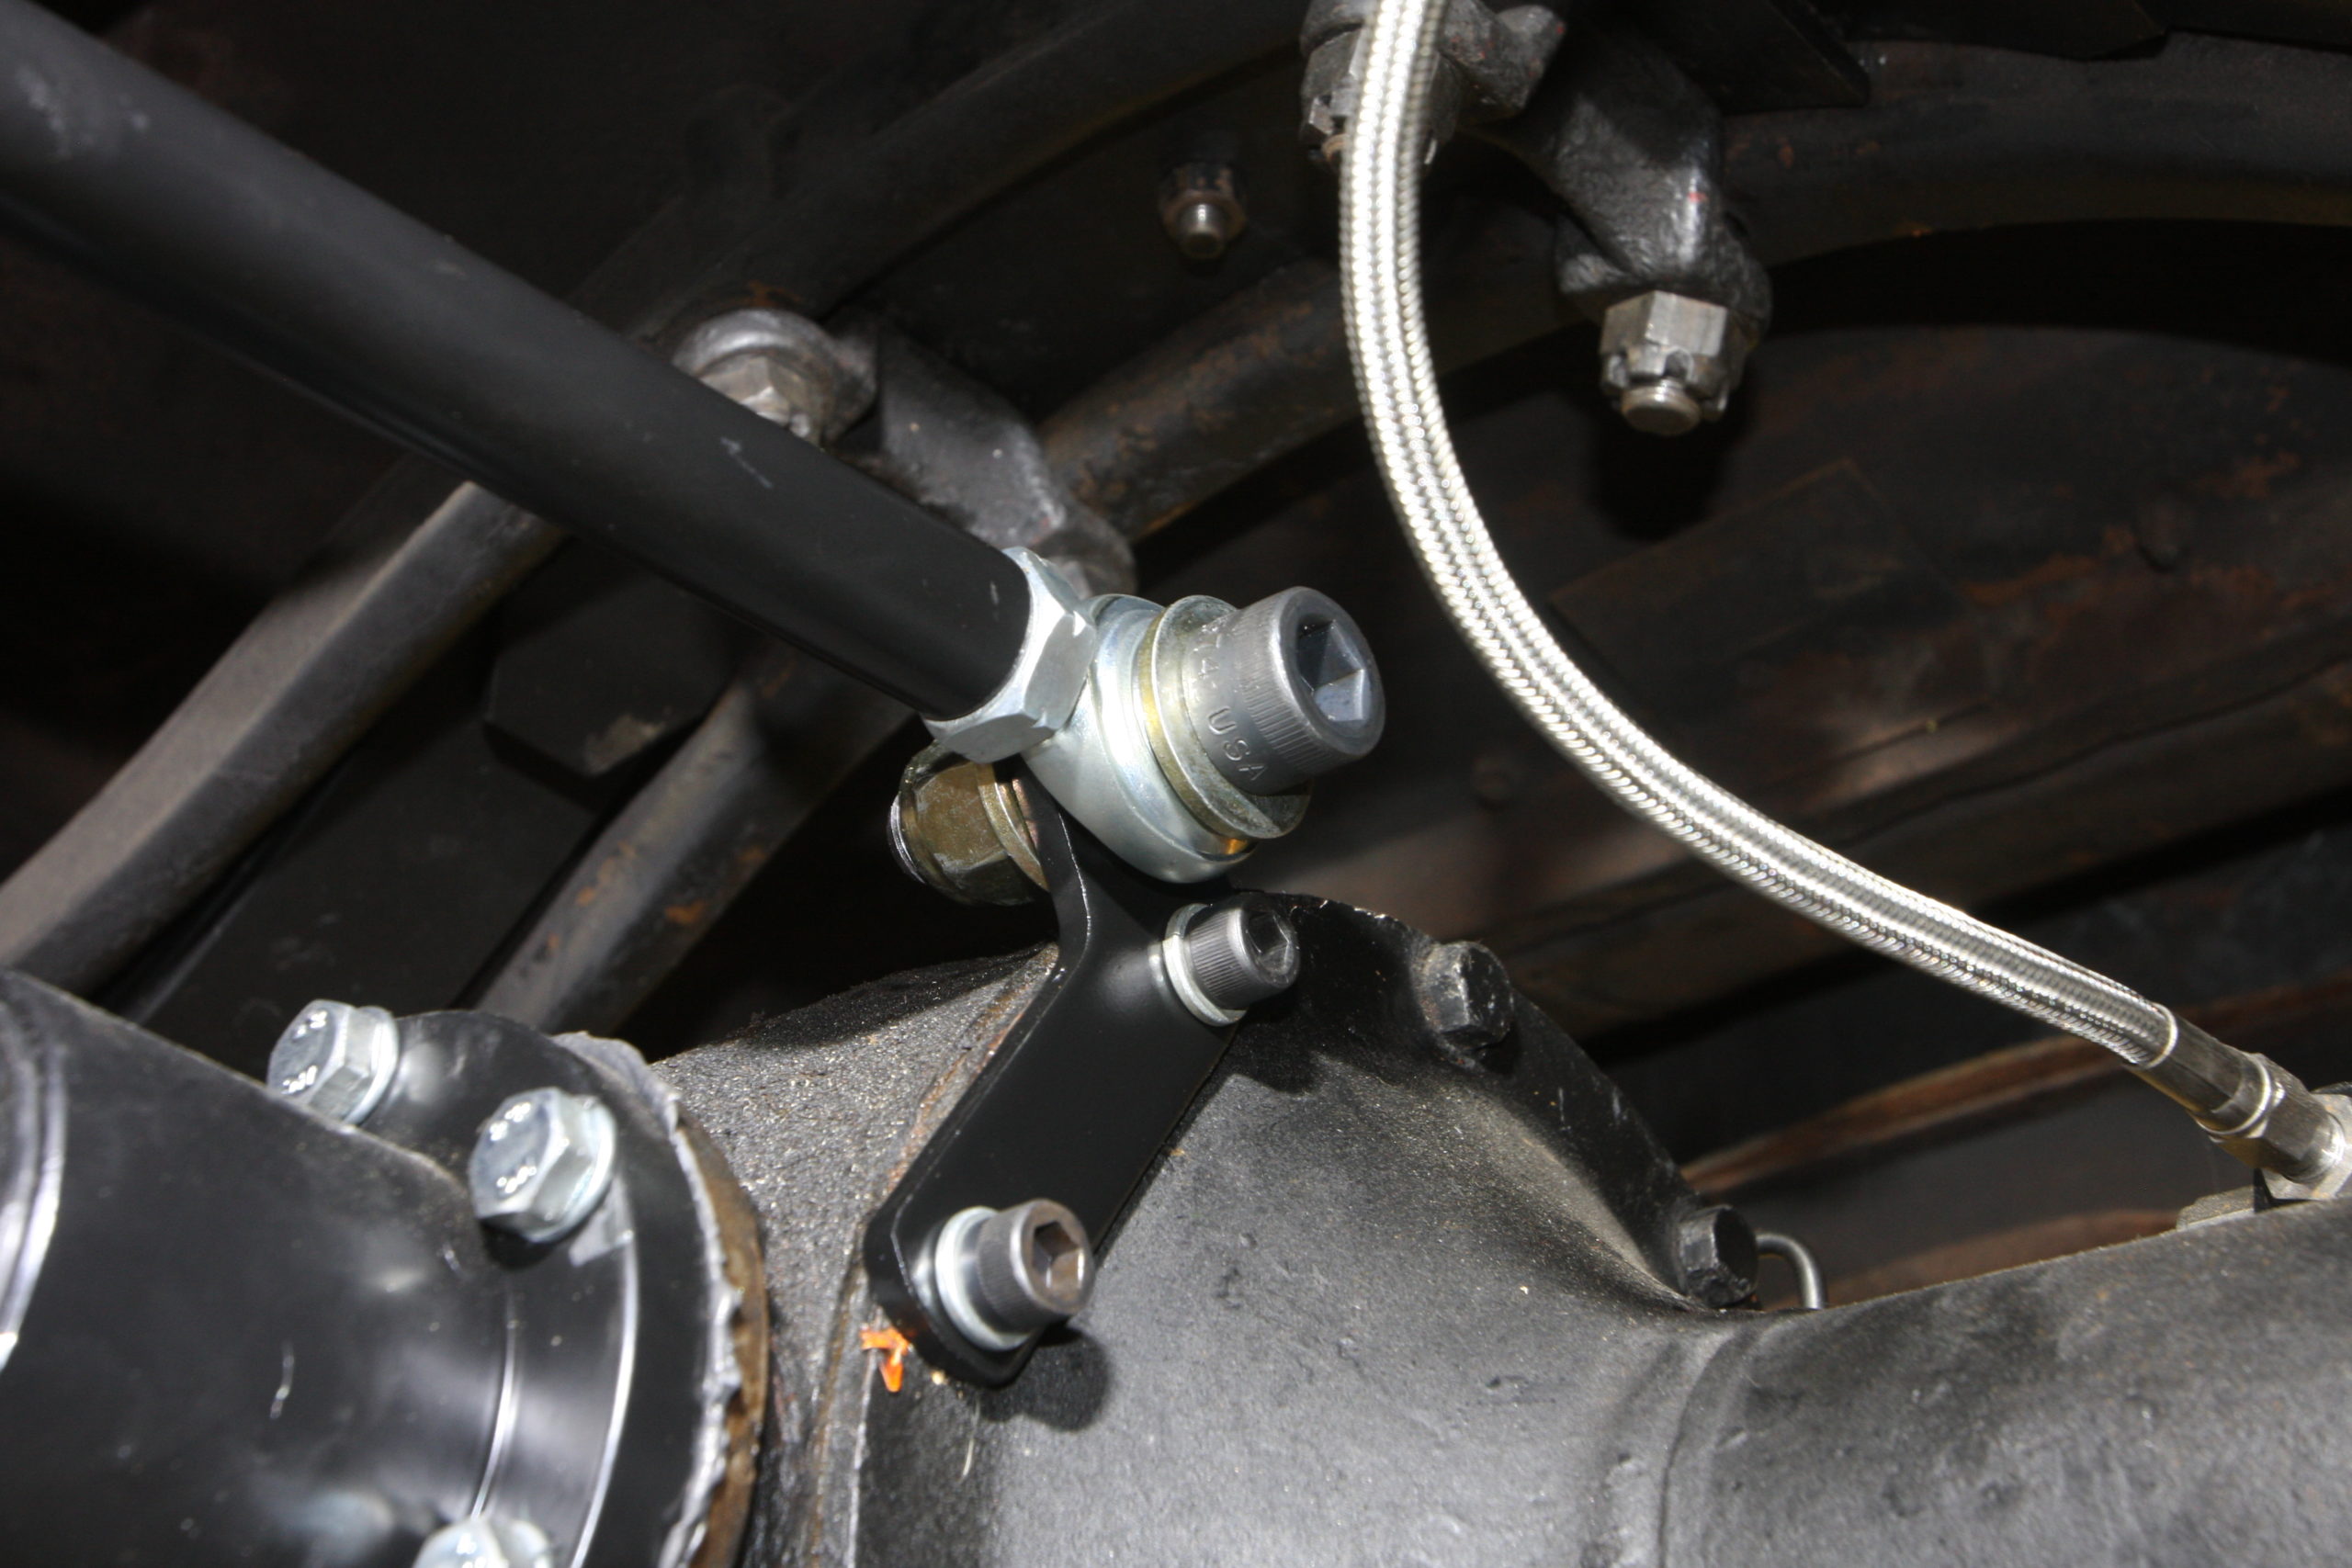
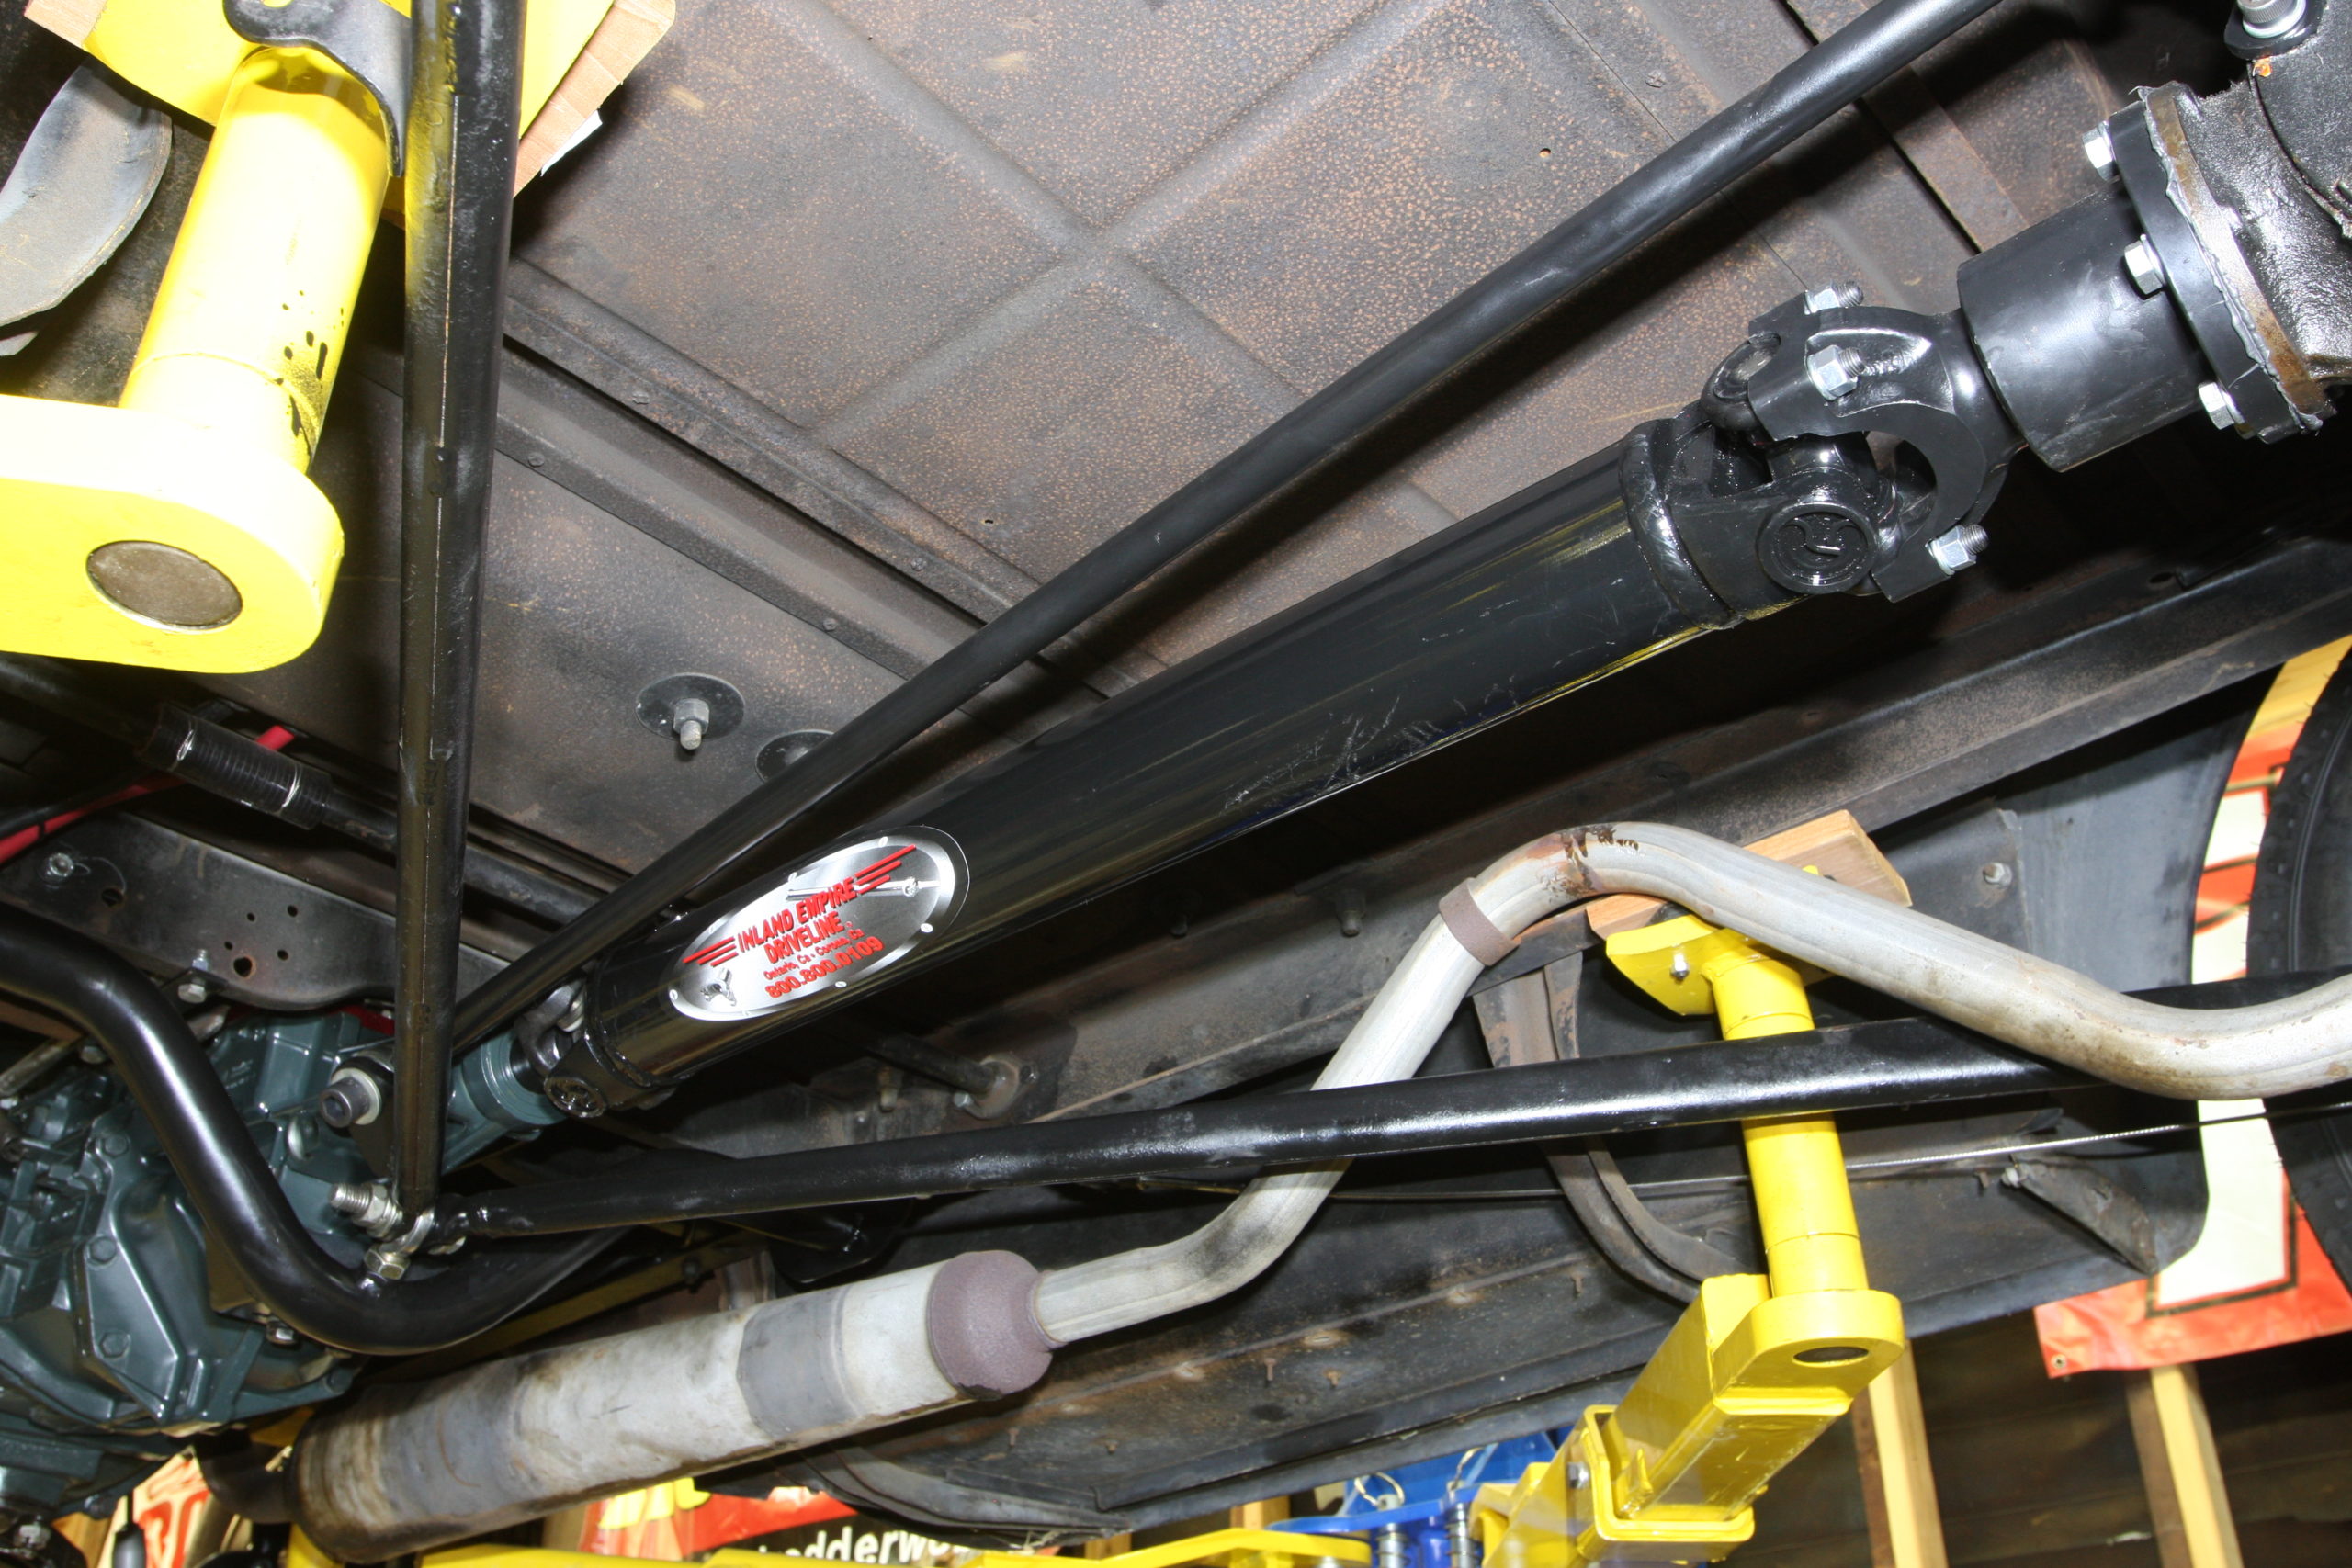
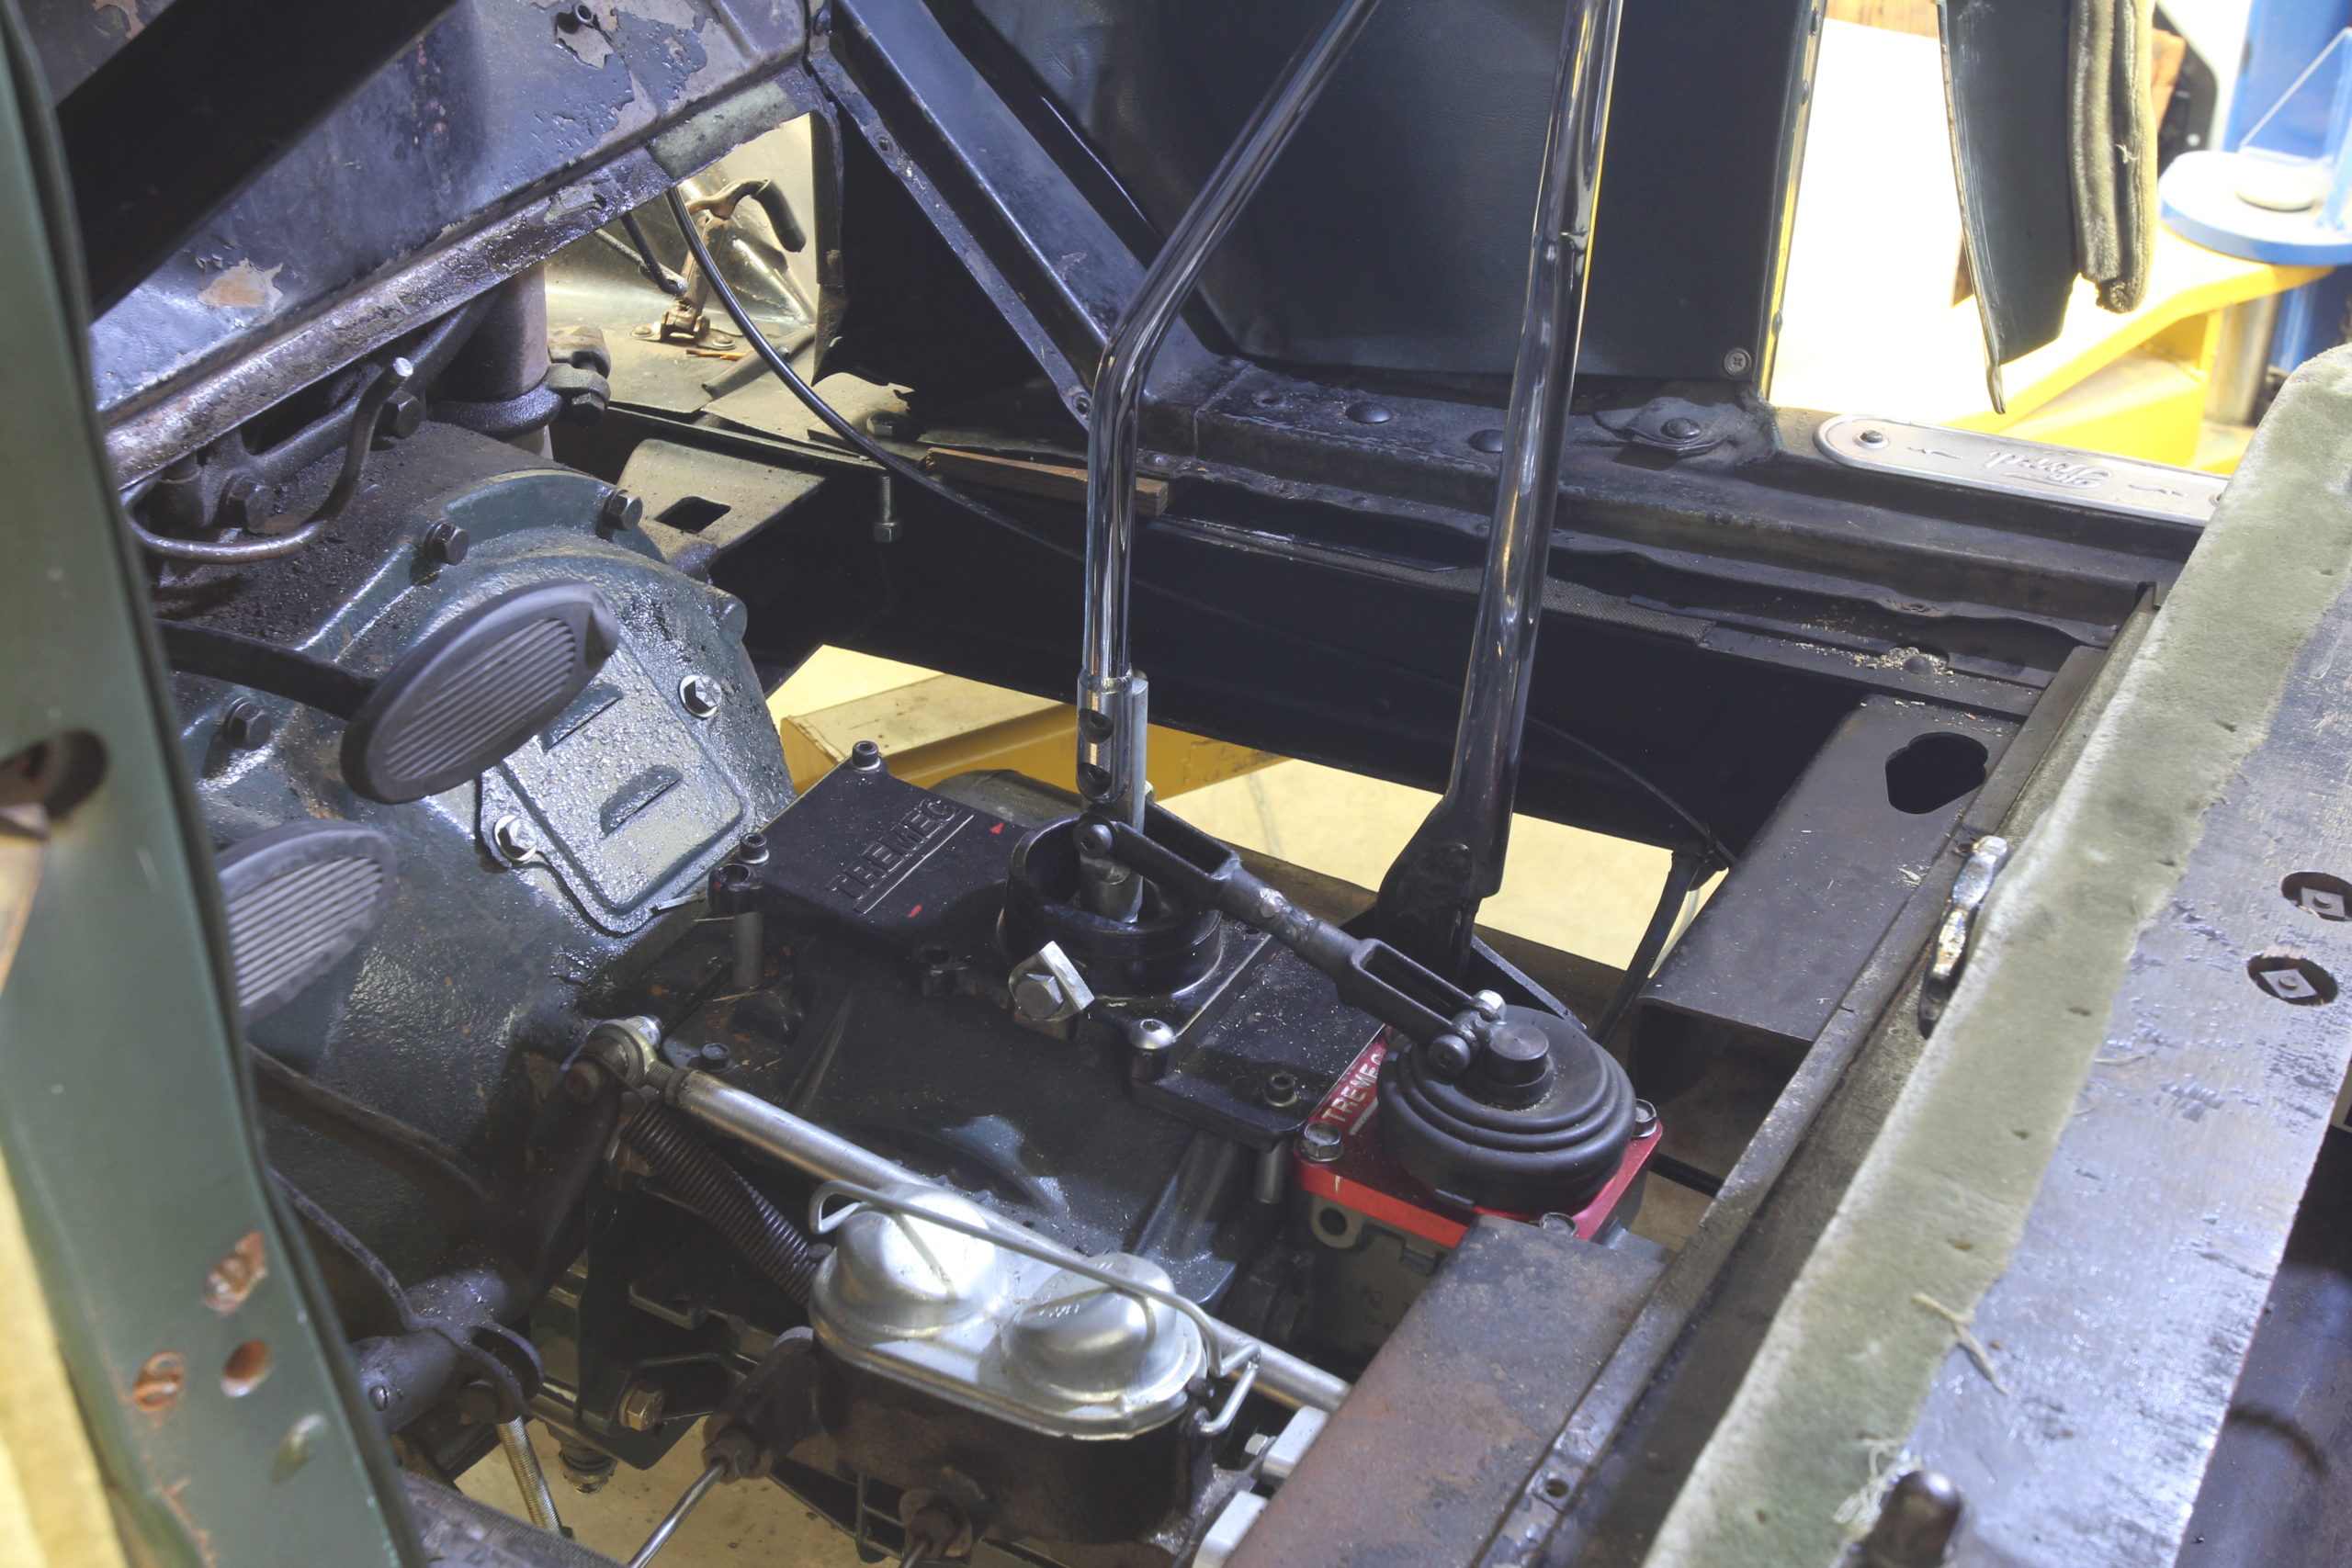
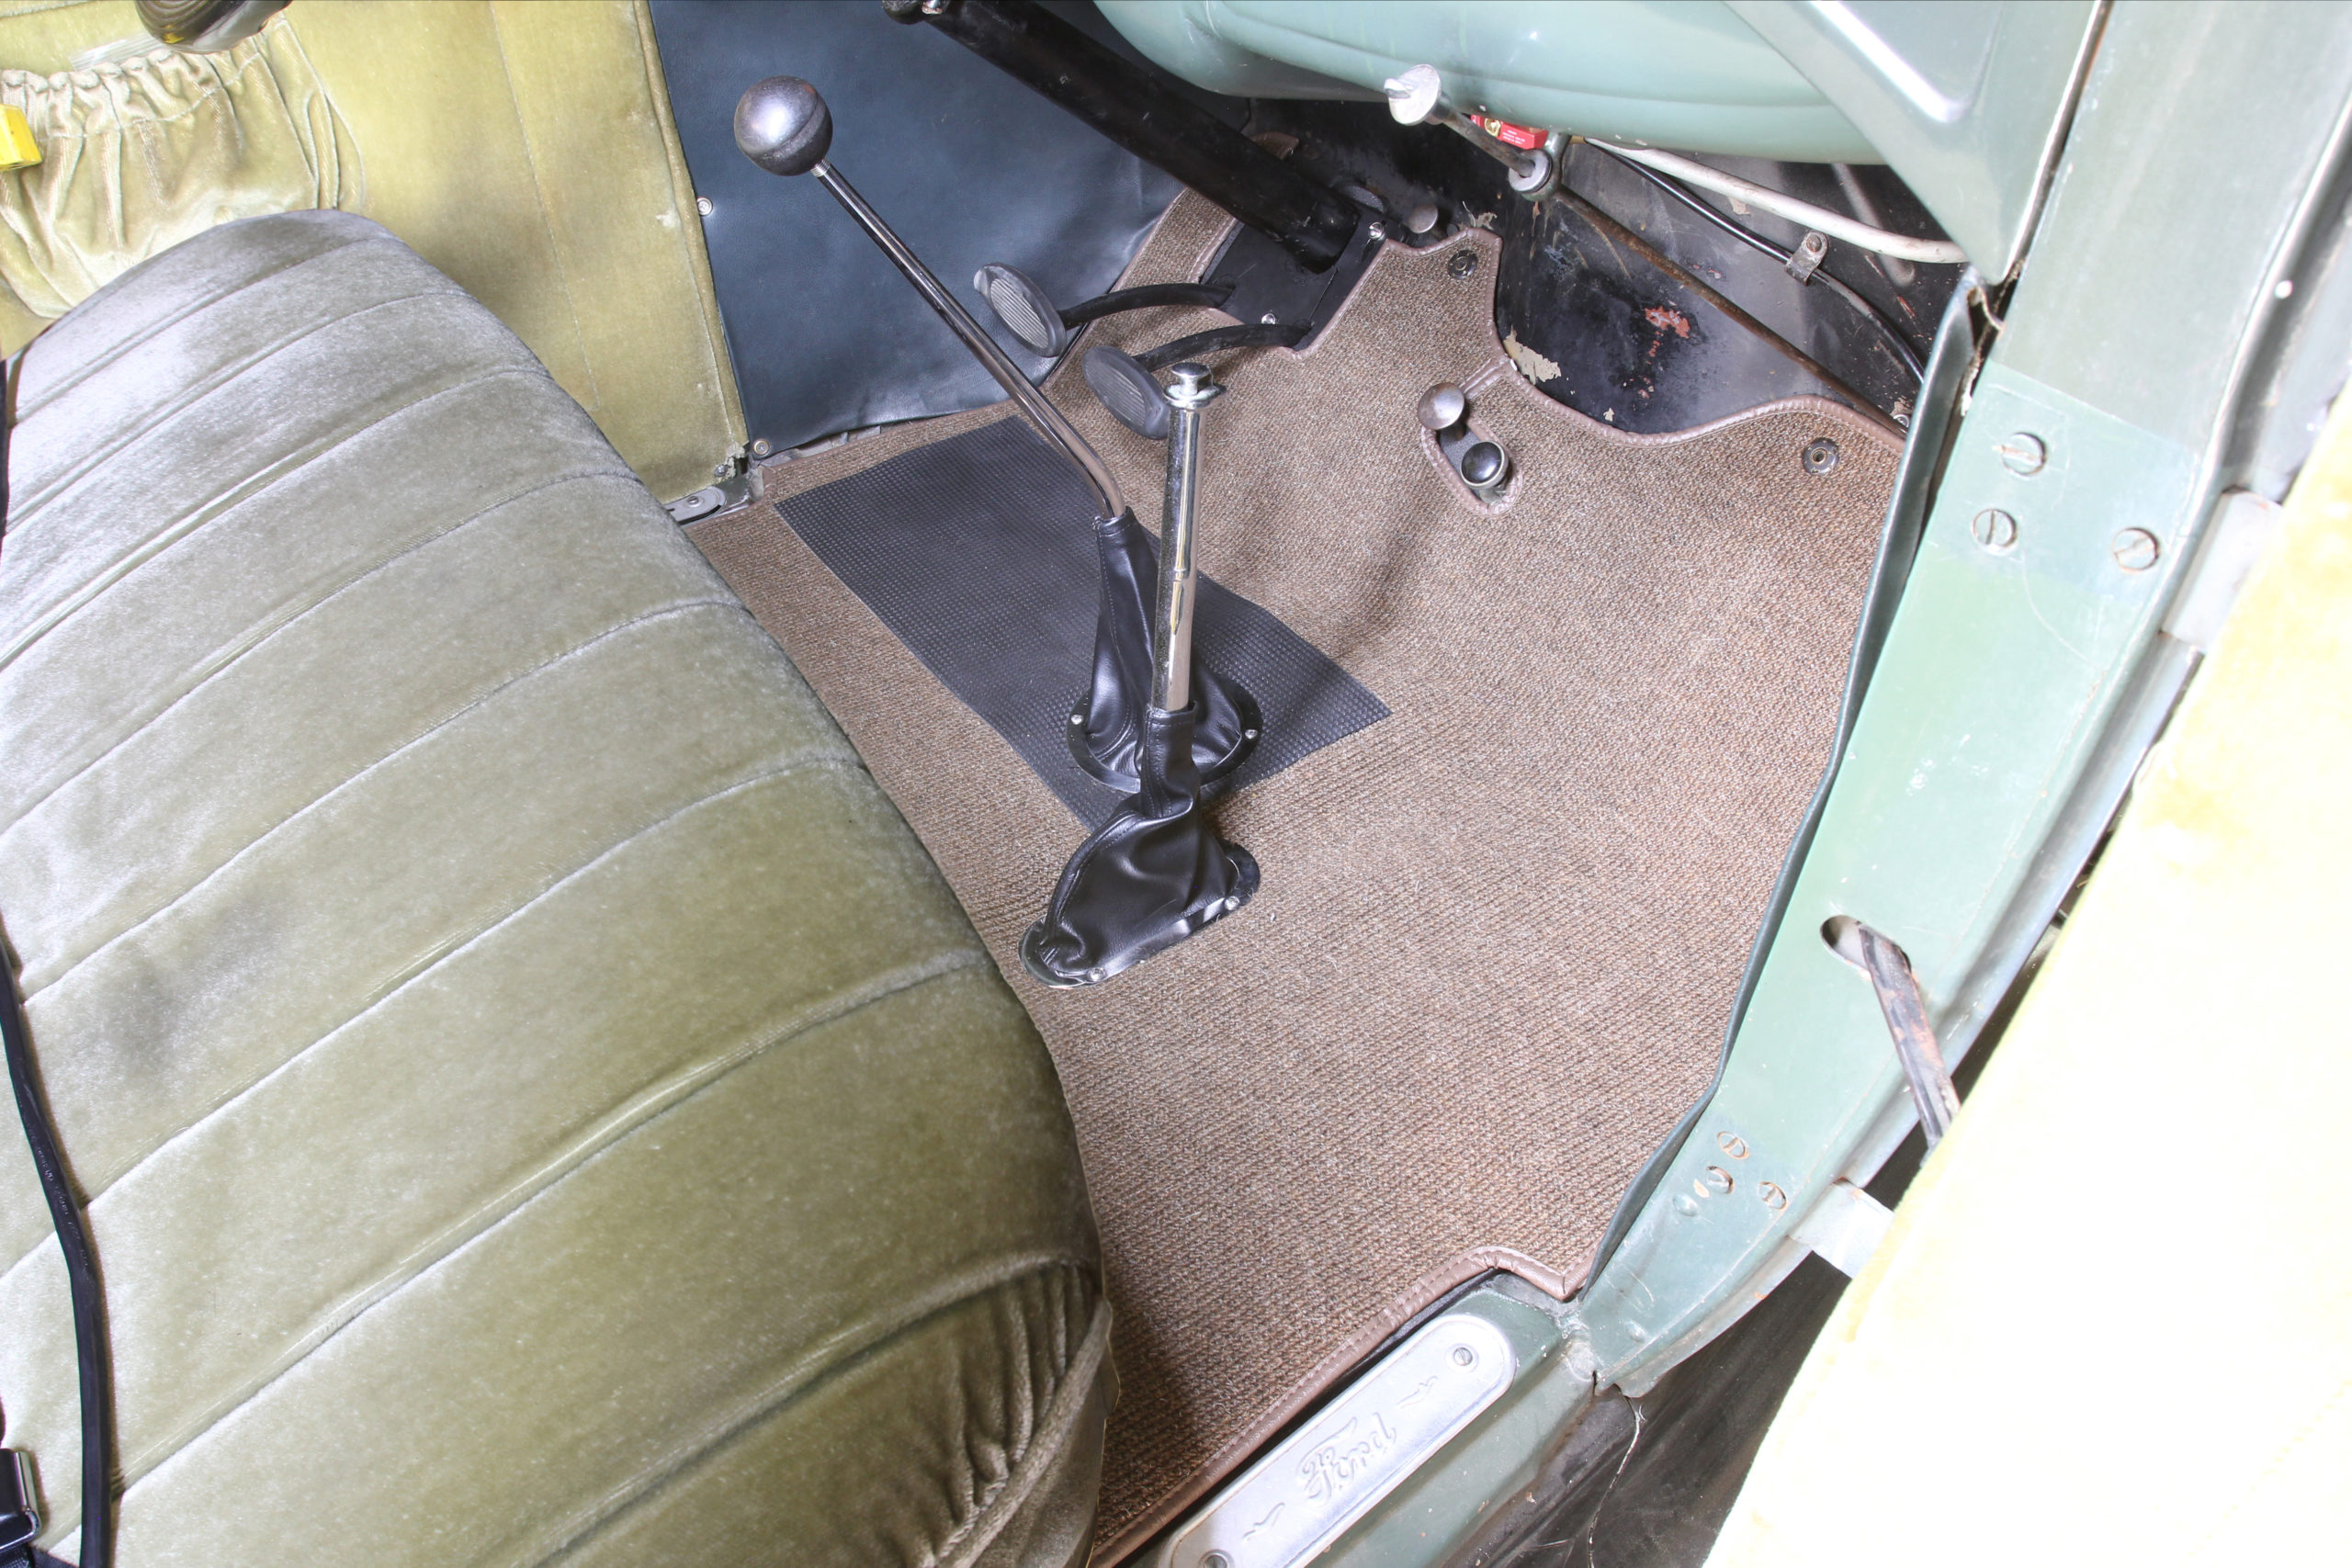
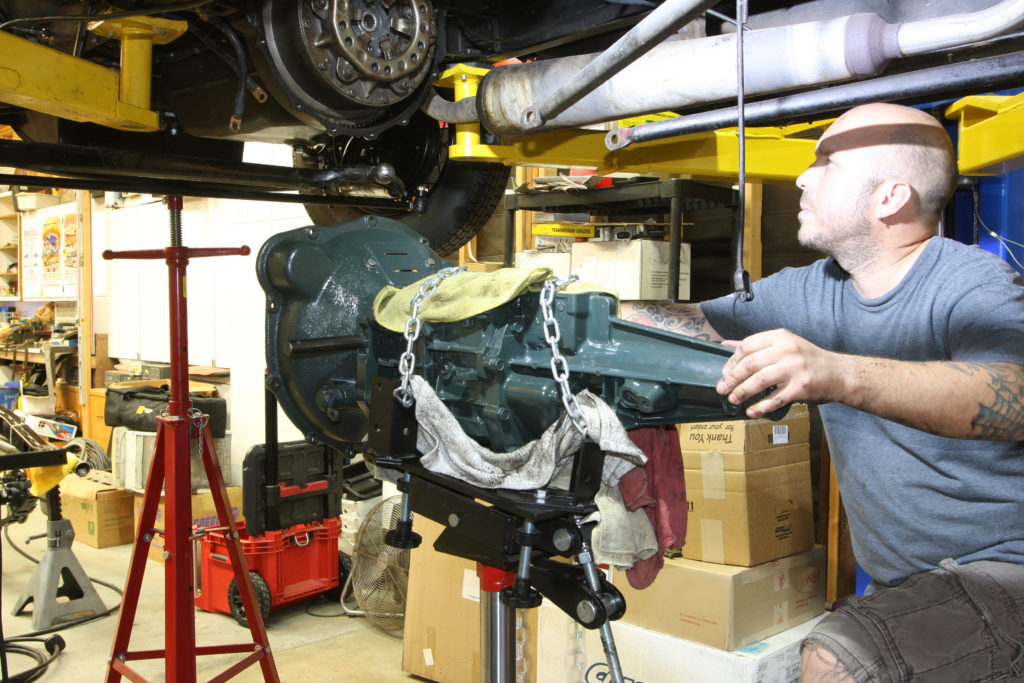
While installing Vintage Metalworks’ T5 kit was straight forward, there were a few side effects that came with fitting a larger transmission into a Model A that weren’t so simple. For starters, installing the T5 meant changing over to an open driveline. Simple enough since Speedway Motors has a kit made specifically for the Model A. But Ford refers to the driveshaft housing as the “torque tube” for a reason, as it controls the rearend’s tendency to wrap during braking or accelerating. Those spindly, pressed rear wishbones won’t handle any kind of torque, so something will need to be done to counter that force now that the torque tube is gone. And regarding that torque tube, the rear wishbones mounted to it, so a new mount is also required. The shifter on the T5, even with the forward mounting position of the S10 tailshaft, pops up through the floor about 8-inches to the rear than stock. The parking brake handle originally mounted off the transmission so this will need to be relocated as well. Thankfully, Vintage Metalworks offers a bracket that mounts the parking brake handle off the T5 trans. The problem with this is that, like the shifter, the location is different from stock due to the T5’s larger dimensions. While these are conflicts that can definetely be dealt with, they’re worth mention since the stock floorboards will need to modified (easy) as will the carpet or floor mat (not so easy). We’ll show you how we tackled these issues and you can formulate your own opinion, but for now, let’s see what it takes to add a gear or two to a Model A. CC

Sources:
Classtique Upholstery
(651) 484-9022
www.classtiqueupholstery.com
Harbor Freight
(800) 444-3353
www.harborfreight.com
Inland Empire Driveline Service
(800) 800-0109
www.iedls.com
Lokar Performance Products
(877) 469-7440
www.lokar.com
Speedway Motors
(800) 979-0122
www.speedwaymotors.com
Vintage Metalworks
(330) 322-3102
www.vintagemetalworks.blogspot.com

Since the rearend assembly needs to be removed in order to drop the transmission, we’ll start there. Here, the rearend assembly has been dropped out of the rear crossmember and the torque tube and u-joint assembly has been removed. We’re using a Harbor Freight transmission jack to hold things securely in place.
The first step in converting a closed driveline to an open driveline is to remove the driveshaft/pinion gear. Normally, this would be done the easy way, by removing the spring, axle housings, axles, and third member, so that it could be slid out through the side of the rearend housing. I don’t want to disassemble the rearend, so we’re going to do it another way, by pulling the driveshaft/pinion gear out of the housing. Unfortunately, there’s no easy way to do this and one must get creative. For that end, I fashioned myself a pinion puller using a clamping collar, a six-inch by 1/2-inch piece of steel round stock and an assortment of hardware.
Here’s the driveshaft/pinion gear puller in action. The clamping collar firmly grabs the driveshaft so the puller has something to push against, effectively pulling the pinion gear assembly, bearings and all, out of the rearend housing. What’s neat about this is the fact that the ring and pinion adjustment is unchanged as the new pinion gear assembly will simply be pressed back into the housing in the same position, no need to readjust the lash, etc.
Ford must’ve smartened up following the Model A as the driveshaft/pinion gear assembly was changed to a two-piece design shortly thereafter. Here’s the long, one-piece Model A unit
Here’s the pinion gear assembly after removing it from the driveshaft. That’s the new pinion shaft, part of Speedway Motors’ open driveline conversion kit at top.
Next, we’re installing the pinion gear assembly on the new Speedway Motors’ pinion shaft using the new yoke assembly to hold the pinion firm while the retaining nut is fastened to 100 ft.lbs.
A cotter key keeps the nut in place.
With the pinion assembled, here’s the entirety of Speedway Motors open driveline kit.
The pinion gear assembly is then slid into the rearend housing.
A seal is installed into the pinion seal housing…
…before the housing is attached to the center section.
The new yoke is then attached, wrapping up the open driveline conversion.
Speedway Motors recommends venting the rearend and provides a barbed fitting that can be installed at the top of either axle tube.
With the stock torque tube and driveshaft out of the way, the original transmission and bellhousing can be removed. Once again, the Harbor Freight transmission jack is irreplaceable.
The orignal clutch and pressure plate is also removed and cast aside. Savvy readers will notice that our flywheel has been lightened, an early trick to increase the revs in the little four cylinder. Here, we’re removing the pilot bearing using the “wet tissue” trick to force it out of the flywheel’s recess.
A new pilot bearing, part of Vintage Metalwork’s kit, is then installed…
…followed by their exclusive clutch…
…and the stock Model A pressure plate.
Over on the bench, the provided throwout bearing collar adapter is installed on the T5.
The Vintage Metalworks’ T5 adapter is then installed against the Model AA bellhousing…
…followed by the T5 itself. Note the pedal shaft that Vintage Metalworks incorporated into the adapter plate, allowing them to retain their stock location.
Inside the bellhousing, a new Model A throwout bearing has been installed…
…including the return spring.
We’re finally ready to mate the T5 transmission assembly to the four-banger!
We mentioned that we’re using a Harbor Freight transmission jack and this job would be much more difficult without it!
And we have contact! Here’s the T5 snuggled in place for the first time.
I really wanted to avoid cutting anything up, but after getting the transmission in place, it was painfully obvious that the wishbones would need to be modified if we wanted to retain any sort of balance between the front and rear universal joints. I also fabricated a transmission crossmember for the T5 trans, this will serve as the perfect location for the front mounting points of the rear wishbones.
I opted to shorten the wishbones and relocate the front mounting point just below the tailshaft of the transmission. This brought the driveline angles much closer.
As we mentioned before, we need to add some method to control rearend wrap. This will be handled by a “third-link”, essentially an additional wishbone that will attach to the top of the rearend housing and the front of one of the rear wishbones. Speedway Motors provided the 48-inch tubing, rod ends, and jam nuts.
Here’s the front mounting point of the “third-link”…
…and the rear mount atop the rearend housing.
The addition of a driveshaft, courtesy of our friends at Inland Empire Driveline Service wraps up the install underneath the car.
While the shifter location on the T5 install is in front of the bench seat, I’d prefer it came up in the stock location. So, an extra Tremec shifter assembly with a 16-inch Lokar shifter was mated to the stock T5 unit with a fabricated linkage. That solved the shifter location, but we’re going to have to live with the location of the parking brake assembly, as it’s mounted using Vintage Metalwork’s bracket and there’s really no where else to put it given the T5’s rather girthy case.
Using a stock floor mat is out of the question since the holes for the shifter and parking brake are cut out at the factory and cannot be modified. Since our coupe is of the Deluxe variety, we opted to replace the funky carpet in which it came with a new carpet kit from Classtique Upholstery. Turns out, they can sew up a kit sans shifter and parking brake holes and provide the heel pad so the customer can install it where they prefer. Here’s our finished floor, with the Classtique carpet kit in place as well as shifter and parking brake boots and trim rings from Lokar Performance Products.