Dressing up a modern small block Ford as a vintage Thunderbird Y-Block engine
T-Bird Transformation
By Ryan Manson * clampdowncomp@gmail.com
When the Flathead engine was discontinued in 1954, it was no surprise when Ford replaced it with a V8 engine that featured an overhead valve design. By that time, nearly all the Domestic OEs offered an OHV V8, save Chevrolet who would follow less than a year later. With an initial displacement of 239ci, ironically the same as the Flathead engines that it replaced, by the mid ‘50s the Y-Block, as it became known, grew to 312 cubic inches, with optionally supercharged arrangements being offered in Ford’s flagship Thunderbird model. Being the top of the line Ford at the time, it’s no surprise that the F-100 guys began to use “take-off” T-Bird parts on their own Y-Block engines, dressing them up or adding high performance parts to a rather benign motor. Finned aluminum valve covers and the 2×4 intake manifolds were among the favorite.
Recently, our friends James and Chris McMenimen purchased a Blueprint Engines crate 306ci Ford small block from Summit Racing (#MLL-BP3060CT) and wanted to give it a more “period” look. We decided that basing the look of the Windsor motor to that of a late ‘50s Thunderbird Y-Block engine would not only look cool, but would demand a second glance.
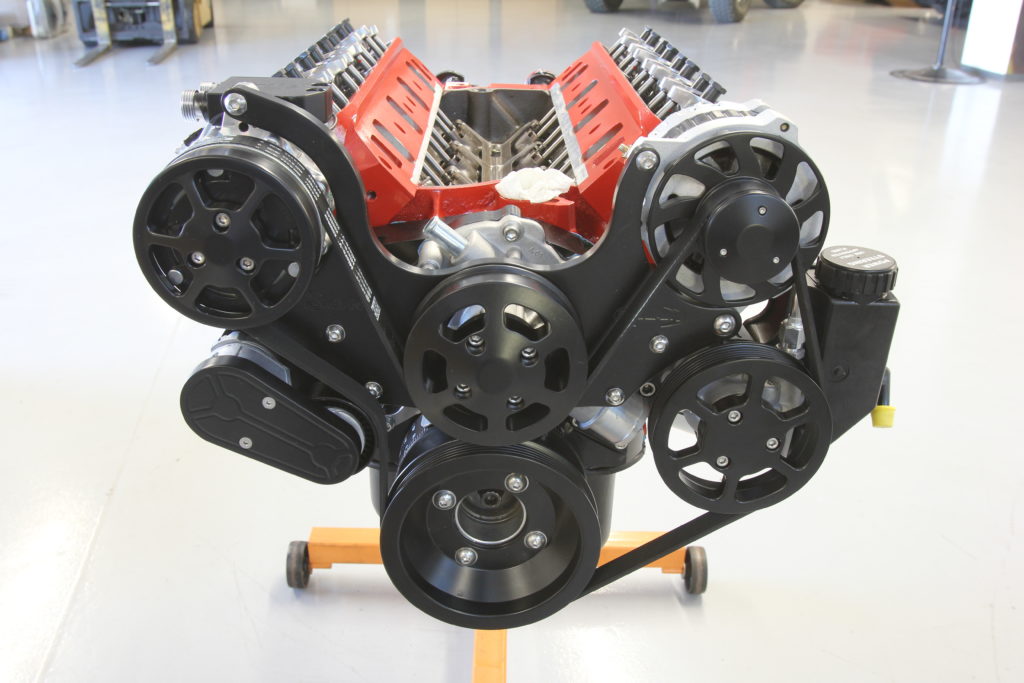
In addition to the vintage aesthetic, we also set about adding the necessary accessories to the front of the engine in the form of an Eddie Motorsports (EMS) S-Drive serpentine belt kit. As anyone familiar with the Blue Oval motors can attest, swapping engine brackets and pulleys from one model to another doesn’t always result in a setup that works together. Different pulley offsets and bracket arrangements make for a junkyard nightmare when it comes to adding an a/c compressor, alternator, and power steering pump using factory fittings, not to mention the requirement of two or more v-belts to drive all those components. EMS’ S-Drive solves the fitment problems as well as the multiple belt arrangement by driving everything with a single 6-rib serpentine belt, just like a modern car. The result is a compact arrangement in a reliable package.
Continuing with the modern/vintage theme, we opted to top the long block with Holley’s brand new Sniper EFI throttle body mated to a Weiand Street Warrior dual plane intake manifold. Designed with ease of installation in mind, the Sniper EFI features self-learning technology that puts an end to cold start issues, hesitations, vapor lock, and flooding. Increased fuel efficiency and the end of that dreaded “exhaust smell” are further improvements gleaned from a simple EFI conversion. The Sniper EFI throttle body features a dual bolt pattern that will mate to 4150-flange as well as spread bore intake manifolds, and the simple four-wire connections make installation almost as easy as swapping out a carburetor. The internal fuel pressure regulator eliminates the hassle of running an external unit and is factory preset at 58.5psi. After an initial setup using the calibration wizard on the full-color touchscreen handheld display, the self-tuning ECU creates a base fuel map which allows for instant start-up before it begins to further tune on its own, automatically. An integrated ignition timing control & coil driver allows the Sniper EFI ECU to control our MSD Digital 6AL ignition box, Blaster coil, and MSD Pro-Billet Distributor, further improving the performance of our “vintage” small block Ford. With minimal wiring, plumbing, and tuning necessary to get the Sniper EFI system up and running, installing the Wideband Bosch O2 sensor in the exhaust might be the most difficult aspect of the installation.
A complement of components from Trans-Dapt as well as a few period-correct decals from National Parts Depot (NPD) and our Ford motor went from low-brow longblock to T-Bird transformation. CC
| Sources: | |
|---|---|
| Blueprint Engines (800) 483-4263 www.blueprintengines.com | Eddie Motorsports (EMS) (888) 813-1293 www.eddiemotorsports.com |
| Holley (866) 464-6553 www.holley.com | MSD (888) 258-3835 www.msdperformance.com |
| National Parts Depot (NPD) (800) 874-7595 www.npdlink.com | Patriot Exhaust Products (909) 599-5955 www.shop.patriotexhaust.com |
| Summit Racing (800) 230-3030 www.summitracing.com | Trans-Dapt Performance Products (562) 921-0404 www.hedman.com/td-performance |
| Weiand (866) 464-6553 www.holley.com |
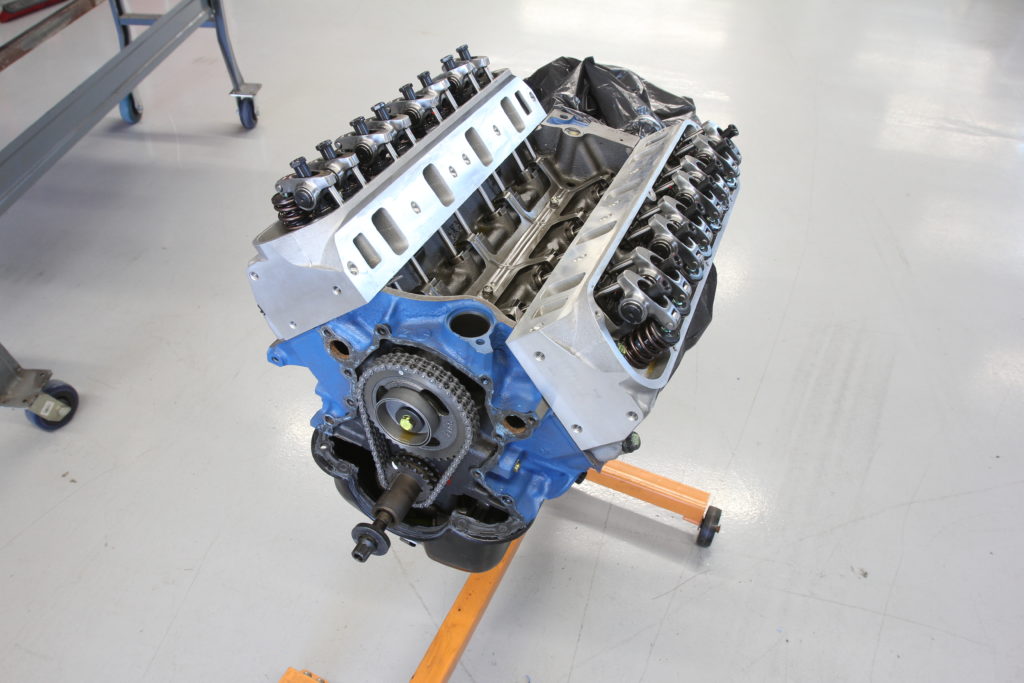
Here’s our Blueprint Engines small block, part number BP3060CT, as received from Summit Racing. We’ve removed the timing cover and valve covers in preparation for the job ahead. 
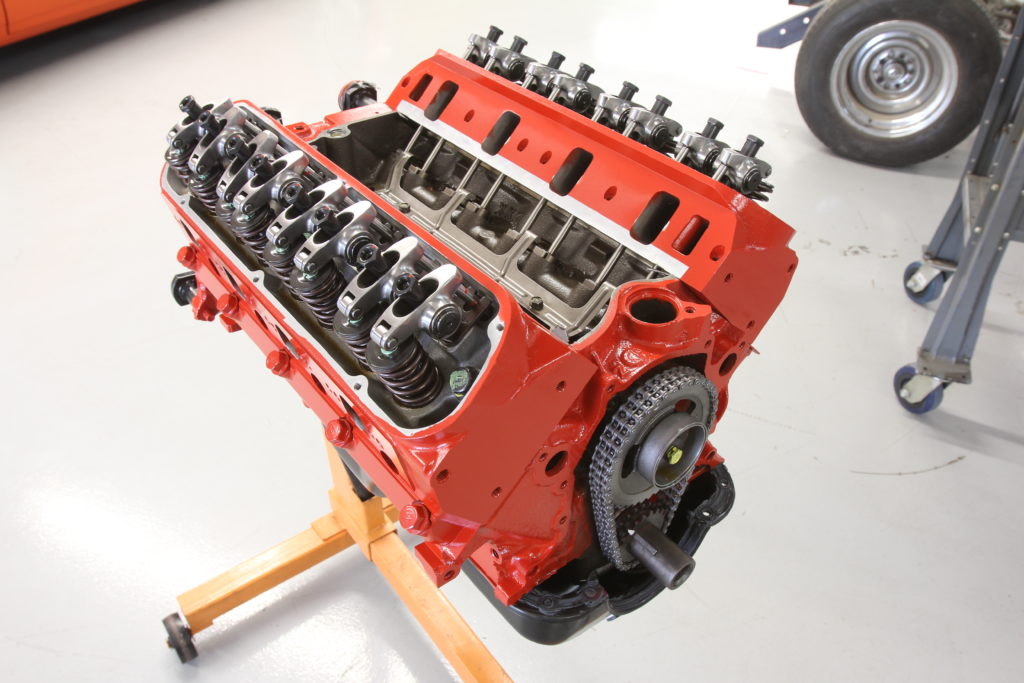
The first step in our aesthetic overhaul is to paint the block and heads Ford Red-Orange to match the early T-Bird engines. We’re using Dupli-Color engine enamel ordered from NPD. 
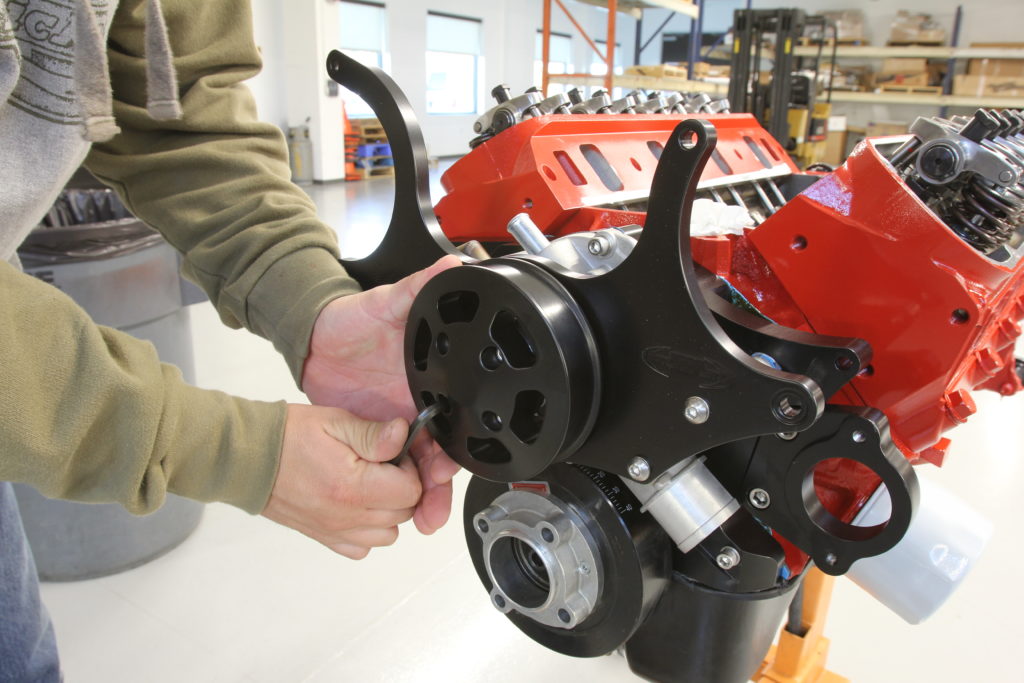
Instead of going through the headache of finding corresponding brackets and pulleys for our engine to mount the power steering pump, a/c compressor, and alternator, we opted to use a matte black finish S-Drive kit from Eddie Motorsports. Their kit includes everything to complete the front end of our engine, including a new timing cover, pulleys, and brackets machined from 6061-T6 aluminum right here in the USA. 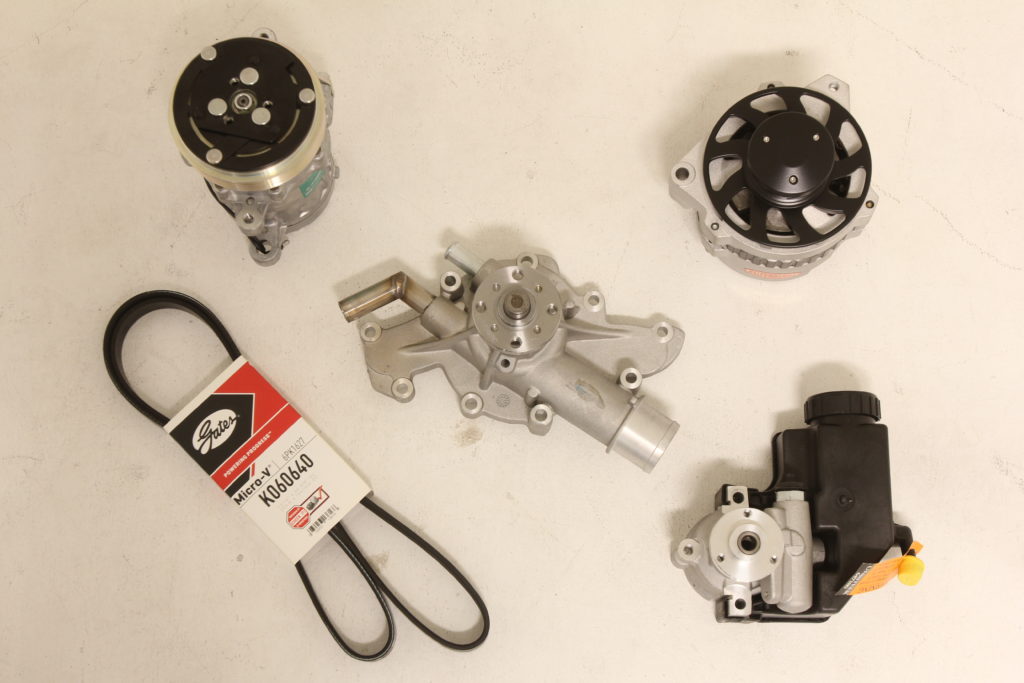
The S-Drive kit comes with a new Sanden SD7 A/C compressor and Powermaster 170-amp one-wire alternator with pulleys already attached, a Ford Racing reverse rotation water pump, a compact, highly efficient Maval GM Type-II power steering pump (in our case with the factory plastic reservoir mounted to the pump for easier and cleaner plumbing), and a Gates serpentine belt. 
A mechanical fuel pump cannot be utilized with the S-Drive kit due to the compact nature of the timing cover. That said, it’s necessary to remove the stock fuel pump eccentric and then reinstall the cam bolt with a drop of thread locker. 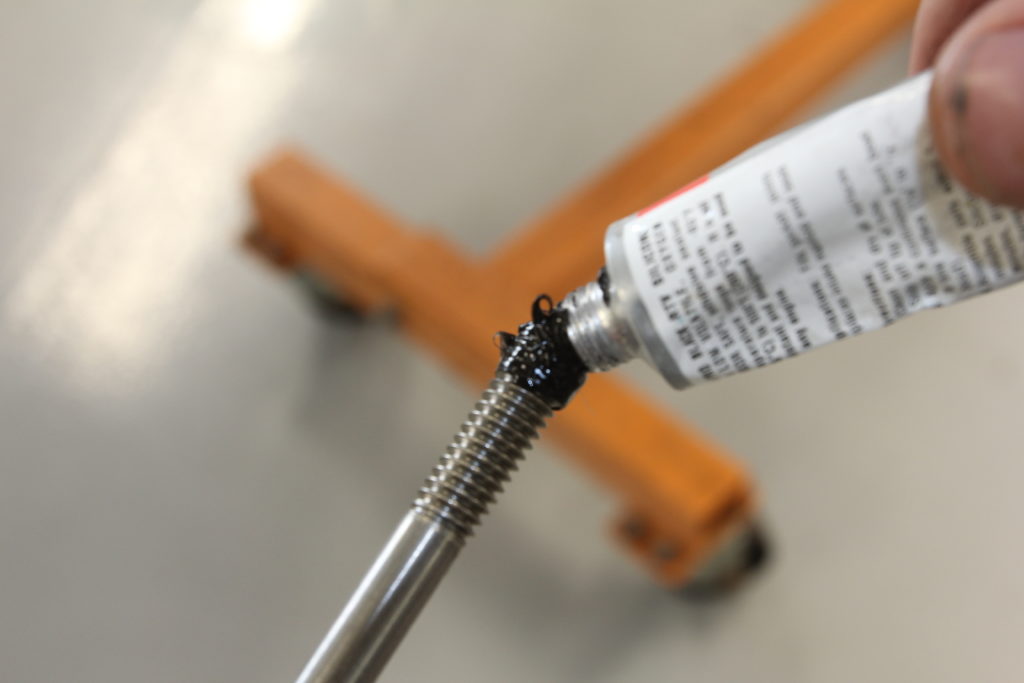
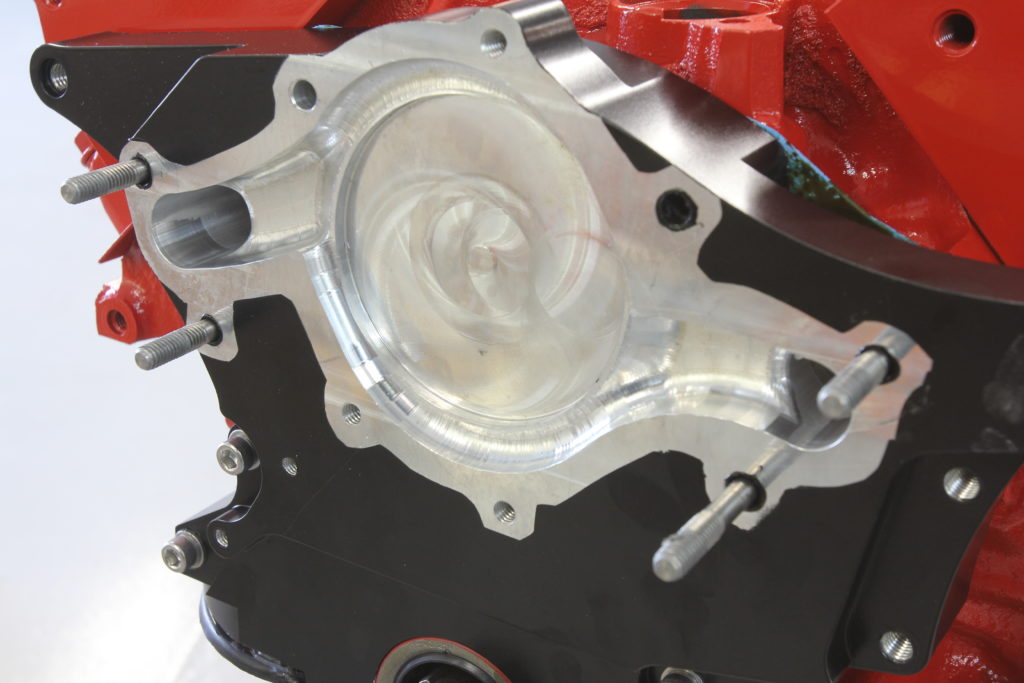
The timing cover is installed using four 5/16-inch studs around the two water outlets. Since the holes in the block intrude into the coolant passage, a dab of RTV is applied to each stud to prevent leaks. Note the longer stud is installed at the lower right. Gasket adhesive is used to install the provided timing cover gasket before the cover is slid in place. 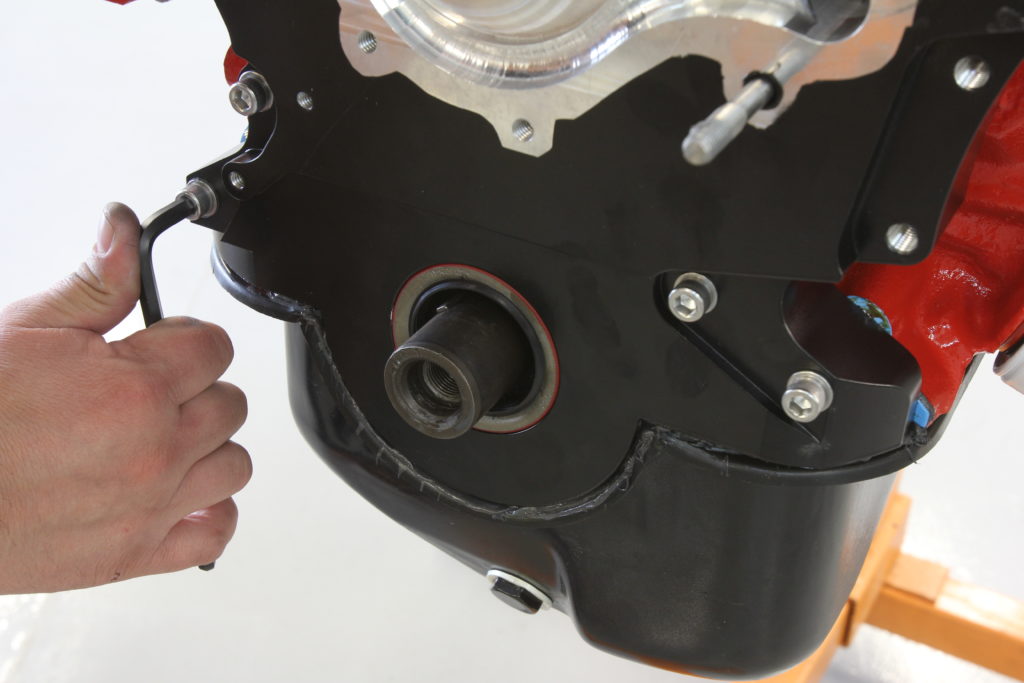
Four 5/16-18×2-inch socket head cap screws fasten the bottom of the cover to the block. The oil pan was lowered slightly to allow the timing cover to be installed. A bead of RTV is applied to the top of the oil pan where it meets the timing cover before the two are fastened together. 
Next, we installed a Professional Products PowerForce harmonic damper (PFS-80007) and pulley spacer (PFS-81007) from Summit Racing The S-Drive must be used in conjunction with a four hole damper with a maximum diameter of 6.40-inches and 3.950-inch overall length. This results in a measurement from the face of the balancer (pulley mounting surface) to the block surface of 4.71-inches. 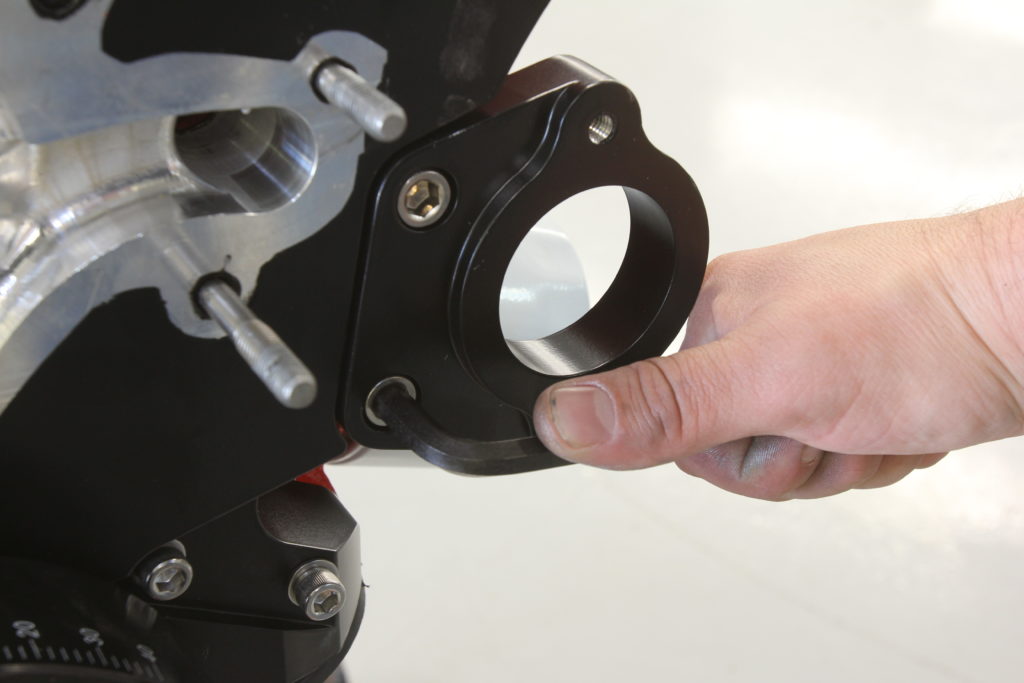
The power steering bracket goes on next using two 3/8-inch capscrews. It bolts to the right side of the cover (facing the engine). If your timing pointer is on the passenger side you can reinstall it. If it’s on the driver side, you can use the new pointer included in the kit and attach it with two 1/4-20 bolts on the bottom left of the cover. Don’t forget to check its accuracy at top dead center! 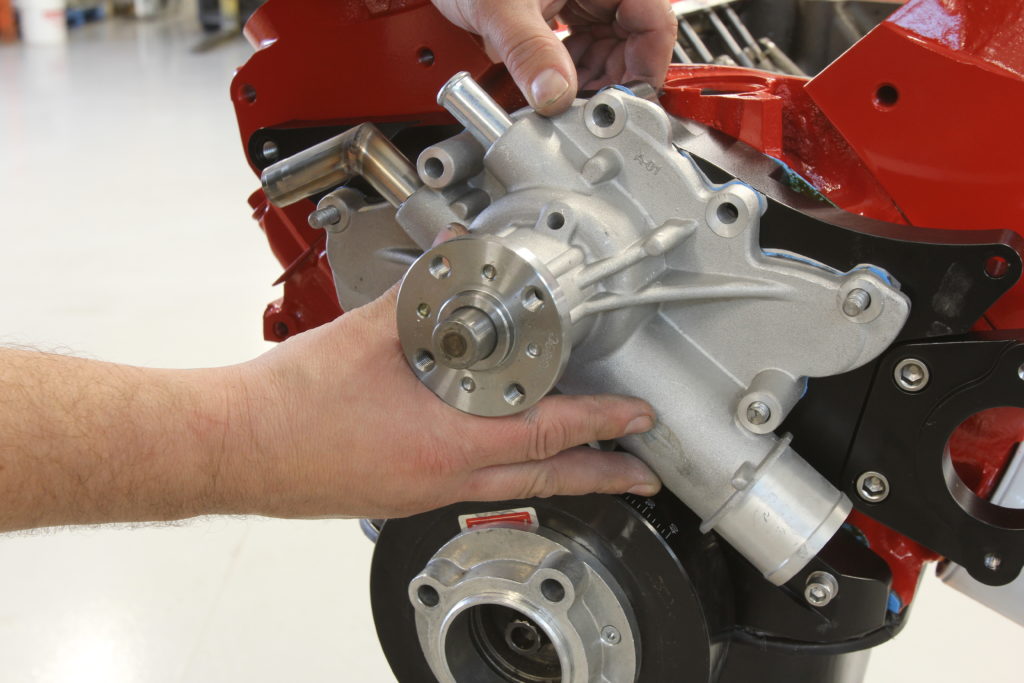
The Ford Racing water pump installs with a gasket and a thin coat of RTV sealer. The pump is slid over the mounting studs and held fast with the supplied 5/16-18 socket head cap screws. 

Four stainless steel “standoff posts” are threaded onto the previously installed studs hand tight with the grooved end facing the water pump. Anti-seize is used on all stainless fasteners. 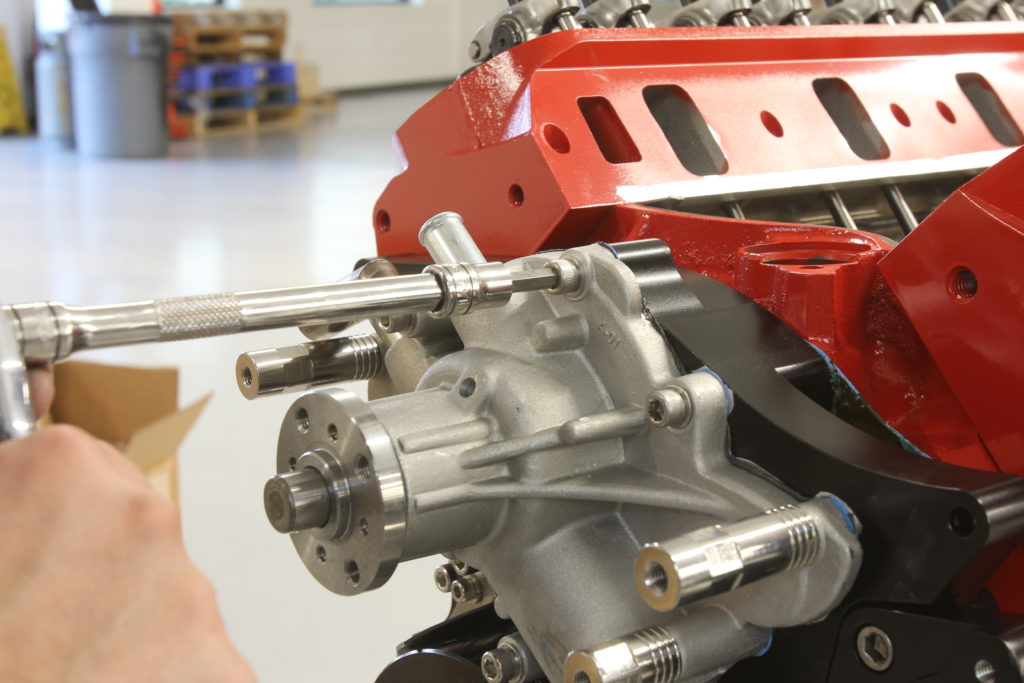
The 5/16-18 fasteners are then tightened, in a clockwise manner. 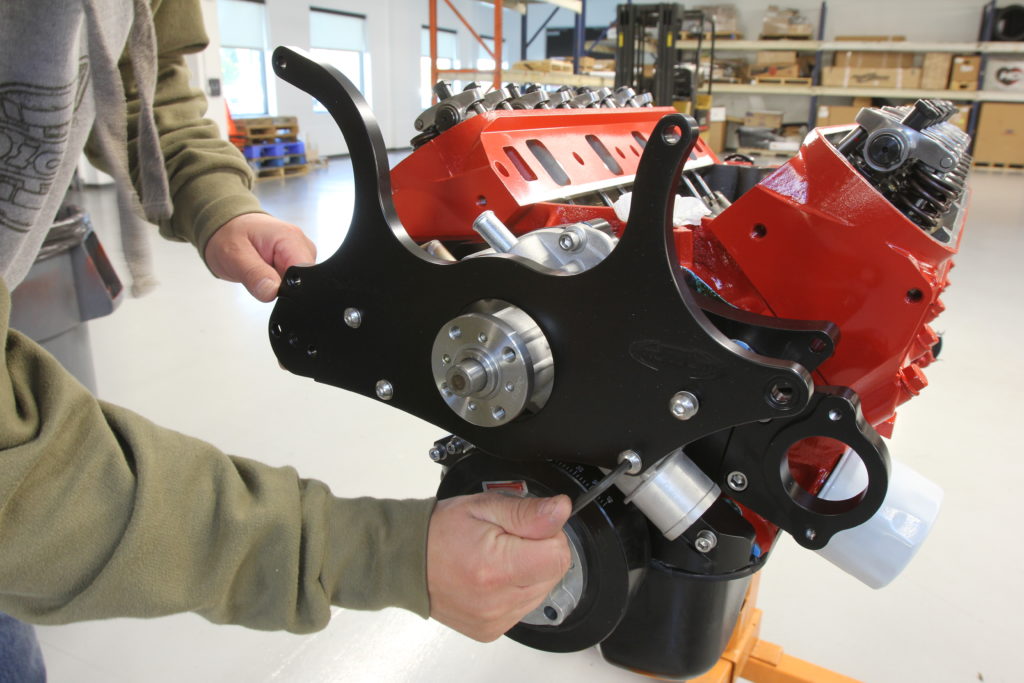
Next, the main bracket is installed using four M8x1.25x25mm button head cap screws and AN washers. All the accessories on the S-Drive kit mount using points on the timing cover, with nothing attached to the heads. This allows it to be universal, working on all Ford small block engines. 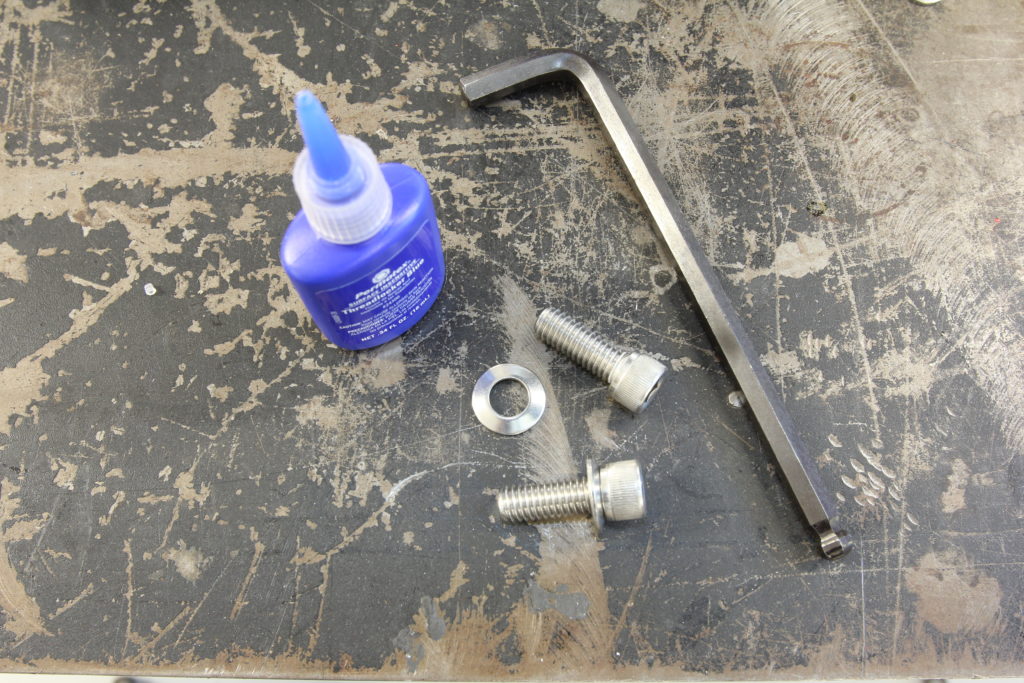
The water pump pulley is installed next, using thread locker to keep the fasteners from backing out. 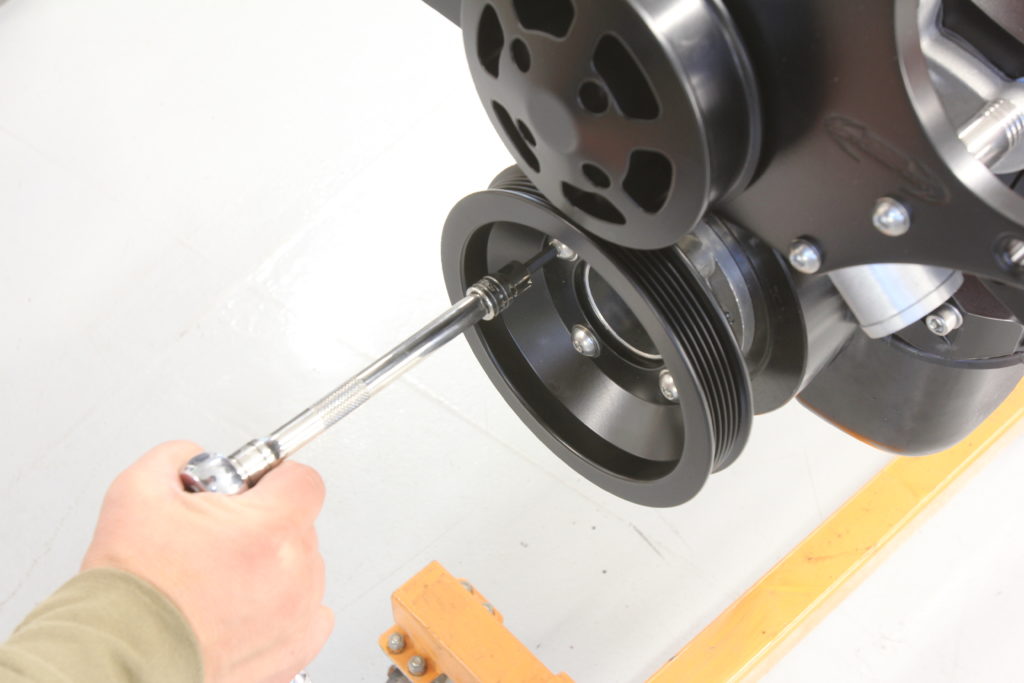
Now the crank pulley is installed using four 3/8-inch cap screws on top of the “cone” of the Belleville cupped spring washers and a dab of thread locker. 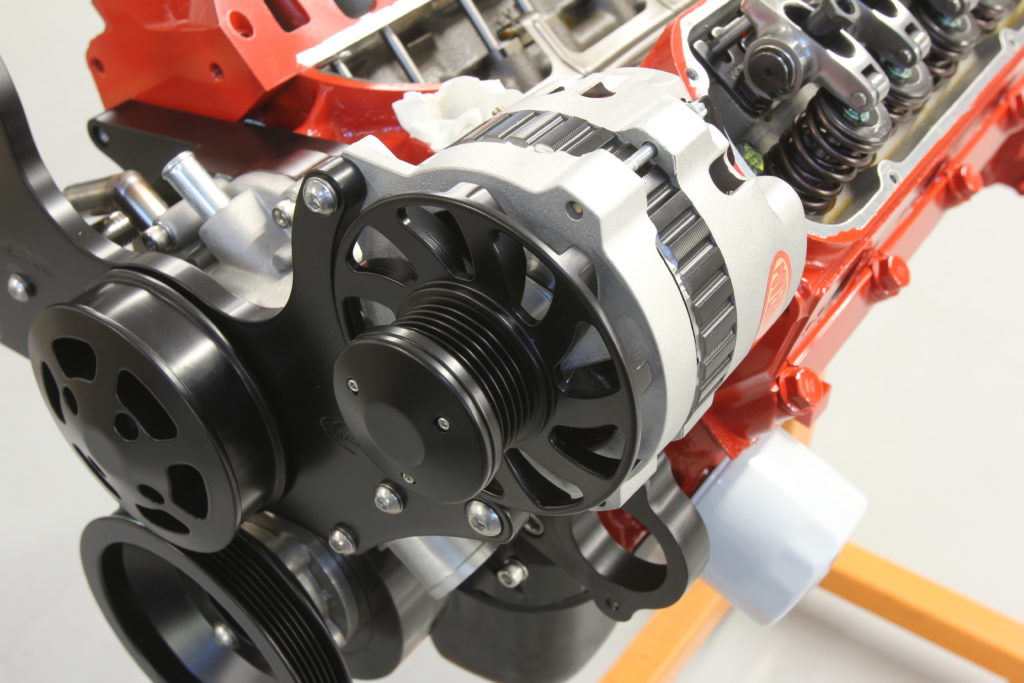
The alternator bolts to the main plate with four 3/8-16×4.5-inch button head cap screws. Use the ¾-inch long stainless steel spacer on the bolt positioned between the back side bottom mount of the alternator and the timing cover. The top fastens with an M8x1.25x25mm cap screw and AN washer. 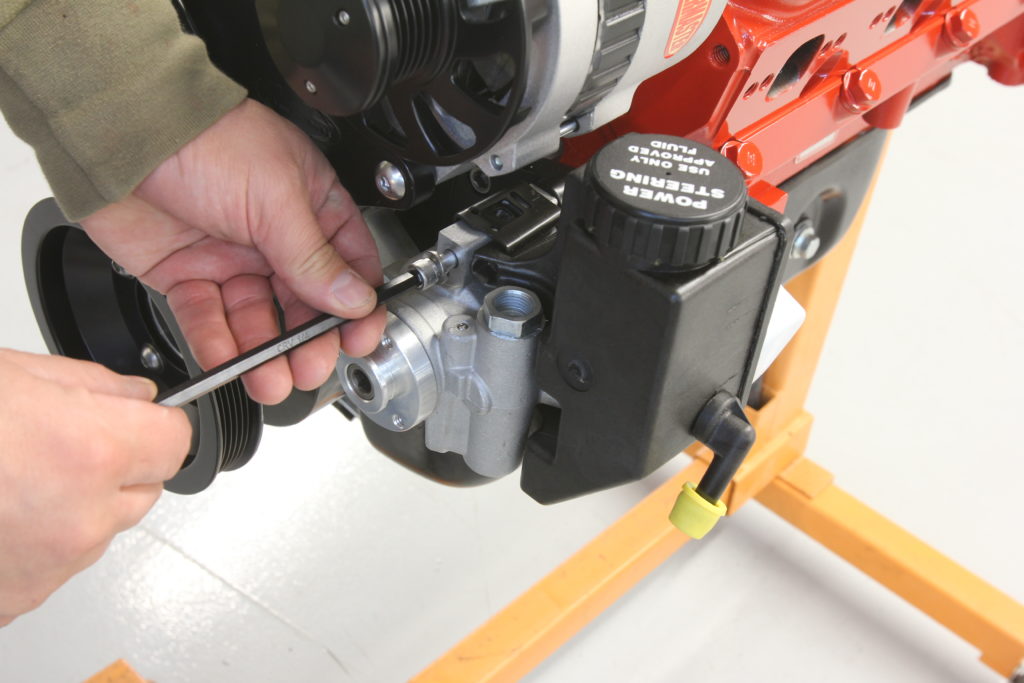
The power steering pump attaches to the previously installed bracket using two 5/16×3-inch cap screws and AN washers. We opted for a pump with the reservoir attached for ease of plumbing. 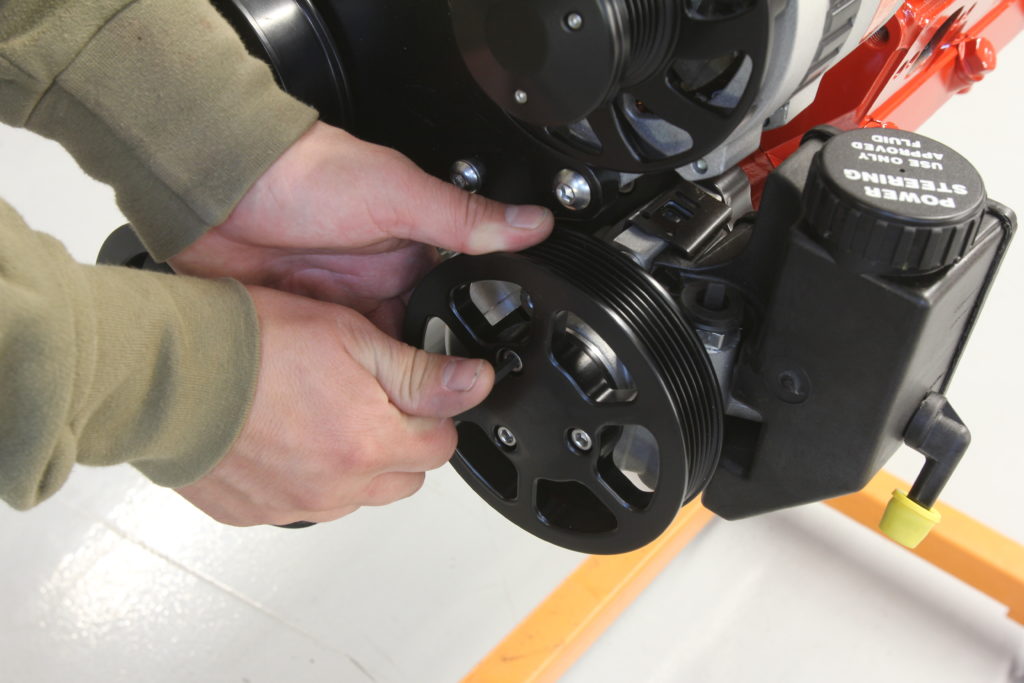
Eddie Motorsports presses a hub onto the snout of the power steering pump, which then accepts a bolt on pulley. This ensures that the installed depth of the pulley lines up perfectly with the rest of the system as opposed to the end user having to press the pulley on similar to a stock Type-II pump. 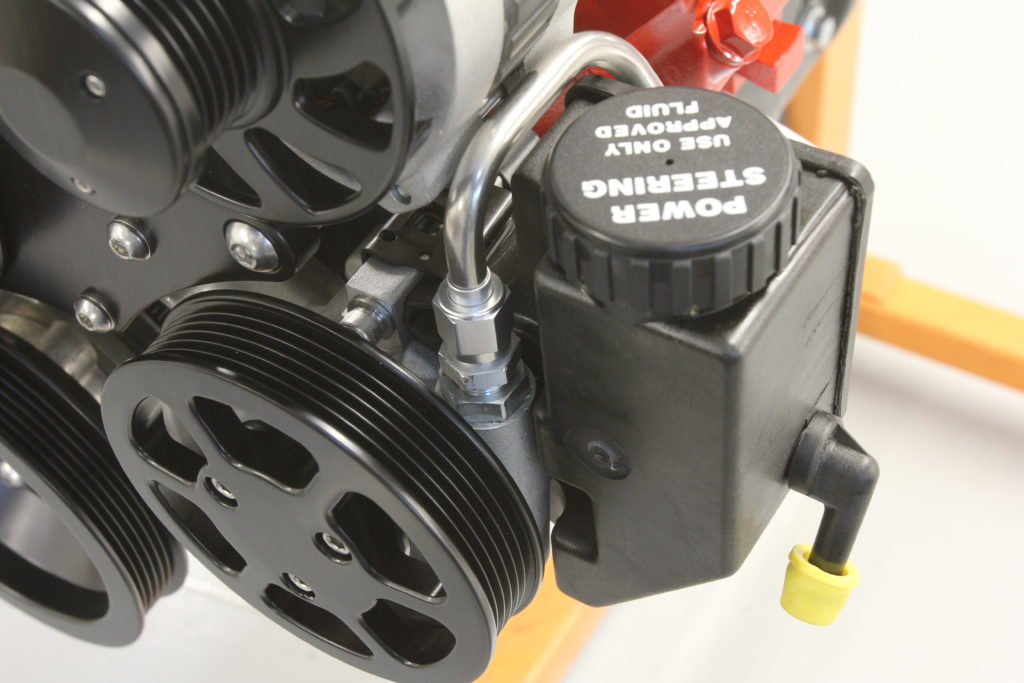
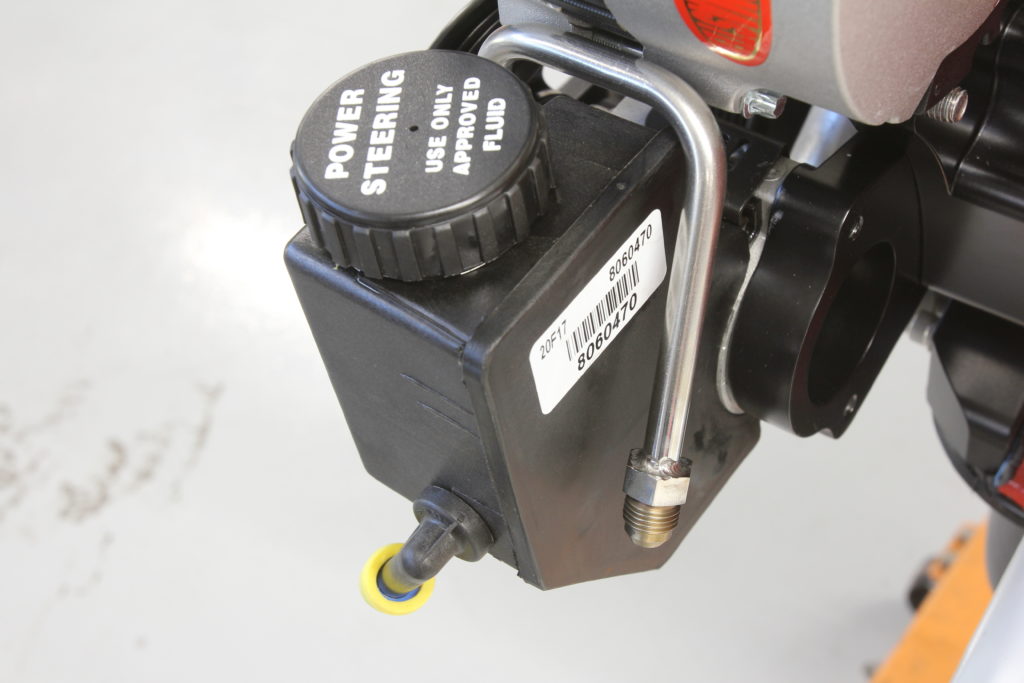
To simplify the power steering system plumbing, the S-Drive kit comes with a section of hard line that relocates the inlet to the backside of the pump, within easy access when it comes time to install the lines. 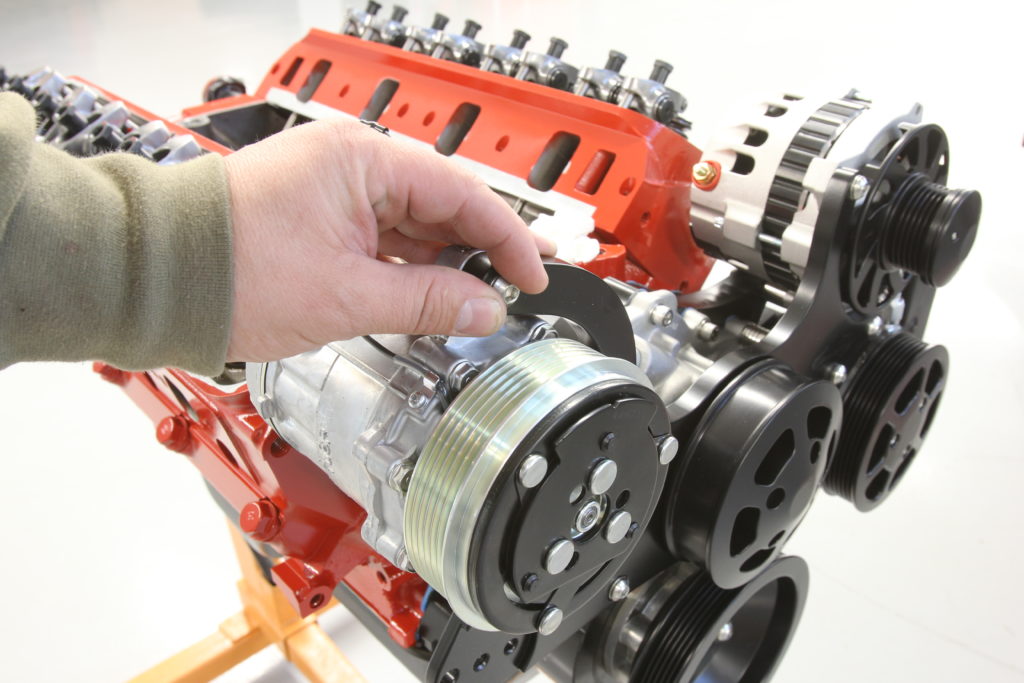
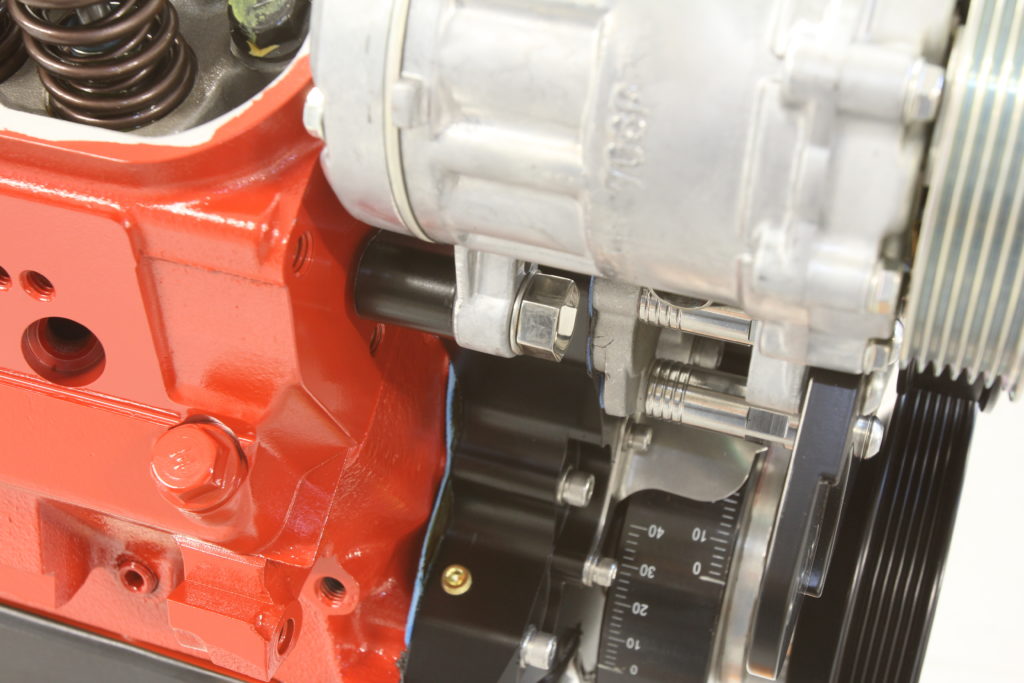
The A/C compressor attaches to the main bracket using two M8x1.25 cap screws and AN washers, one each on the top and bottom mounts. Hand tighten only at this point. On the bottom rear mount, a ½-inch shoulder bolt and washer is used to attach the compressor to the timing cover. 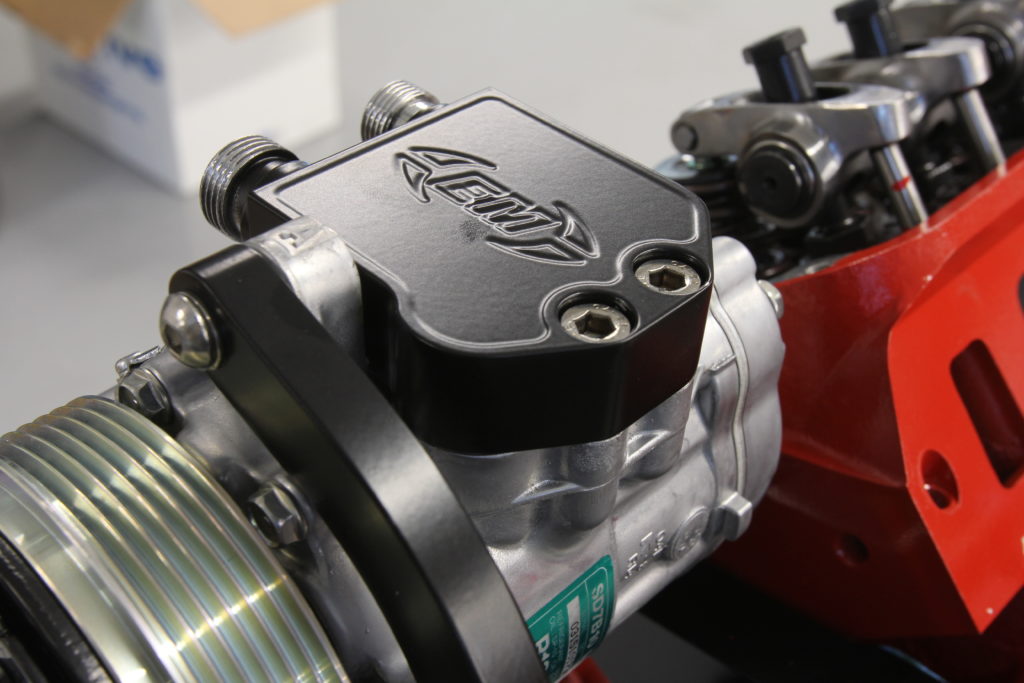
EMS provides this trick manifold for the a/c compressor, sealed to it using the original o-rings. 
The belt tensioner is one of the last pieces of the puzzle and is held in place using the supplied 3/8×2.25-inch fastener. 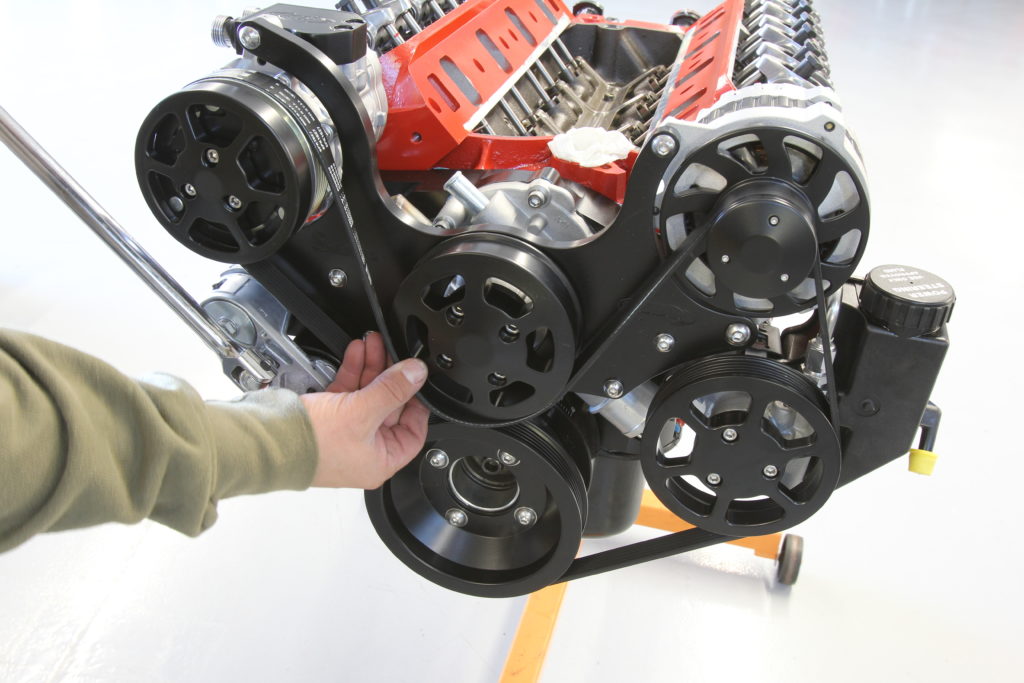
A ½-inch breaker bar is used to relieve the pressure on the tensioner so that the provided 6-rib serpentine belt can be installed. 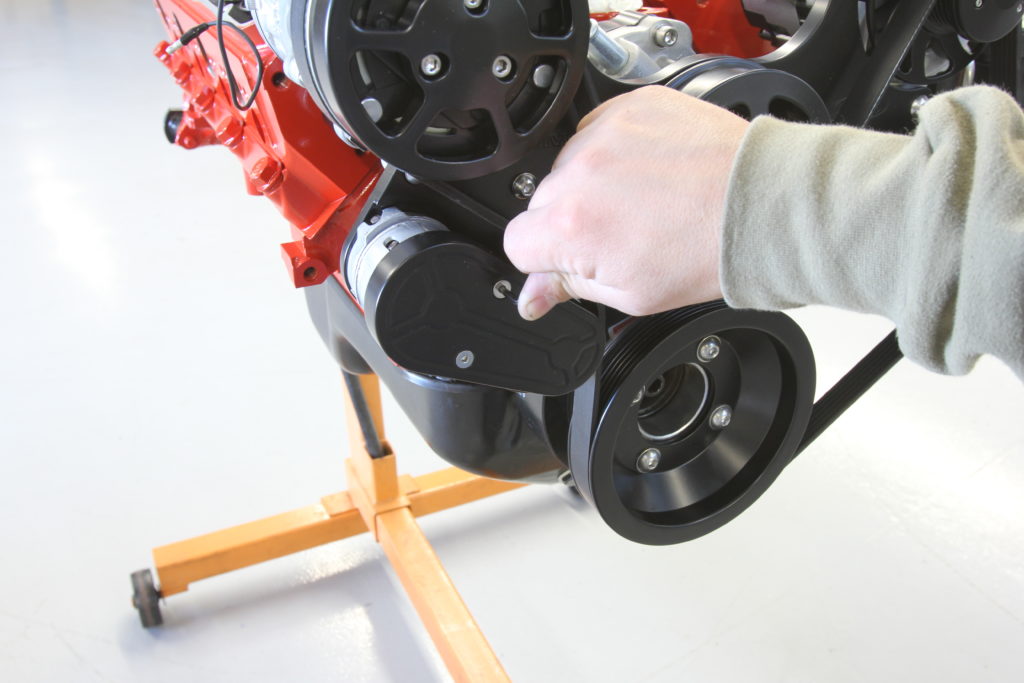
Two 10-32×3/4-inch socket head cap screws fasten the billet aluminum tensioner cover, effectively finishing off the S-Drive installation. 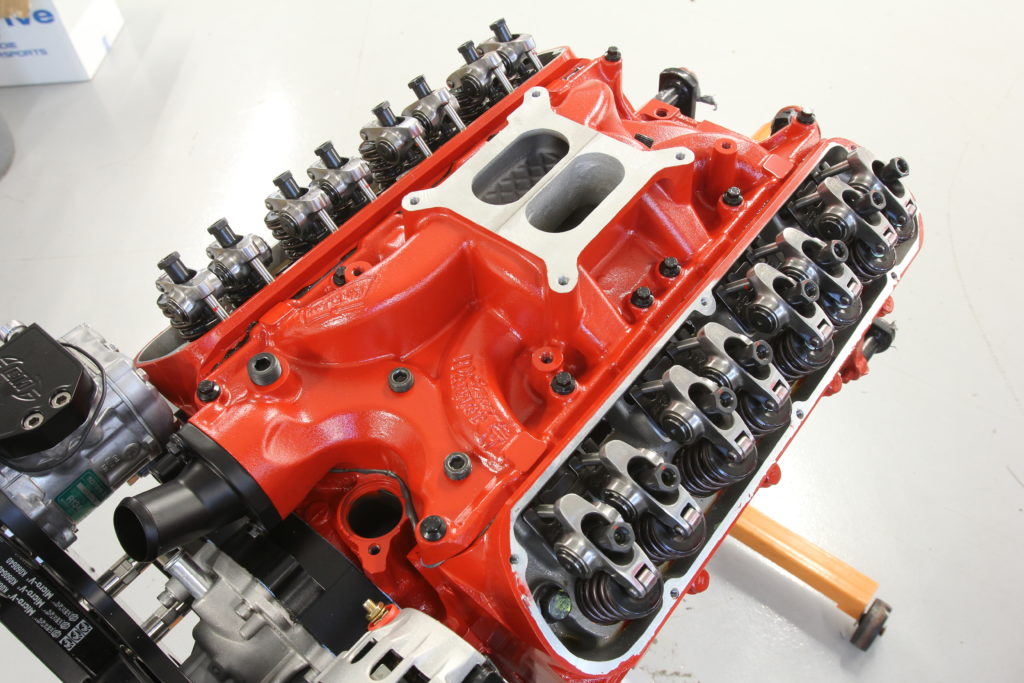
Continuing on with our dress up appointments, a Weiand Street Warrior dual plane intake manifold is installed, painted to match the engine. A black powdercoated thermostat housing from Trans-Dapt is also in place. 
An MSD Digital 6AL ignition box, Blaster coil, and MSD Pro-Billet Distributor will handle the spark on our small block, controlled by Holley’s Sniper EFI ECU. 
Here’s the MSD Pro-Billet Distributor slid in place. The 6AL box and coil will be mounted on the firewall once the engine finds a permanent home. 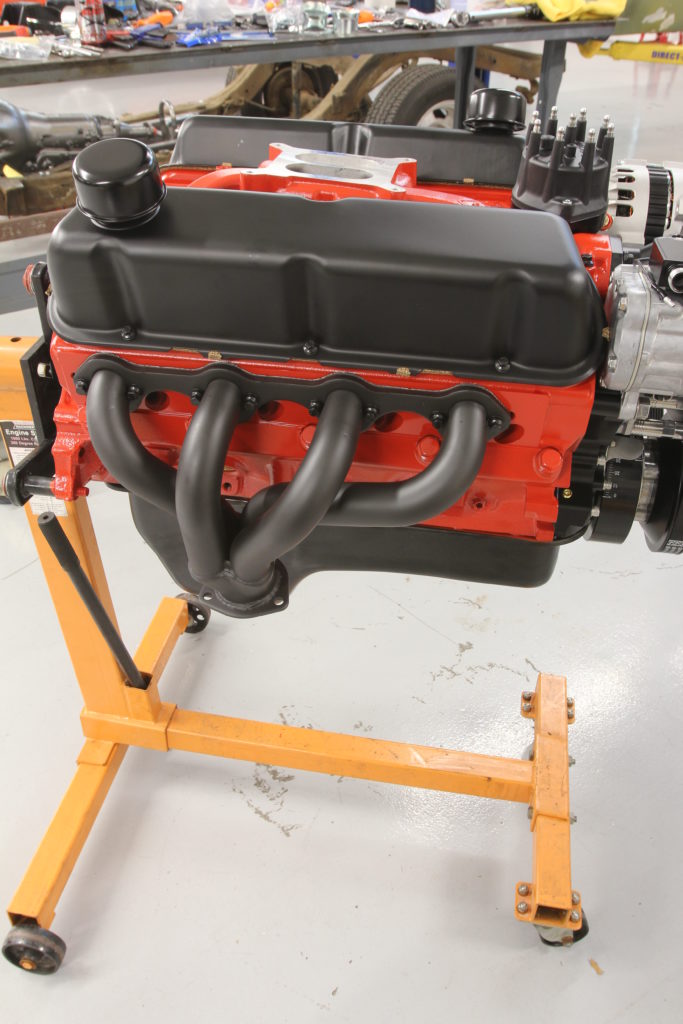
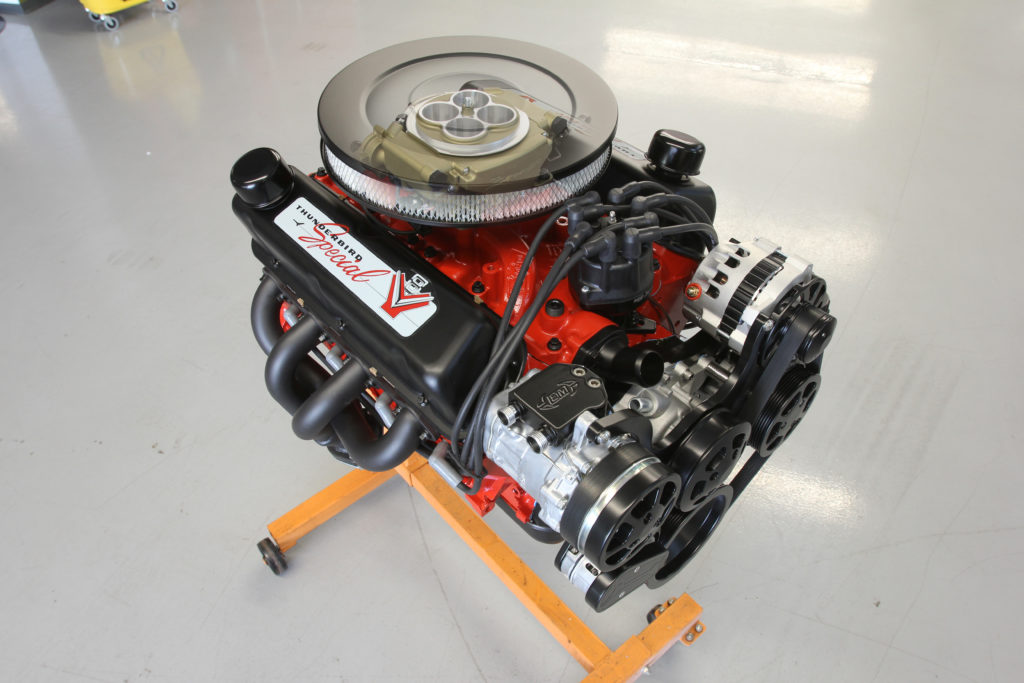
A pair of powder coated Asphalt Black valve covers and breathers courtesy of Trans-Dapt top the engine while a pair of Patriot shorty headers shot in a high temp black coating will expel the spent gasses. 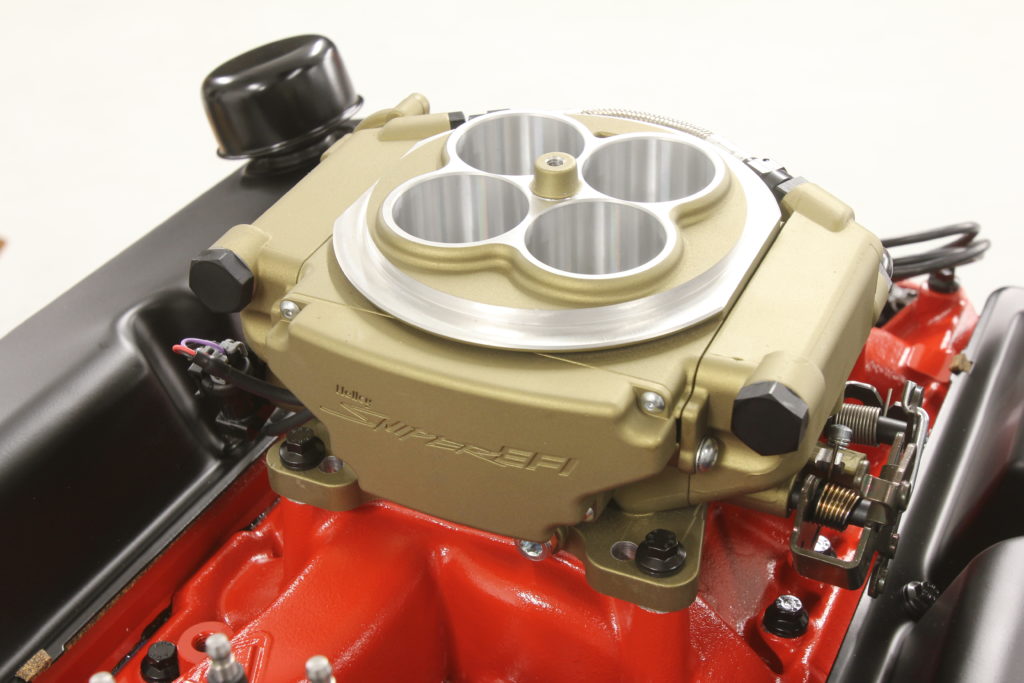
To fuel our Ford, we opted to go with the latest and greatest from the guys at Holley, Sniper EFI. This throttle body bolts where just about any four-barrel carb used to sit and houses the ECU, making installation super easy. In fact, four wires are all that need to be connected to power the unit. We opted for the Classic Gold Finish to further our vintage aesthetic and to compliment the red and black engine appointments. 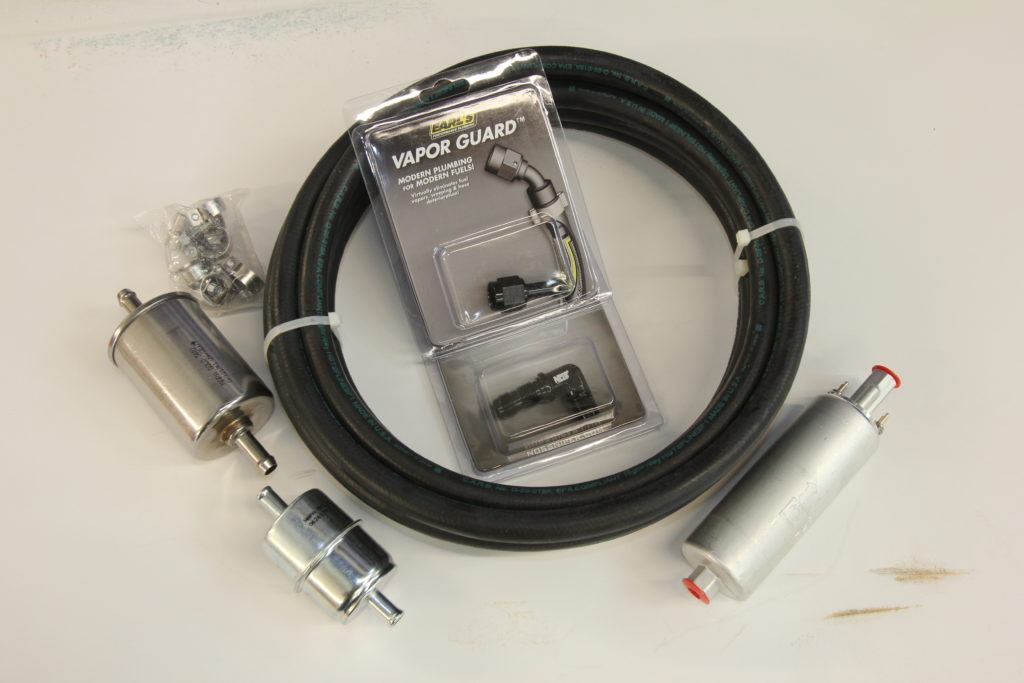
The Sniper EFI Master Kit comes with everything needed to completely plumb the fuel system including 20 feet of 3/8-inch EFI fuel hose, an inline fuel pump, post- and pre-fuel filters, return bulkhead, and all the necessary fittings and hardware. 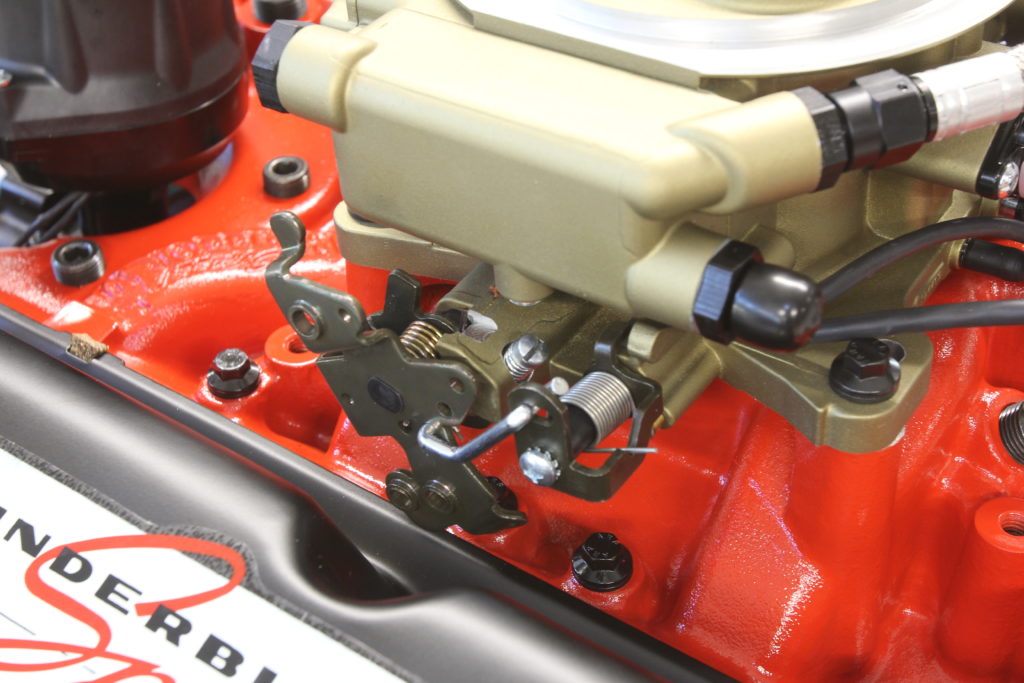
The Sniper EFI throttle body is designed to accommodate a number of OE-style throttle cable/linkage and transmission kickdown arrangements. 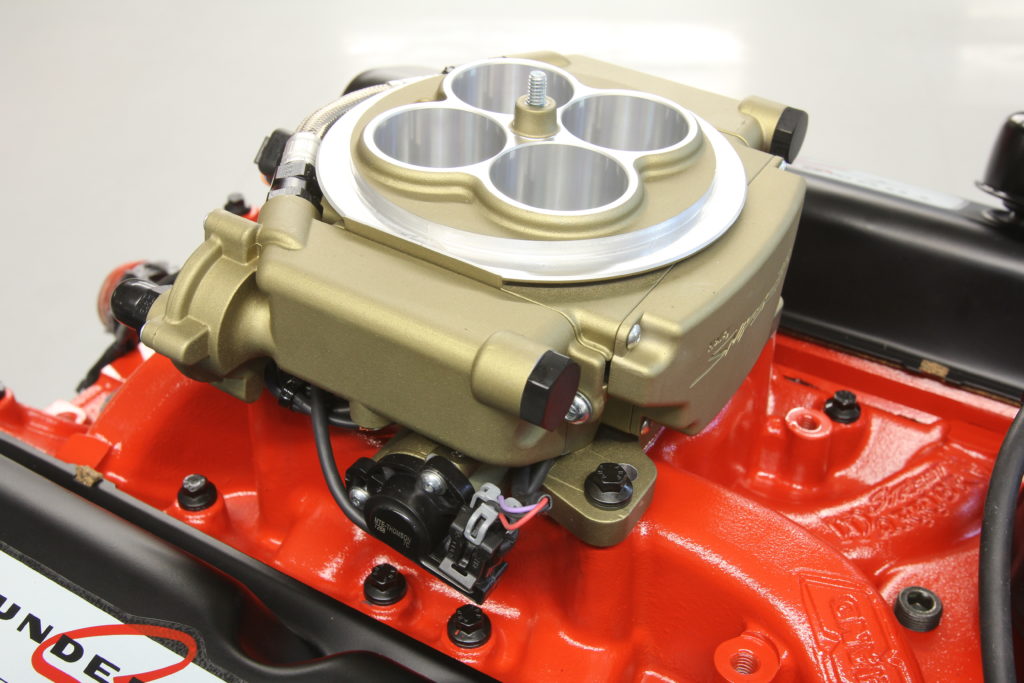
Two of the three fuel inlets face the front of the throttle body. The throttle position sensor (bottom of image) is one of a handful of self-contained components installed on the throttle body. 
The idle air control valve is another built-in sensor, pictured here below the crossover fuel line. An additional fuel inlet is at the far left of the throttle body, while the fitting at the right side is the outlet/return, affixed to the business end of the fuel pressure regulator. A 3/16 ported vacuum port and two manifold vacuum ports (3/16- and 3/8-inch) are also located at the rear of the throttle body. 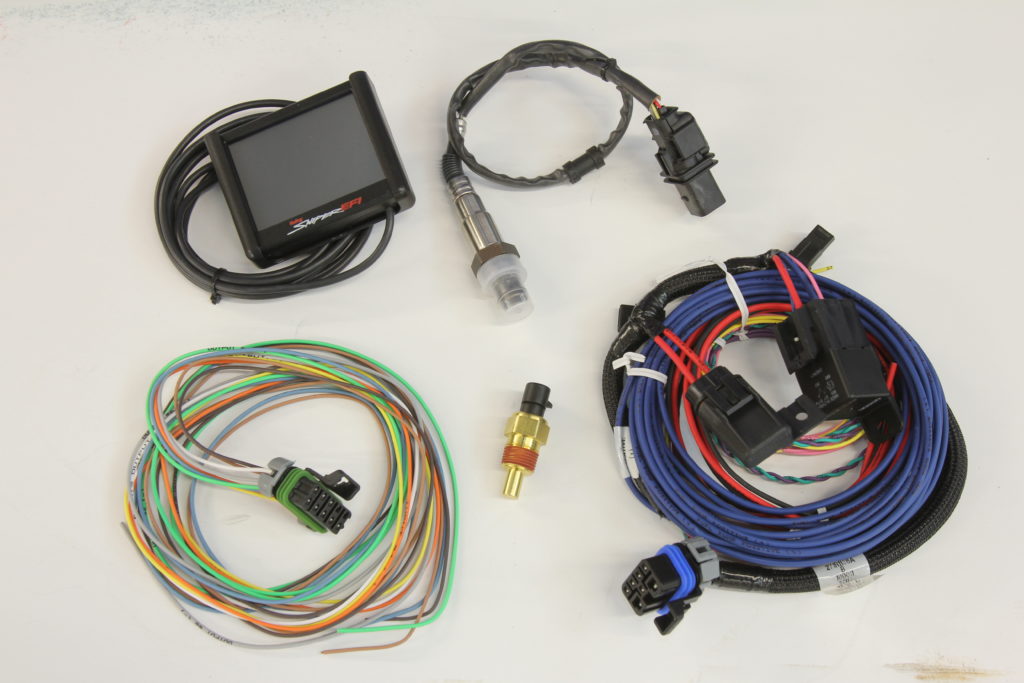
Here are the peripheral components of the Sniper EFI kit: high resolution full color touchscreen handheld used for initial setup, tuning, and gauge display, Bosch LSU 4.9 Wideband O2 sensor, coolant temp sensor, main harness and ignition adapter, and output wiring harness. 
The coolant temperature sensor is installed in the front water jacket of the Weiand intake manifold. 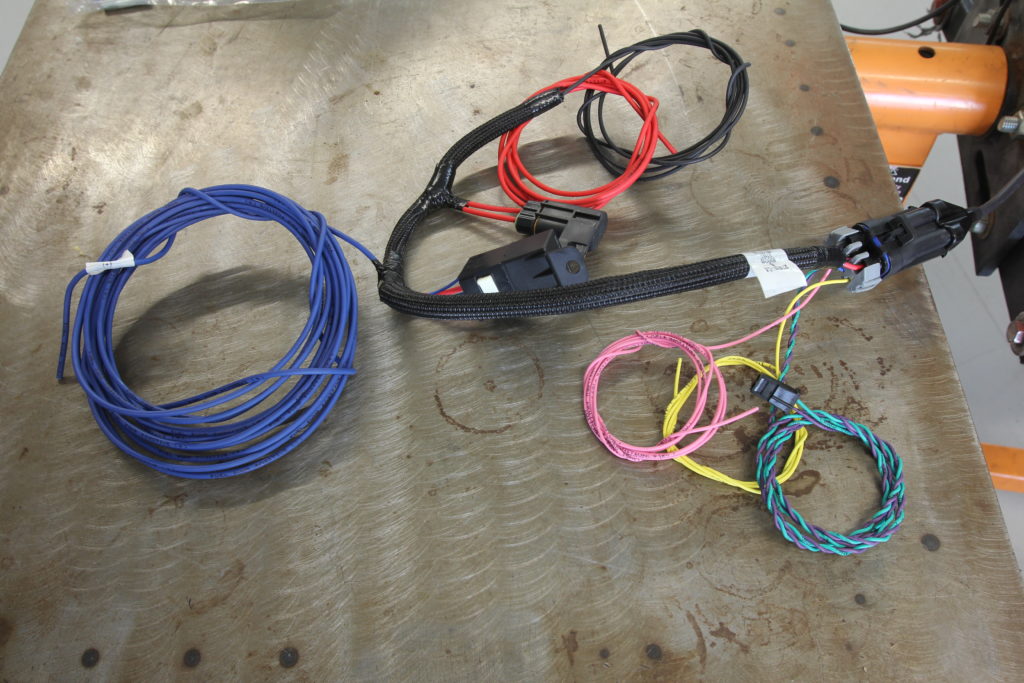
The main wiring harness provides fused power and ground for the system as well as a 12v switched, coil input signal, and a pair of crank signal wires. A relay is also built into the harness to provide power to the electric fuel pump. 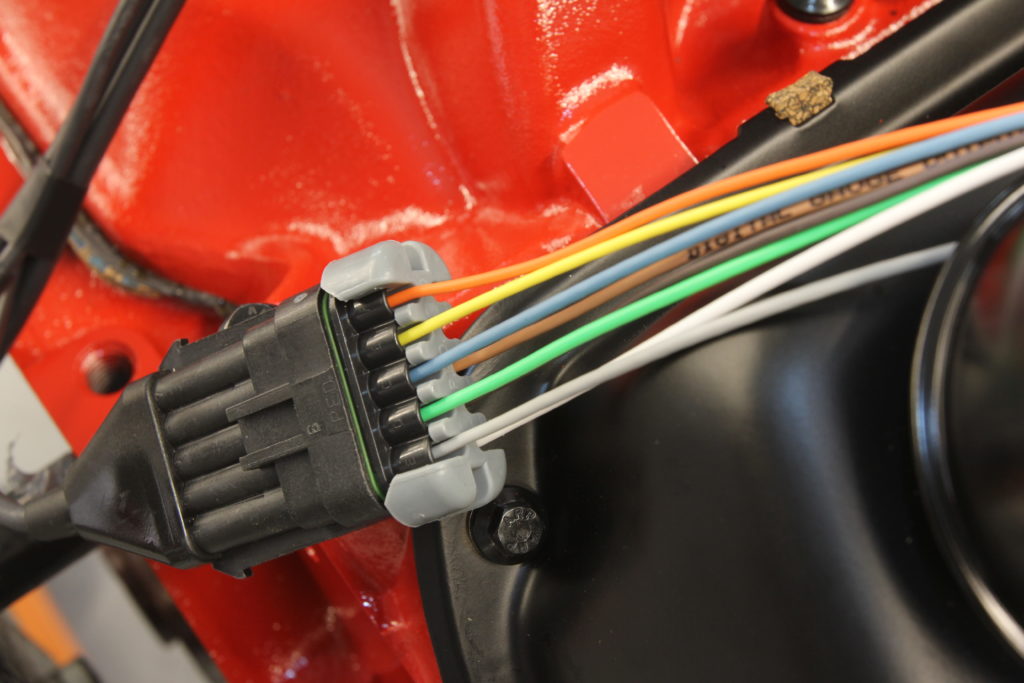
The output wiring harness provides connections for ground-triggered a/c relay, programmable ground input, two separate electric fan ground triggers, ground side trigger for a/c shutdown relay, points output used to trigger a CDI box or coil drive module, tach output, and digital gauge output used t drive Holley EFI analog gauges. 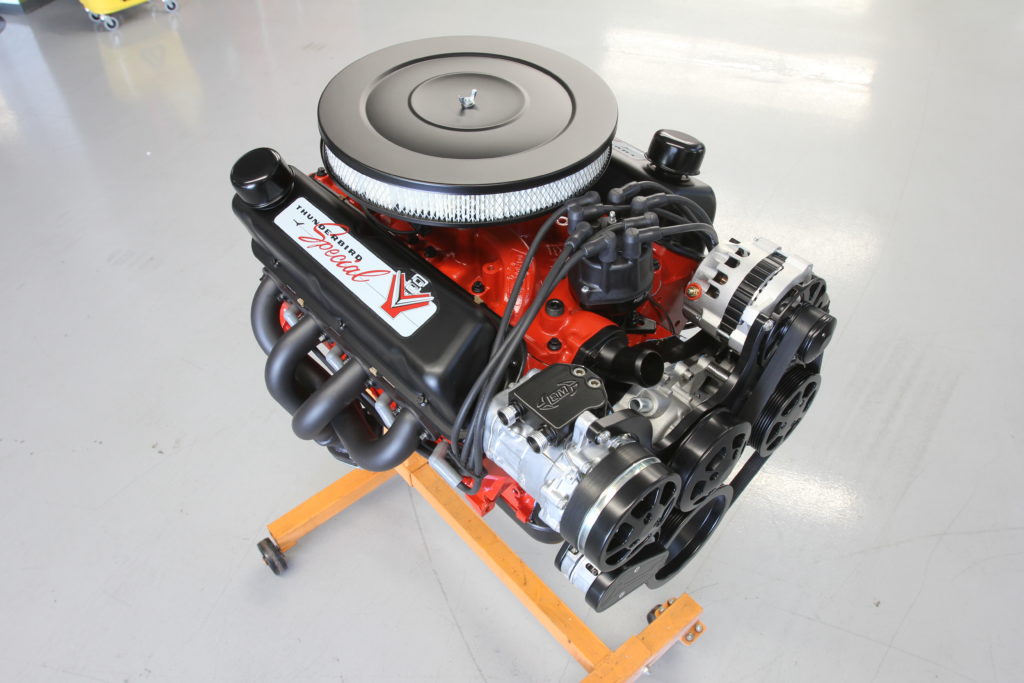
A low-profile Asphalt Blak powdercoated air cleaner courtesy of Trans-Dapt hides the fact that our vintage engine is packing contemporary technology in the Holley Sniper EFI system. A pair of Thunderbird Special valve cover decals from National Parts Depot (NPD) finishes the T-Bird treatment of our Windsor build masterfully.